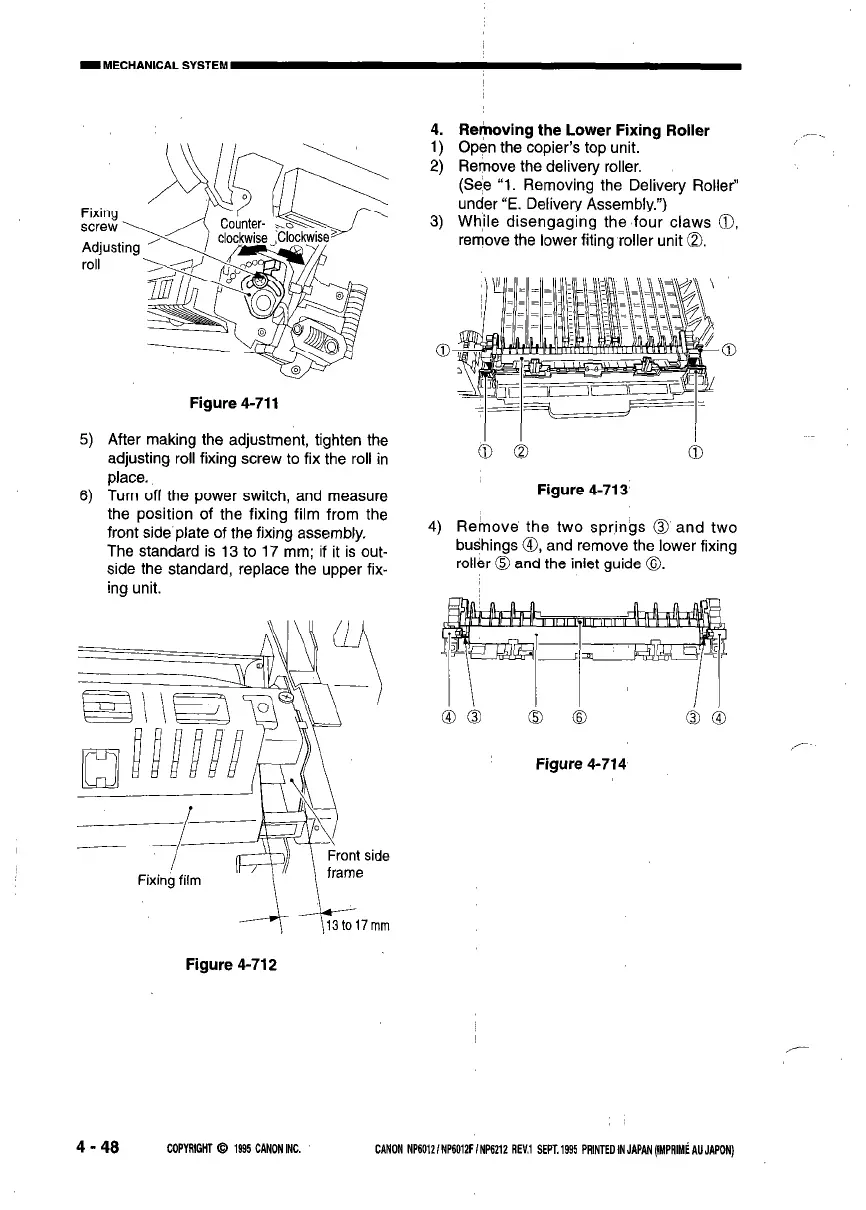
Fixing
screw
Adjust
roll
5)
6)
Figure 4-711
After making the adjustment, tighten the
adjusting roll fixing screw to fix the roll in
place.
Turn off the power switch, and measure
the position of the fixing film from the
front side plate of the fixing assembly.
The standard is 13 to 17 mm; if it is out-
side the standard, replace the upper fix-
ing unit.
Re(noving the Lower Fixing Roller
Open the copier’s top unit.
Remove the delivery roller.
(See “1. Removing the Delivery Roller’
under “E. Delivery Assembly.“)
Wh,ile disengaging the four claws 0,
remove the lower fiting roller unit 0.
4) Rehove the two sorinas 0 and two
Figure 4-713
bushings @I>, and remove‘ihelower fixing
roller @ and the inlet guide 8.
Figure 4-714
Figure 4-712
4 - 48 COPYRIGHT 0 1995 CANON INC.
CANON NP6012 INP6012F INP6212 REV.1 SEPT. 1995 PRINTED IN JAPAN (IMPAIM~ AU JAPON)



 To Next Page