RS – Multi-Stage, I-280
Centrifugal Pump 280 – 16.03.EN
38
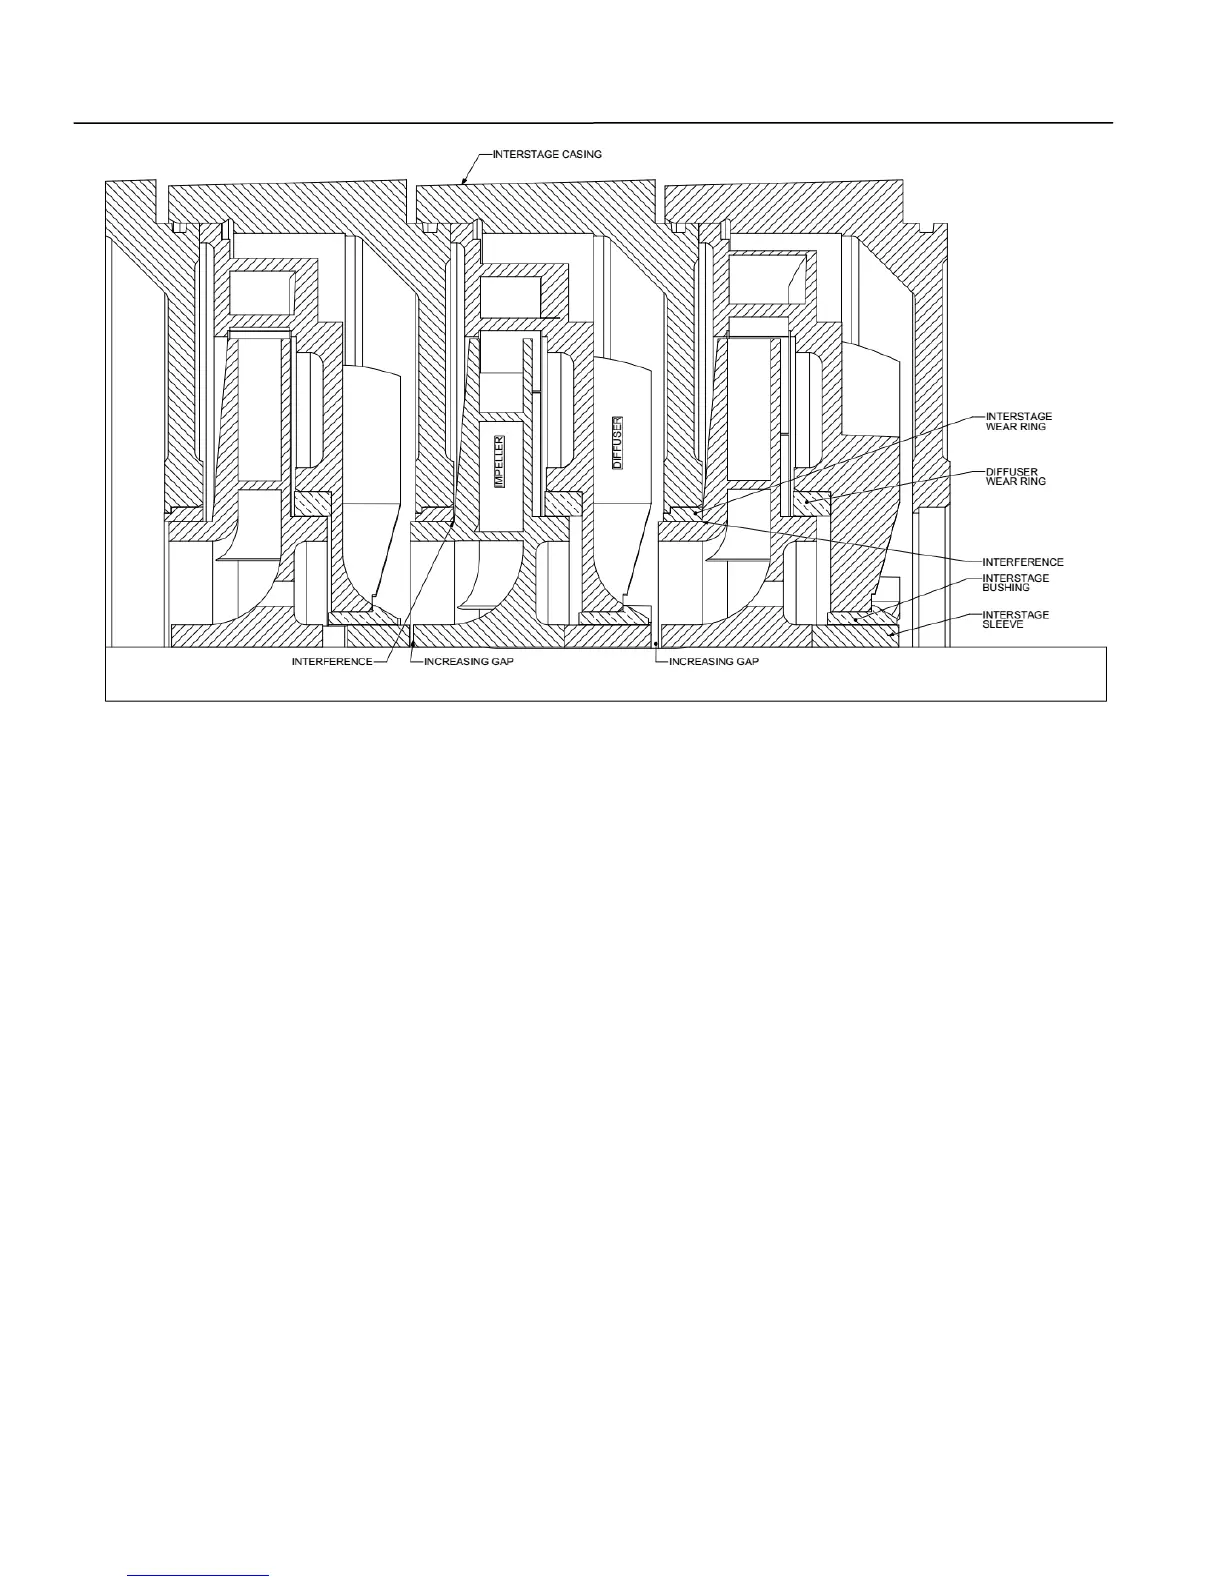
Figure 11. Bushing Not Torqued Interference
24. Remove interfering stages keeping close track
of how many shims are between each stage.
25. Slide outboard sleeve (14X) onto outboard end
of shaft (6), aligning keyway in sleeve with
impeller key (32).
26. Install O-ring (89A) onto last stage diffuser
bushing (63X). Install last stage diffuser bushing
into last stage diffuser (5X), make sure that
diffuser wear ring (7X) is installed in the last
stage diffuser.
NOTE
Refer to Table 5, Sleeve Bearing Dimensions to
determine if replacement of sleeve bearing
(63Y) is required.
27. Install the last stage diffuser (5X) with last stage
diffuser bushing (63X) and bushing O-ring (89A)
into the discharge case (1). Install sleeve
bearing (63Y) in discharge casing (1).
28. Install the discharge casing (1) with diffuser
(5X), and wear ring (7X) on interstage casing
(111). Confirm proper discharge casing
orientation.
29. Install tie bolts (173), washers (645) and hex
nuts (616) and torque to 50 ft/lbs temporarily.
NOTE
Remove pump from vertical position and place
in horizontal position either on a milled flat
surface or a pump base.
30. Loosen the tie bolt hex nuts (616) and tap with
soft mallet both suction and discharge casings
to make feet flat to the milled surface of the
base.
NOTE
Ensure that the pump feet are on a milled flat
surface or the base before tie rod hex nuts are
torqued.
31. Tighten hex nuts (616) firmly and evenly. Refer
to Table 14 for recommended torque
requirements.
32. Sleeve (14X) should protrude .09 inch past the
sleeve bearing (63Y), use shims to achieve gap.
33. Install shaft washer (28) on shaft (6).