94
MAINTENANCEQUESTIONS FRÉQUENTESUNDERHÅLL
RENGÖR FILTERKORGEN
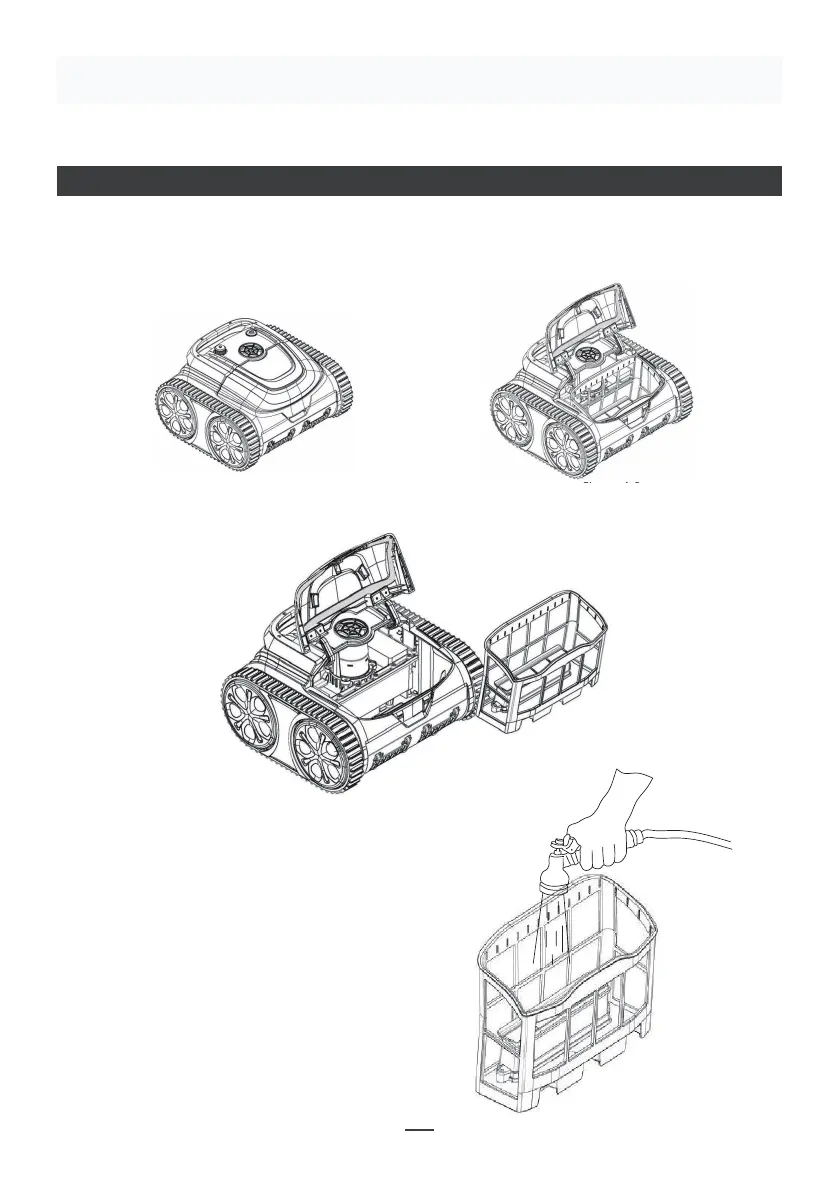
• Ta ut filterkorgen: Placera poolroboten på marken, öppna locket för hand enligt den
position som anges i bilden (bild 4-1), och filterkorgen visas i bilden (bild 4-2).
Make sure that the machine is turned off (the indicator lights are
completely off). When charging, please take the machine out of the
swimming pool, and place the machine indoors or in a splash-resistant
facility for charging. Unscrew the waterproof cap on the machine (ensure
that the charging port is dry) and connect the charging port with the
charging connector. When the battery charger light is red, indicating that it
is charging, when it turns green, it means that charging is completed.
4.3.1 Take out the filter basket: Place the cleaner on the shore, open the
cover plate by hand according to the position indicated in the figure (Figure
4-1), and the filter basket is shown in the figure (Figure 4-2).
4.2 Charge the robot
4.3 Clean the filter cartridge
4.2.2 Charger indicator
4.2.1 Charging Operation
LED Indicator Charging state
Green light is always on
Red light is always on Normal charging
plugged or the charging is complete
09
Figure 4-1 Figure 4-2
• Ta ut filterkorgen från poolroboten (bild 4-3).
• Rengöring av filterkorgen
Skölj bort smutsen på filterskärmen med
rent vatten (bild 4-4).
4.3.2 Take out the filter basket from the machine (Figure 4-3).
Figure 4-3
4.3.3 Cleaning of the filter basket
Rinse the dirt of the filter screen with clear water (Figure 4-4).
4.3.4 Installation of the filter basket
Reinstall the filter basket to the machine. The filter basket is aligned with
the water inlet and put into the cleaning machine. Put the cover plate on,
make the filter basket fit with the cover plate perfectly.
Figure 4-4
10
 Loading...