SR209 Plus Series
│ 15
2. System Components Installation and Removal
SR209 Plus supports up to 4 x 3.5” hot-swap SAS/SATA HDD or 4 x 3.5” Internal SAS/SATA HDD. Support for different storage and
peripheral options will vary depending on the system model and/or available accessory options installed.
2-1 Side Cover Installation
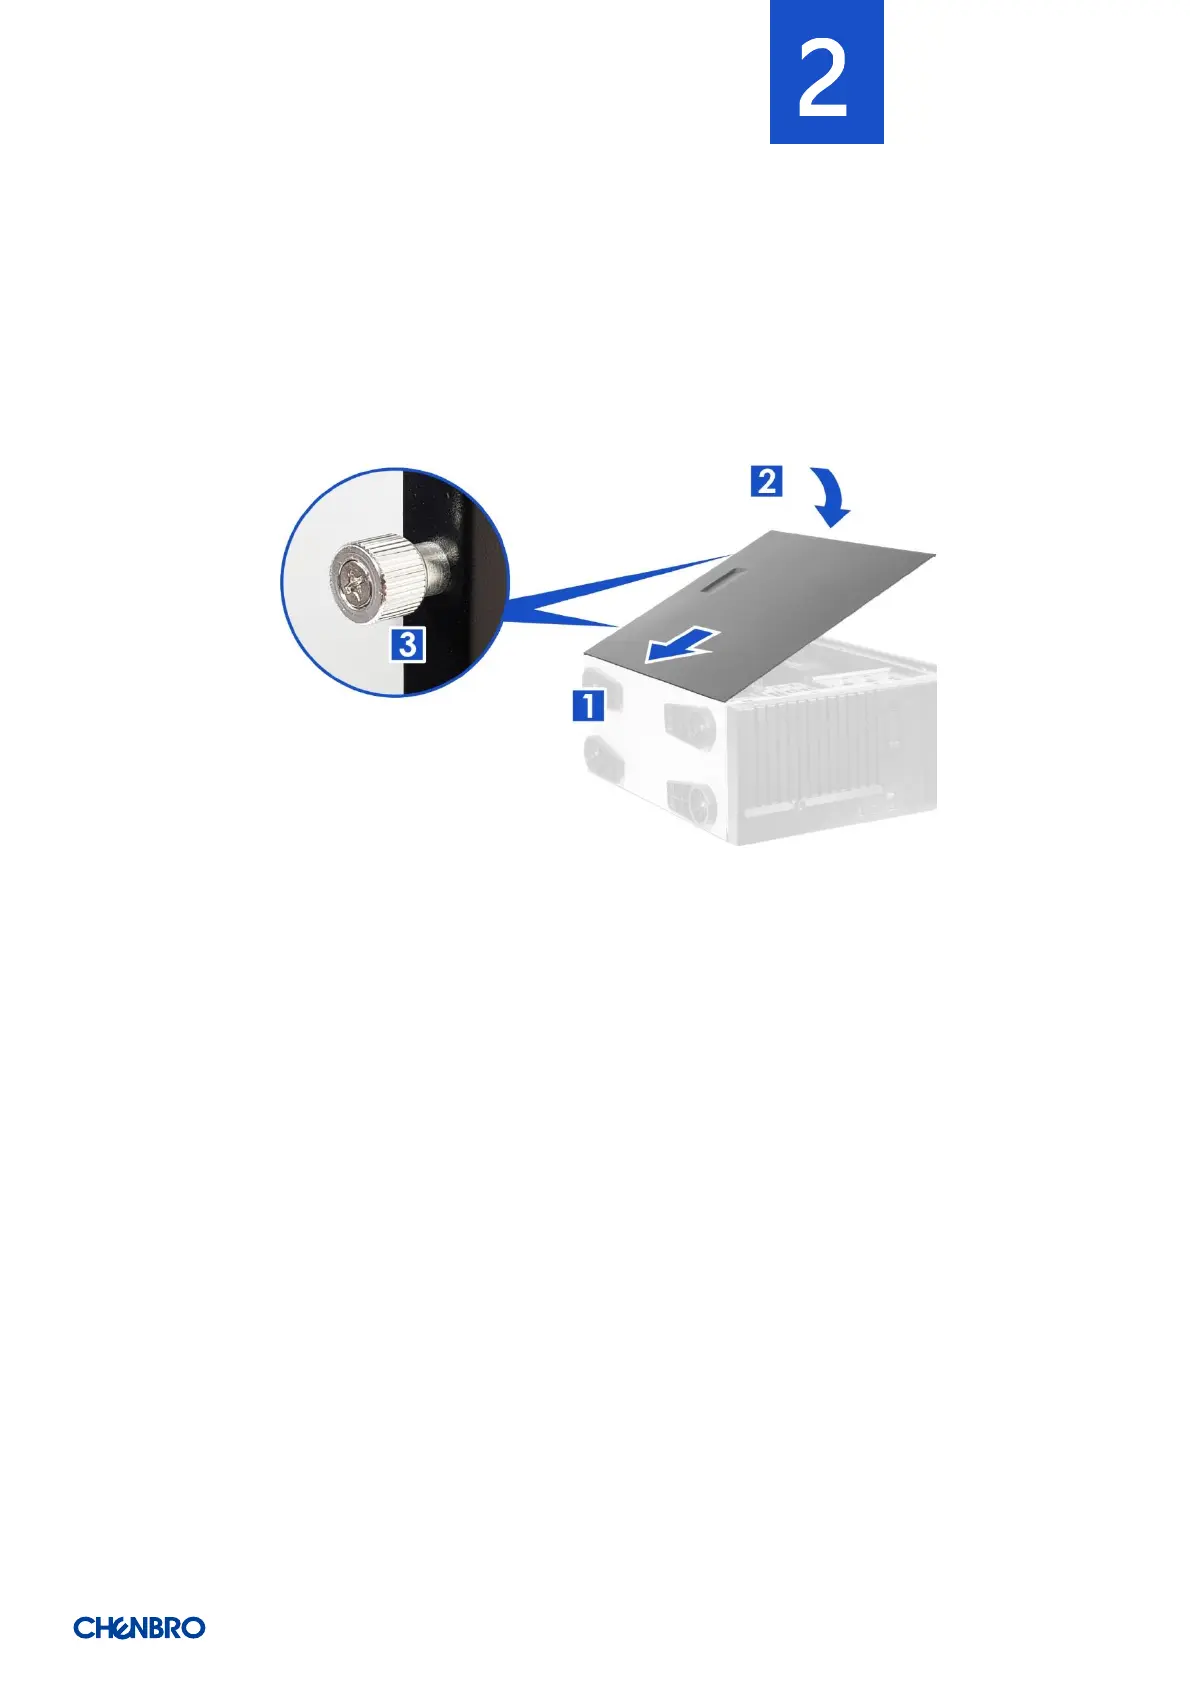
Figure 10 Side cover installation
1. Insert the cover along the bottom groove.
2. Place down the cover towards the chassis.
3. Secure the thumb screws on the top and bottom.
 Loading...