Maintenance FLEX-AUGER® Feed Delivery System
48
MA1032F
8.Replacing the battery in the Agri-Timer:
A. Disconnect electrical service at the breaker.
B. Remove the (2) screws and the face of the timer.
C Replace the existing batteries with new batteries.
D. Use existing wire ties to secure the new batteries in place.
E. Reinstall the face of the timer and secure using (2) screws previously removed.
F. Reconnect electrical service to the system.
Proximity Switch Adjustment Procedures:
The Proximity Switch includes an adjustable delay. The delay may be set from 1 second to 10 minutes.
1.Use a small screw driver provided to turn the Delay Adjustment Screw (See Figure 24.) Turn the screw
counter clockwise until the light stays on. Turn the screw clockwise one complete revolution. This sets the
delay to 1 second.
2.To increase the delay, turn the Delay Adjustment Screw clockwise.
Watch the indicator light; quick flashes = shorter time delay, slow flashes = longer time delay.
The Proximity Switch is shipped with the sensitivity preset at the factory. This setting is adequate for most
feed types and conditions. However if the sensitivity does need to be adjusted, carefully follow these
instructions:
3.Allow power to be supplied to the switch for at least 15 minutes to properly warm the sensor. Chore-Time
recommends wiring the proximity switch to have a constant 220 V. supply. See the wiring diagrams supplied
with the Proximity Switch.
4.Set the Proximity Switch time delay to 1 second as specified in the instructions above.
5.Use a small screw driver to remove the caulk concealing the Sensitivity Adjustment Screw (See Figure 24.)
6.IMPORTANT: A Proximity Switch may be used in a feed bin boot to shut the fill system down when it no
longer senses feed.
A Proximity Switch may also be used as a feed level switch at the control end of the line. In this application
the switch is used to shut the system down when it senses feed.
Before adjusting the Proximity Switch, carefully consider how you want the switch to react when it senses
feed. For addition information, see the instructions shipped with the Proximity Switch.
Greater switch sensitivity is achieved by turning the Sensitivity Adjustment Screw clockwise.
Less switch sensitivity is achieved by turning the Sensitivity Adjustment Screw counterclockwise.
Note the screw orientation before beginning adjustment. Adjust the Sensitivity Adjustment Screw 1/4 turn,
test switch, continue adjusting as required.
Discard damaged or replaced equipment according to local and national codes. Many of the components may
be recycled.
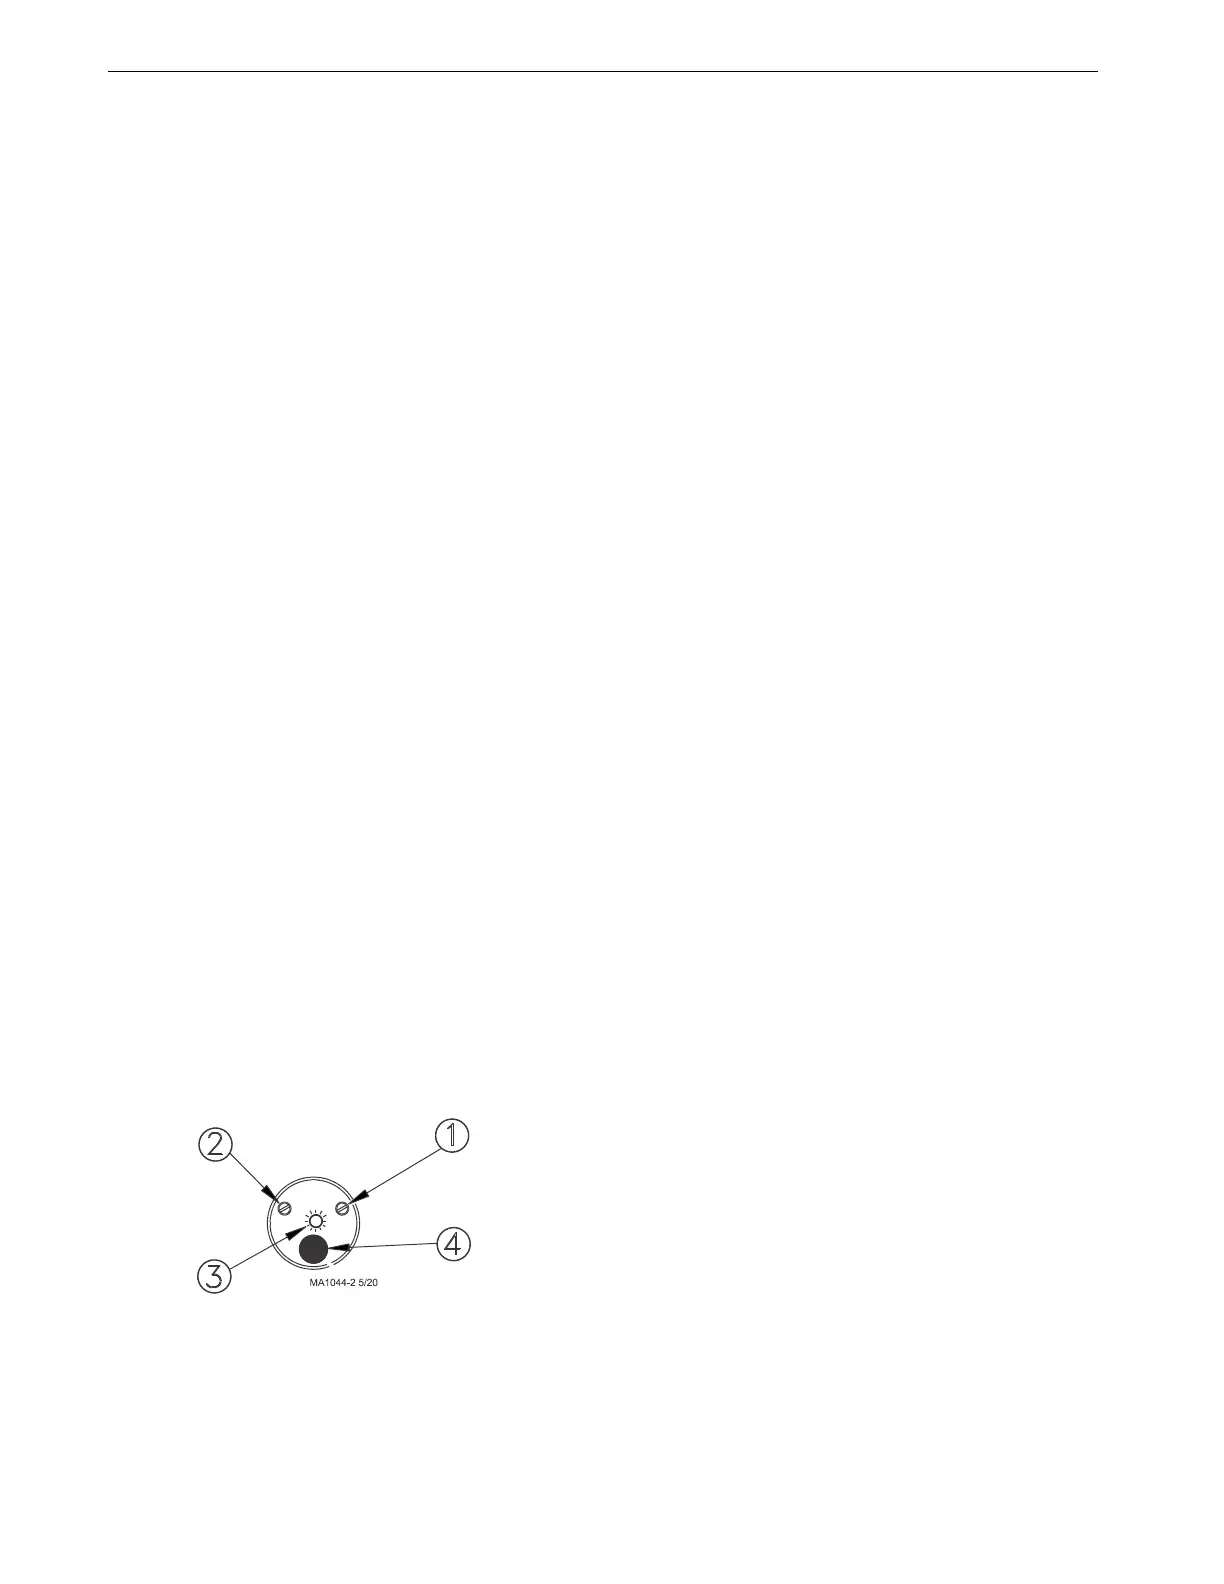
Key Description
1 Sensitivity Adjustment Screw
2 Delay Adjustment Screw
3 Indicator Light
4 Power Cord
Figure 24. Proximity Switch End View
 Loading...

