Operation and Setting
2-15
Test Steps (OS)
(1) Connection the DUT with correct procedures.
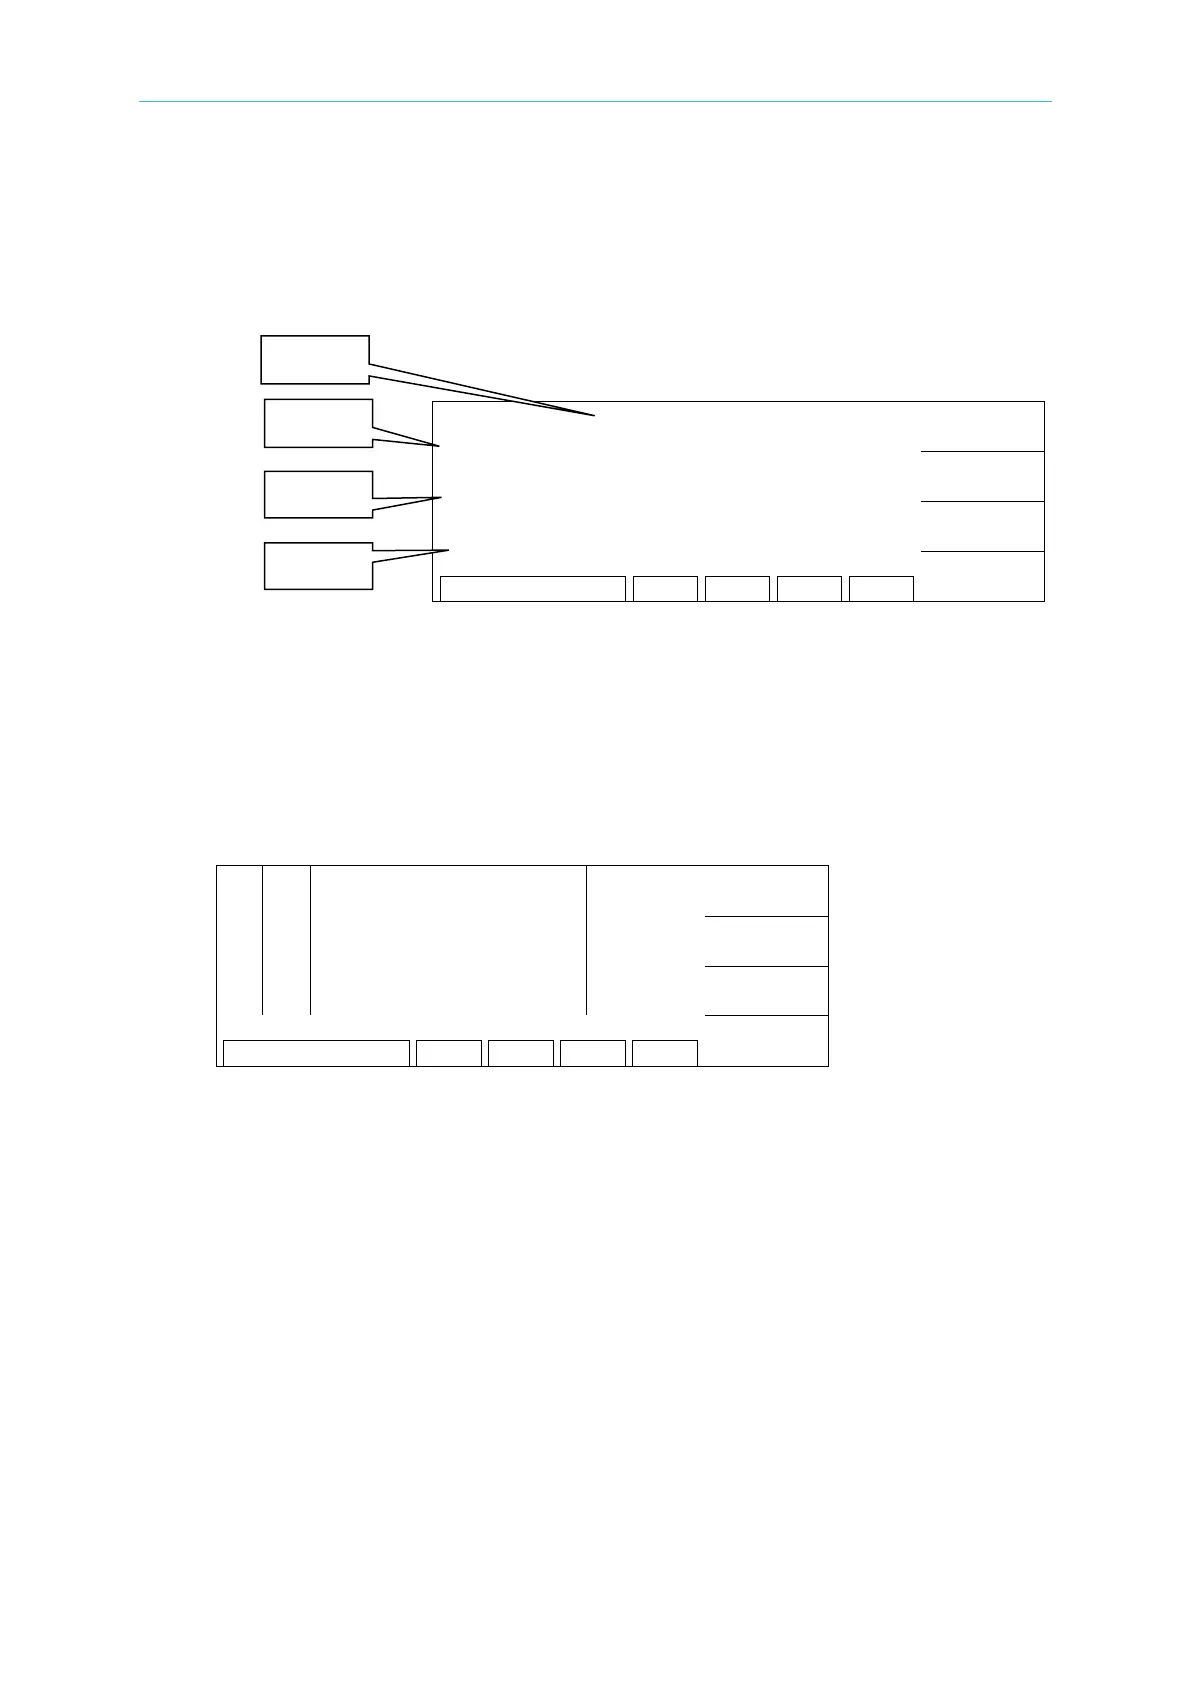
(2) In [Standby Menu] (as shown below):
PRESET
MENU
MORE..
1. OS in “Line 1” indicates this step is open/short detection mode.
2. “Line 2” indicates the output voltage set for test.
3. “Line 3” indicates the capacitance value for reading.
4. “Line 4” indicates the test time.
(3) Press [STOP] to enable it standby for test and the “Status Line” shows “STANDBY”.
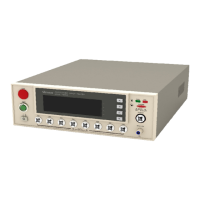
(4) Please press [MORE..] to enter the test menu of multiple STEPS, the menu as
shown below:
OFFSET
GET Cs
MORE..
1. Please press [OFFSET] to perform OFFSET elimination at first. It is need to
perform OFFSET elimination again when change the wire or fixture every time.
This is for ensure the accuracy for the test.
2. It is need that the capacitance standard sample for the test as the DUT when
test or change new DUT of capacitance. Press [GET Cs] to read the standard
capacitance value for the value when test.
3. Please press [MORE..] again to back to standby menu.
4. Press [START] to begin the test. It will begin to output the voltage. The
DANGER indicator lights up and the “Status Line” shows “UNDER TEST” to
warn you that it is in test state and there is voltage output. “Line 2” will show the
voltage output reading, “Line 3” will show the reading of capacitance, and “Line
4” performs timing and countdown work.
Note: When test OSC Mode, Get Cs current range at this time decides the display of
capacity effective digit.
Example: Get Cs voltage 0.018kV, Get Cs capacitance value 17.4nF, current=
1.18mA -- at the mass current range