Test
Installation
Pet-Immune PIR Motion Detector
5
4
3
LED Indication
PCB Layout
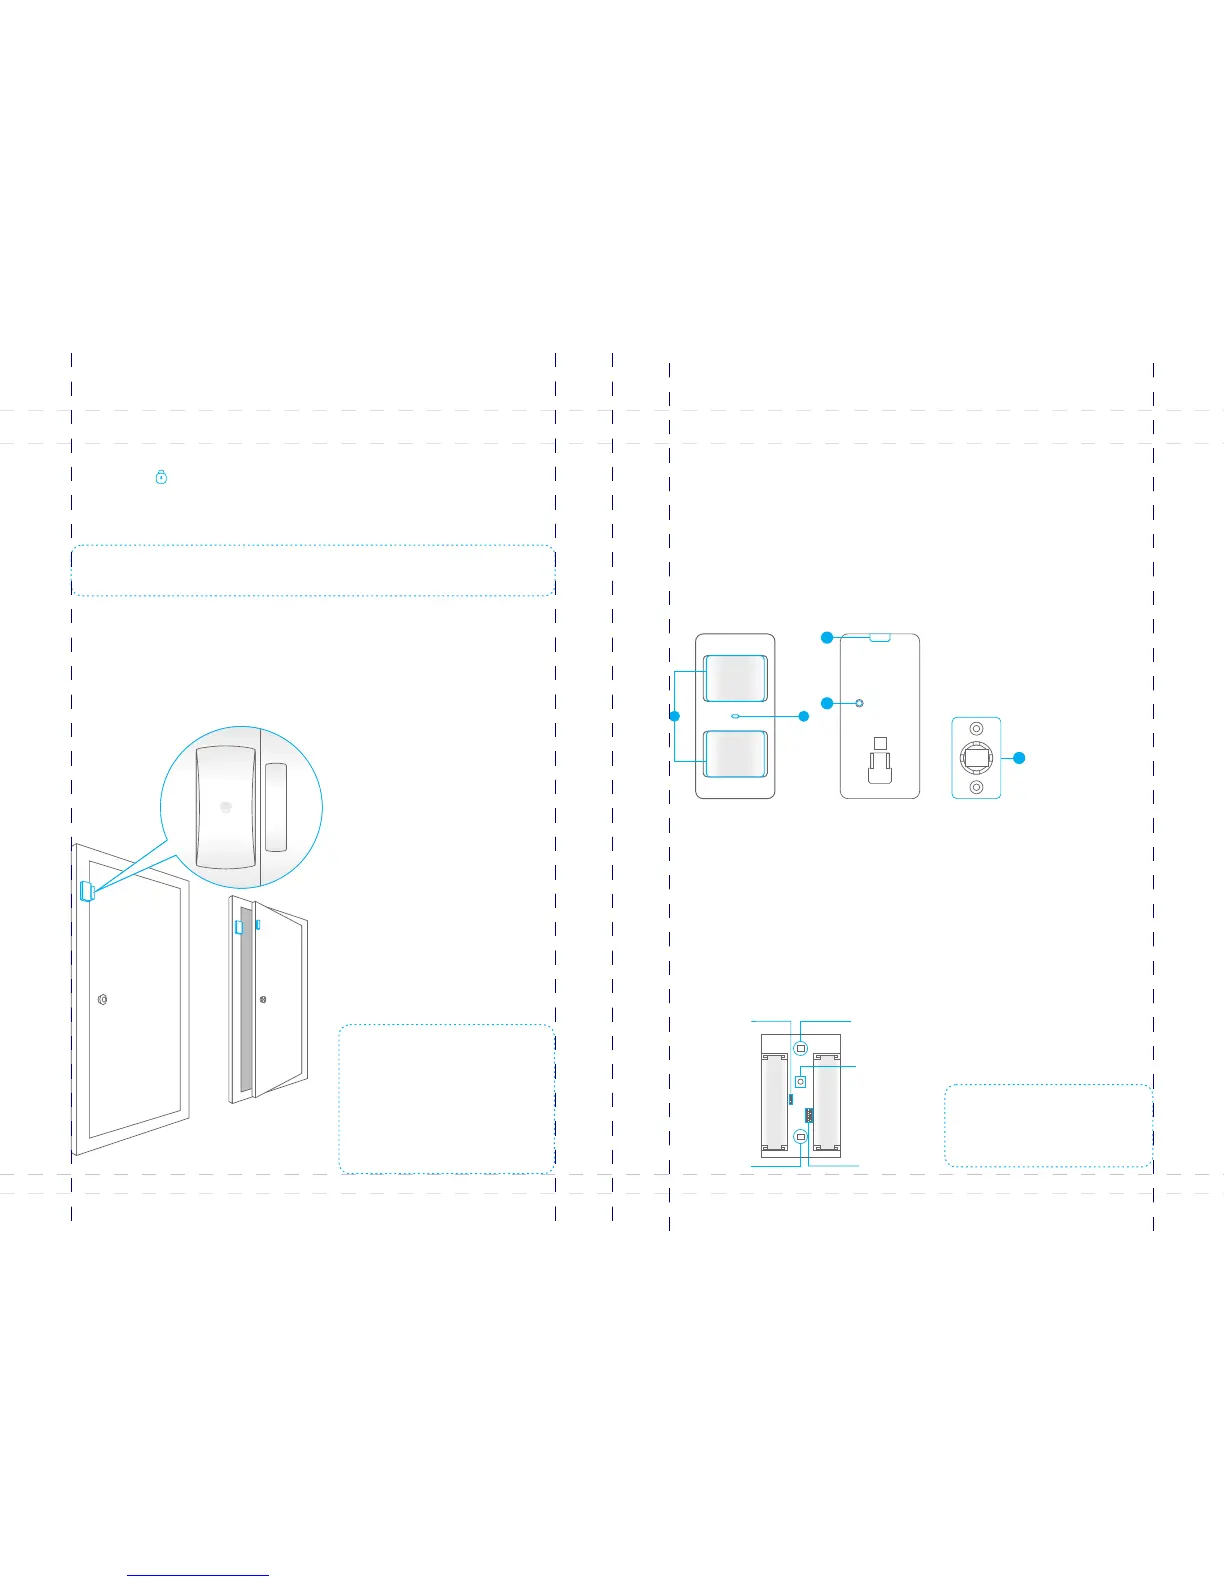
1. Press the back cover and slide down to remove the back cover.
2. Remove the insulating strip. The contact works immediately.
3. Press the button on the remote control. The system switches to the arm [Arm ]
status. Separate the transmitter and magnet. The LED is on and the panel alarms. It
indicates that the sensor works properly.
Note: There are triangle marks on the side of the transmitter and magnet. Make sure the
triangle marks face each other and within the range of 1 cm.
Note: Make sure the transmitter and
magnet works properly on the desired
locations. If a metal door is installed,
place spacers under the transmitter
and magnet. Do not apply the contact
to a rolling shutter. Purchase dedicated
contacts for rolling shutters when
necessary.
Mount the transmitter on the frame and the magnet on the door or window. Make
sure the magnet is on the right side of the transmitter. Secure the transmitter and
magnet on the desired locations with double-sided tapes or screws.
The detector adopts digital dual-core fuzzy logic control processing technology and
intelligent analysis algorithm, effective resolution of interfering signal and human
movement signal, preventing false alarm. It features automatic temperature
compensation and resistance to flow technology, adapting to environmental and
temperature change. It can detect human movement within the 8-meter cone space,
suitable for halls, hallways, etc. The detector features pet immunity for small animals
up to 25kgs.
Appearance
1. Detecting lens
2. LED
3. Snap joint
4. Test button
5. Installation bracket
Blinks continuously: Under self-testing state.
Blinks once: Intruder is detected.
Blinks twice: 3 minutes testing is finished, enters power saving mode.
Blinks once per 3 seconds: Low battery indication, LCD shows: Sensor 1-50(Sensor
Name) low battery, please change the batteries immediately.
Note: If the detector is disassembled,
system will sound immediately,and
LCD shows "Sensor 1-50(Sensor
Name) Sensor Tamper".
2
1
AA 1.5V LR6
AA 1.5V LR6
LED ON / OFF
Infrared sensor
Infrared sensor
Zone setting
Tamper switch
15
16