1
2
3
1
2
3
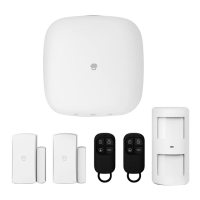
Normal Sensor: In arm mode, when normal sensors are triggered, system will alarm. In
disarm mode, when normal sensors are triggered, system will not alarm.
24 Hour Sensor: Under any circumstances, when 24 hour sensors are triggered, system
will alarm at once.
Delay Sensor: In arm mode, when delay sensors are triggered, system will alarm after
the set time if the entry delay time was set before. (For "Entry Delay", please refer to
page 32).
Home Sensor: In home mode, only normal sensors will be triggered for alarming while
home sensors will not be triggered. This will allow user to move freely at home.
Names of Sensors
If user wants to rename the sensors, please choose “Edit Sensor Name” in step 5 and
press . Then input the sensor name. [Enter]
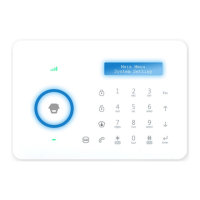
Test Mode
Test if the sensors are connected successfully to the control panel.
Log on the menu, press or , choose “Accessories”, press .[ ] [ ] [Enter]
Press or , choose “Test Mode”, press . LCD display will show “Yes?”, [ ] [ ] [Enter]
press again to start testing mode for 10 minutes.[Enter]
Please trigger coded sensors in order, the sensors will transmit signals to control panel.
When 3 beeps are heard, LCD display will collect the triggering time of the sensors.
Then you can count the connected sensors based on the numbers displayed on the
LCD screen. Exit by pressing button.[Esc]
3. System Settings
Date and Time
Date
Log on the menu, press or , choose “System Settings”, press .[ ] [ ] [Enter]
Press or , choose “Date and Time”, press .[ ] [ ] [Enter]
Press or , choose “Date”, press .[ ] [ ] [Enter]
Input date, press .[Enter]
1
2
3
4
Date Format
Log on the menu, press or , choose “System Settings”, press .[ ] [ ] [Enter]
Press or , choose “Date and Time”, press .[ ] [ ] [Enter]
Press or , choose “Date Format”, press .[ ] [ ] [Enter]
Press or , choose format, press .[ ] [ ] [Enter]
Time
The default time is set on 24 hours standard.
Log on the menu, press or , choose “System Settings”, press .[ ] [ ] [Enter]
Press or , choose “Date and Time”, press .[ ] [ ] [Enter]
Press or , choose “Time”, press .[ ] [ ] [Enter]
Input current time, press .[Enter]
Entry and Exit Delay
If user is not used to taking along with the remote control, entry and exit delay could
be set.
When entry and exit delay is set, user could exit the house in set time period, then
system will be armed automatically; when user is back without disarming the system,
entry delay will allow time for user to disarm the system. Otherwise, the system will take
this as an intrusion and send out alarming alert.
Entry Delay
Entry delay is set to leave time for user to disarm the system when delay sensors are
triggered.
Log on the menu, press or , choose “System Settings”, press . [ ] [ ] [Enter]
Press or , choose “Entry Exit Delay”, press .[ ] [ ] [Enter]
Press or , choose “Entry Delay”, press .[ ] [ ] [Enter]
Input time for entry delay; press for confirmation.[Enter]
Entry delay time is calculated on seconds; default is 0 second (off); setup range is 0-
999 seconds.
Note: [ * ] [ESC]press the button of the control panel to clean when input wrong. Press the to
exit.
Note: The zone setting of delay sensor, please refer to page 31.
4
1
2
3
4
1
2
3
4
31
32