6-3
Cisco Content Delivery Engine 205/220/250/280/285/420/460/475 Hardware Installation Guide
Chapter 6 Installing the VQE and Initially Configuring a CDE
Re-manufacturing a CDE
–
8 bits
–
No parity
• VQE image CD (if installing VQE software on the CDE250 2V0). For the procedure, see the
“Installing VQE Release 3.11 Software” section in the Release Notes for Cisco CDA Visual Quality
Experience Application, Release 3.11.
• Console connection
Installing a CDE
To install a CDE, do the following:
Step 1 Ensure that the CDE is powered off.
Step 2 Attach the USB DVD-ROM drive to any available USB port at the rear of the CDE (see Figure 1-9 on
page 1-10).
Step 3 Attach a power cord and keyboard to the CDE, and attach a terminal server to the CDE serial port and
ensure the serial communications are properly configured (see Figure 1-9 on page 1-10).
Step 4 Insert the VQE installation image CD in the DVD-ROM drive.
The system boots from the image on the CD. This requires a terminal server to be connected to the serial
port of the CDE. All communication is done through the serial port (see the “Before You Begin” section
on page 6-2 for terminal server settings).
Step 5 Power on the external USB DVD-ROM drive.
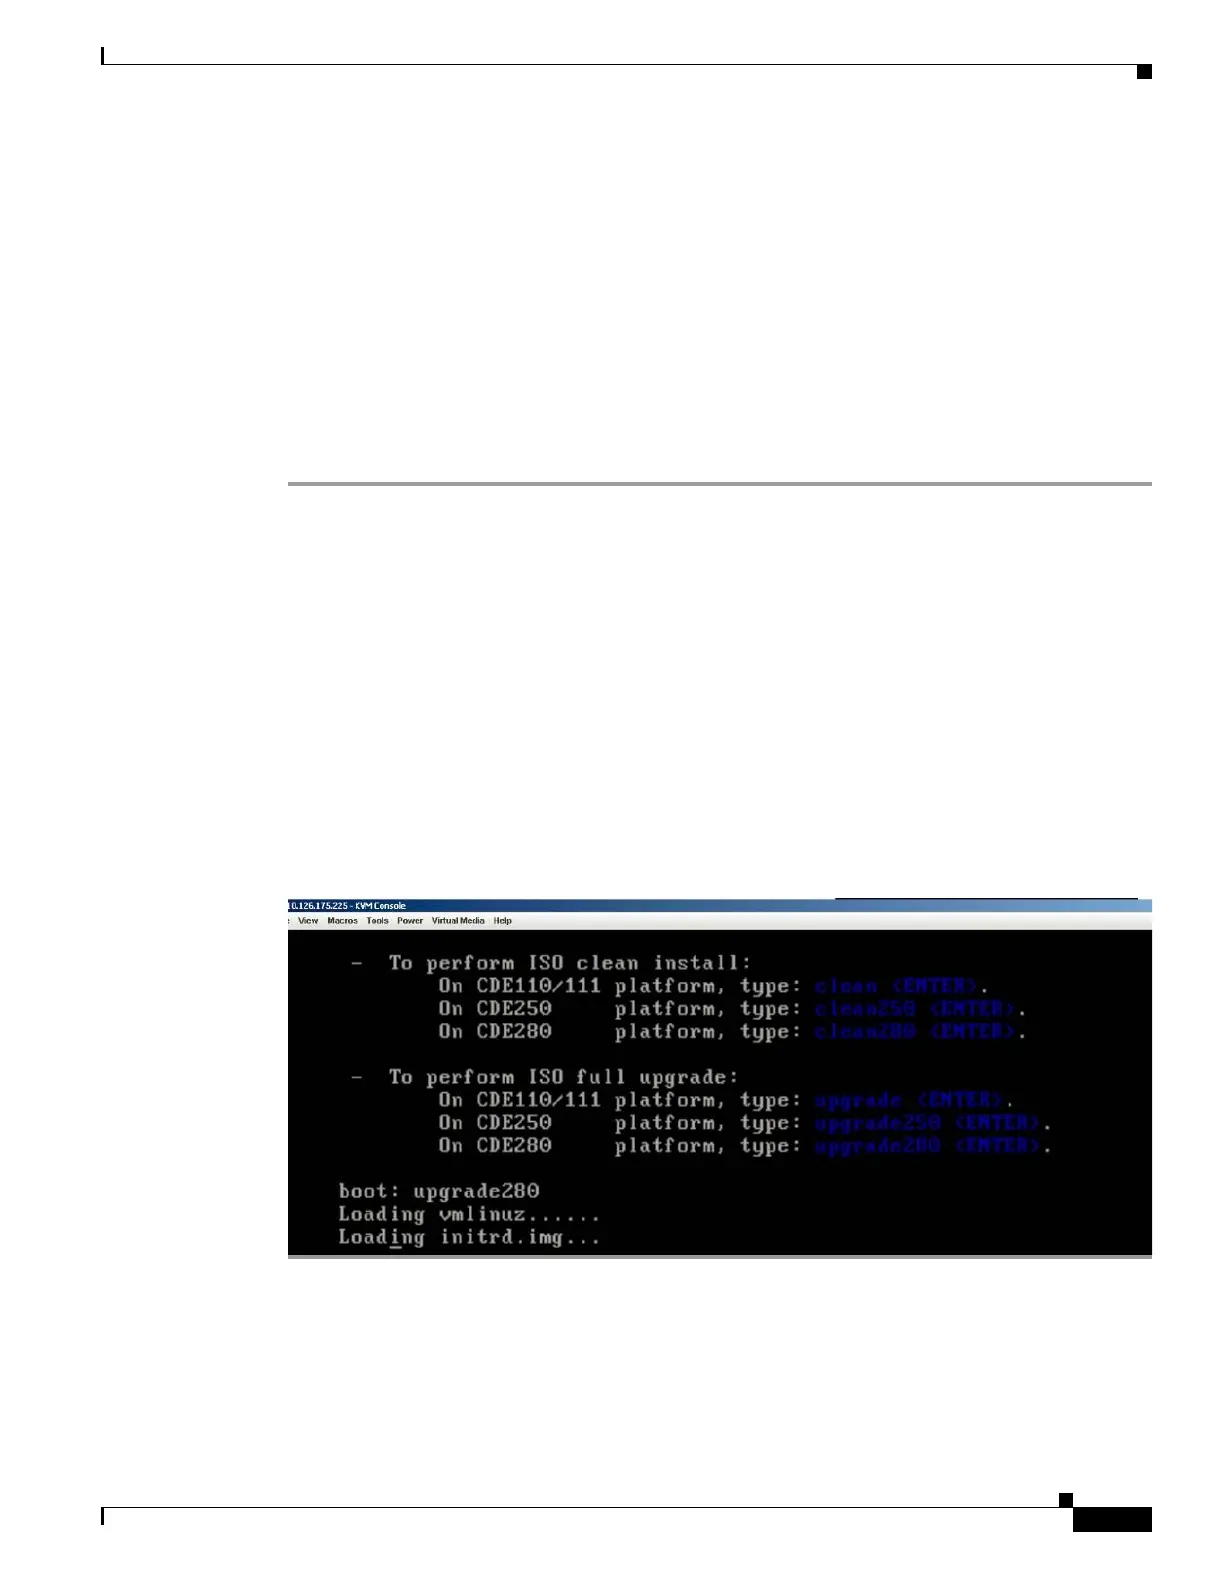
Step 6 To start the booting process, see “ISO Clean Installation” section in the Release Notes for Cisco CDA
Visual Quality Experience Application, Release 3.11.
Figure 6-1 ISO Clean Installation
Re-Manufacturing and Installing CDE280
To install the CDE280 with the help of CIMC, do the following:
 Loading...