6-4
Cisco Content Delivery Engine 205/220/250/280/285/420/460/475 Hardware Installation Guide
Chapter 6 Installing the VQE and Initially Configuring a CDE
Re-Manufacturing a CDE
Note For more information on setting up the CIMC, and logging on to the CIMC, see the “Launching
a CDE280 for the First Time” section on page 4-3
Step 1 Configure the BIOS boot order:
a. Navigate to the BIOS section of the CIMC Web Interface, and click Configure Boot Order, see
Figure 4-7 on page 4-18
Caution Ensure that the DVD image is unloaded or unmounted after the first reboot following the installation.
This boot order change is permanent. To change the boot order temporarily, see “ISO Clean Installation”
section in the Release Notes for Cisco CDA Visual Quality Experience Application, Release 3.11
b. Select the Add virtual media, and then select KVM mapped DVD, see Figure 4-8 on page 4-18
c. Click the Add device and then Save Changes.
Step 2 Mount a virtual ISO:
a. Navigate to the Summary section of the CIMC and click the Launch KVM Console to launch the
console, see Figure 4-9 on page 4-19
Note You may be prompted several times, before you get to the KVM console.
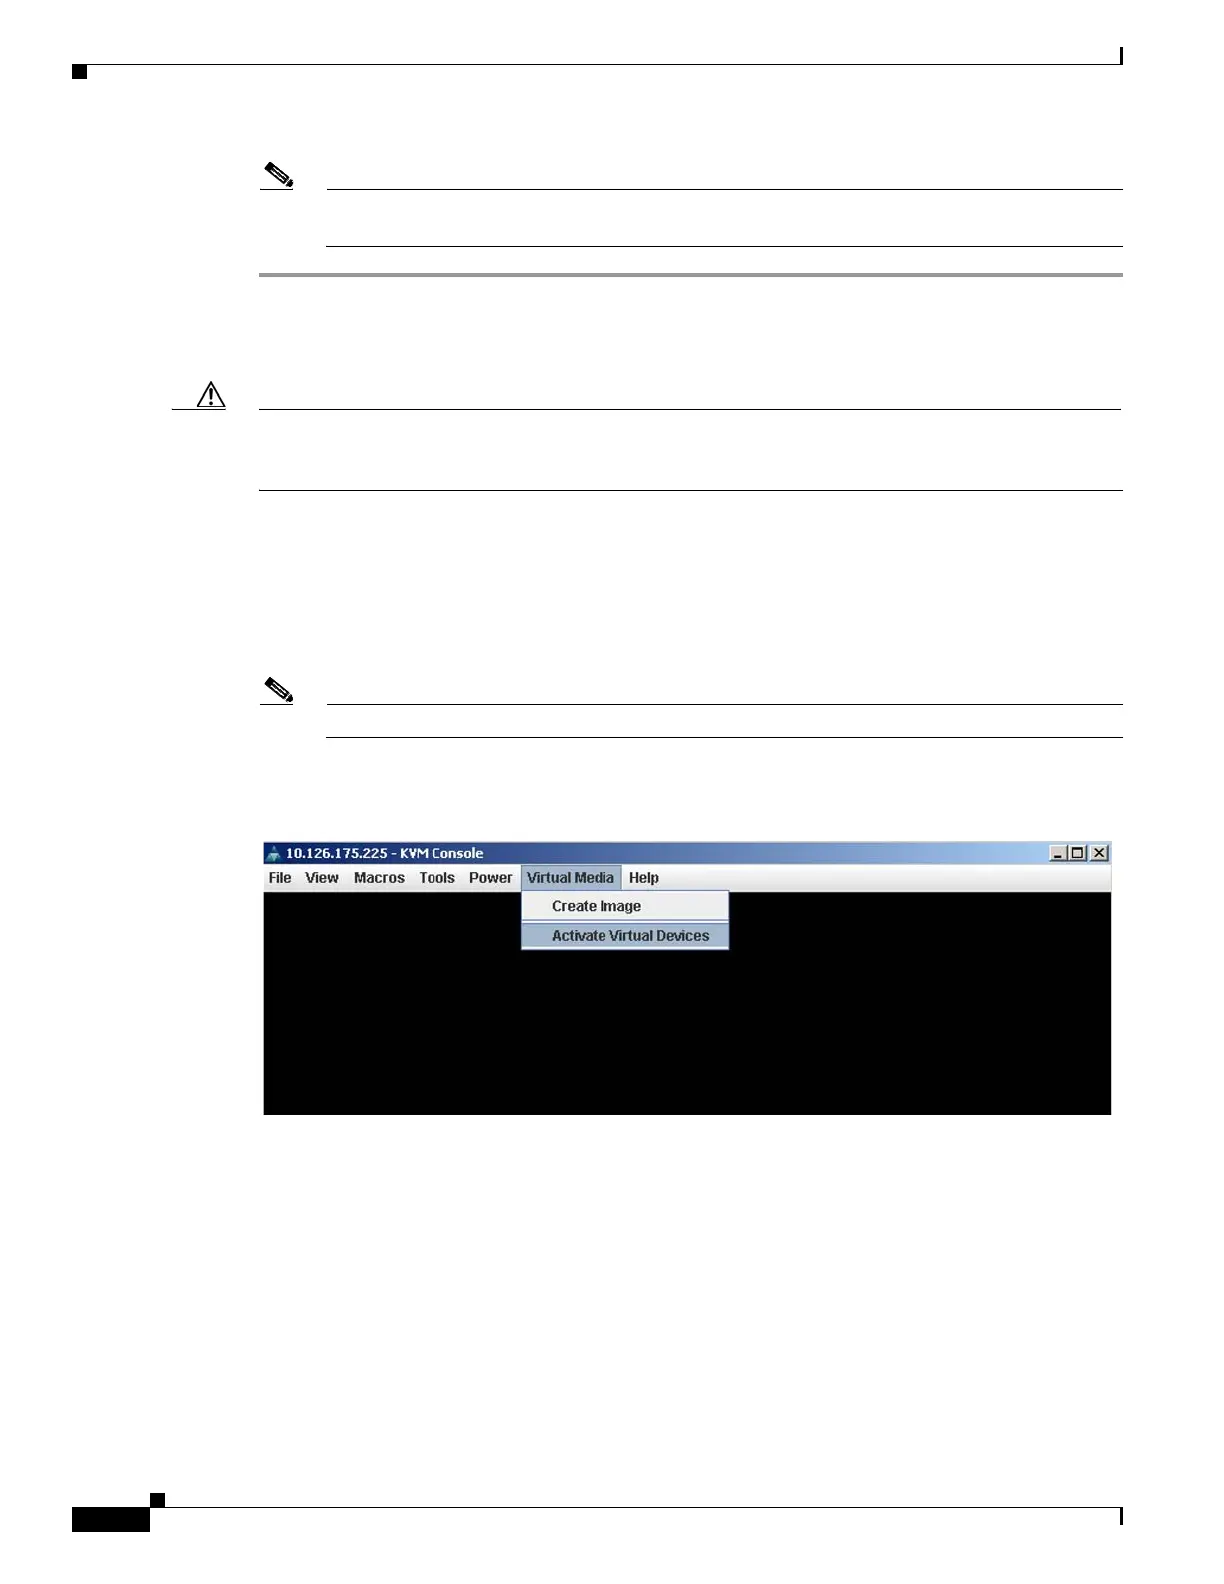
b. In the prompt KVM console, from the Virtual Media tab, select Activate Virtual Devices
Figure 6-2 Activating Virtual Devices
c.
From the Virtual Media tab, select the Map CD or DVD.
 Loading...