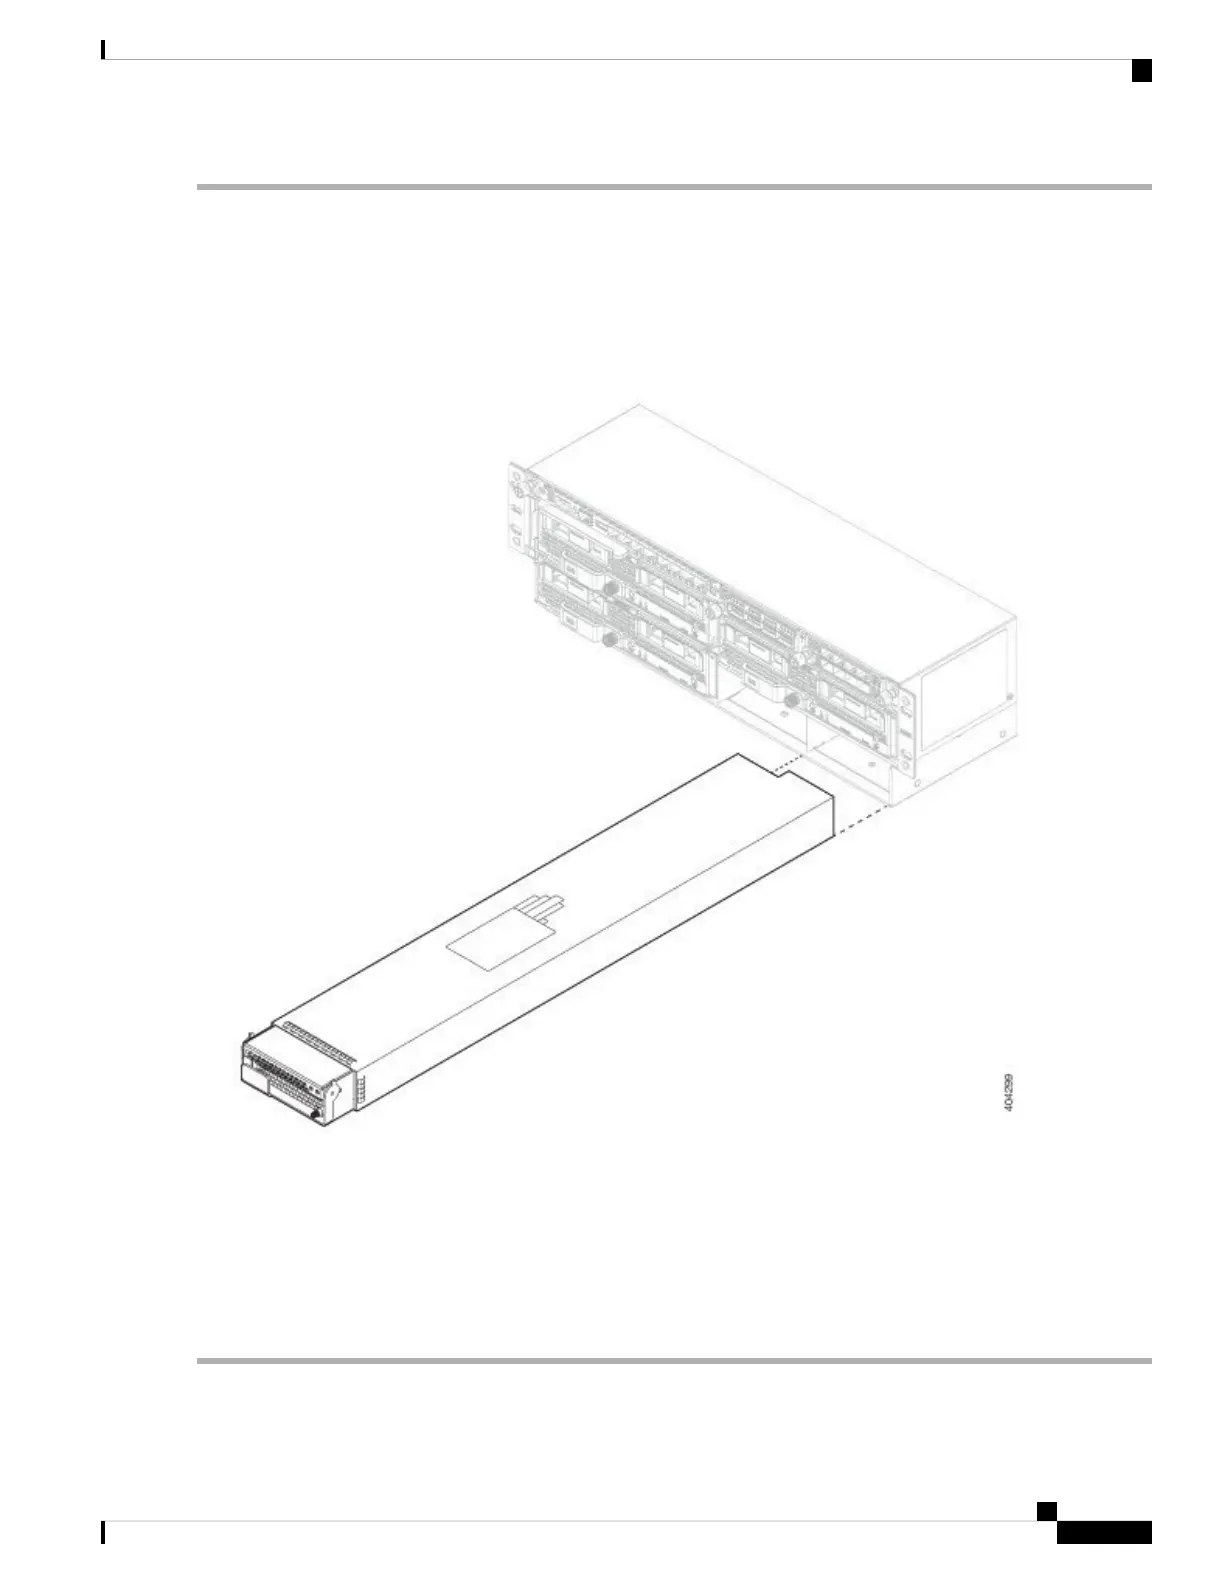
Step 1 To remove the power supply module, face the front of the chassis, and loosen the captive screw on the right side of the
power supply module.
Step 2 Lift up the handle of the power supply to unseat it.
Step 3 Using the handle, pull the power supply module from its slot. Place your other hand under the power supply module to
support it while you slide it out of the chassis. Install the new power supply module immediately.
Figure 47: Remove and Replace the Power Supply Module
Step 4 To install a new power supply, place the handle of the power supply module in the up position.
Step 5 Hold the power supply module with both hands and slide it into the power supply module bay.
Step 6 Gently push the power supply module into the chassis until it is fully seated, and press the handle down.
Step 7 Tighten the captive screw on the right.
Step 8 Verify the power supply module is operating correctly by checking the power supply module LED. See Power Supply
Modules, on page 26 for more information.
Cisco Firepower 9300 Hardware Installation Guide
71
Installation, Maintenance, and Upgrade
Remove and Replace the Power Supply Module

 Loading...