3-5. Disassembly, Reassembly and Lubrication
3-31 CLP-621 & CLP-631
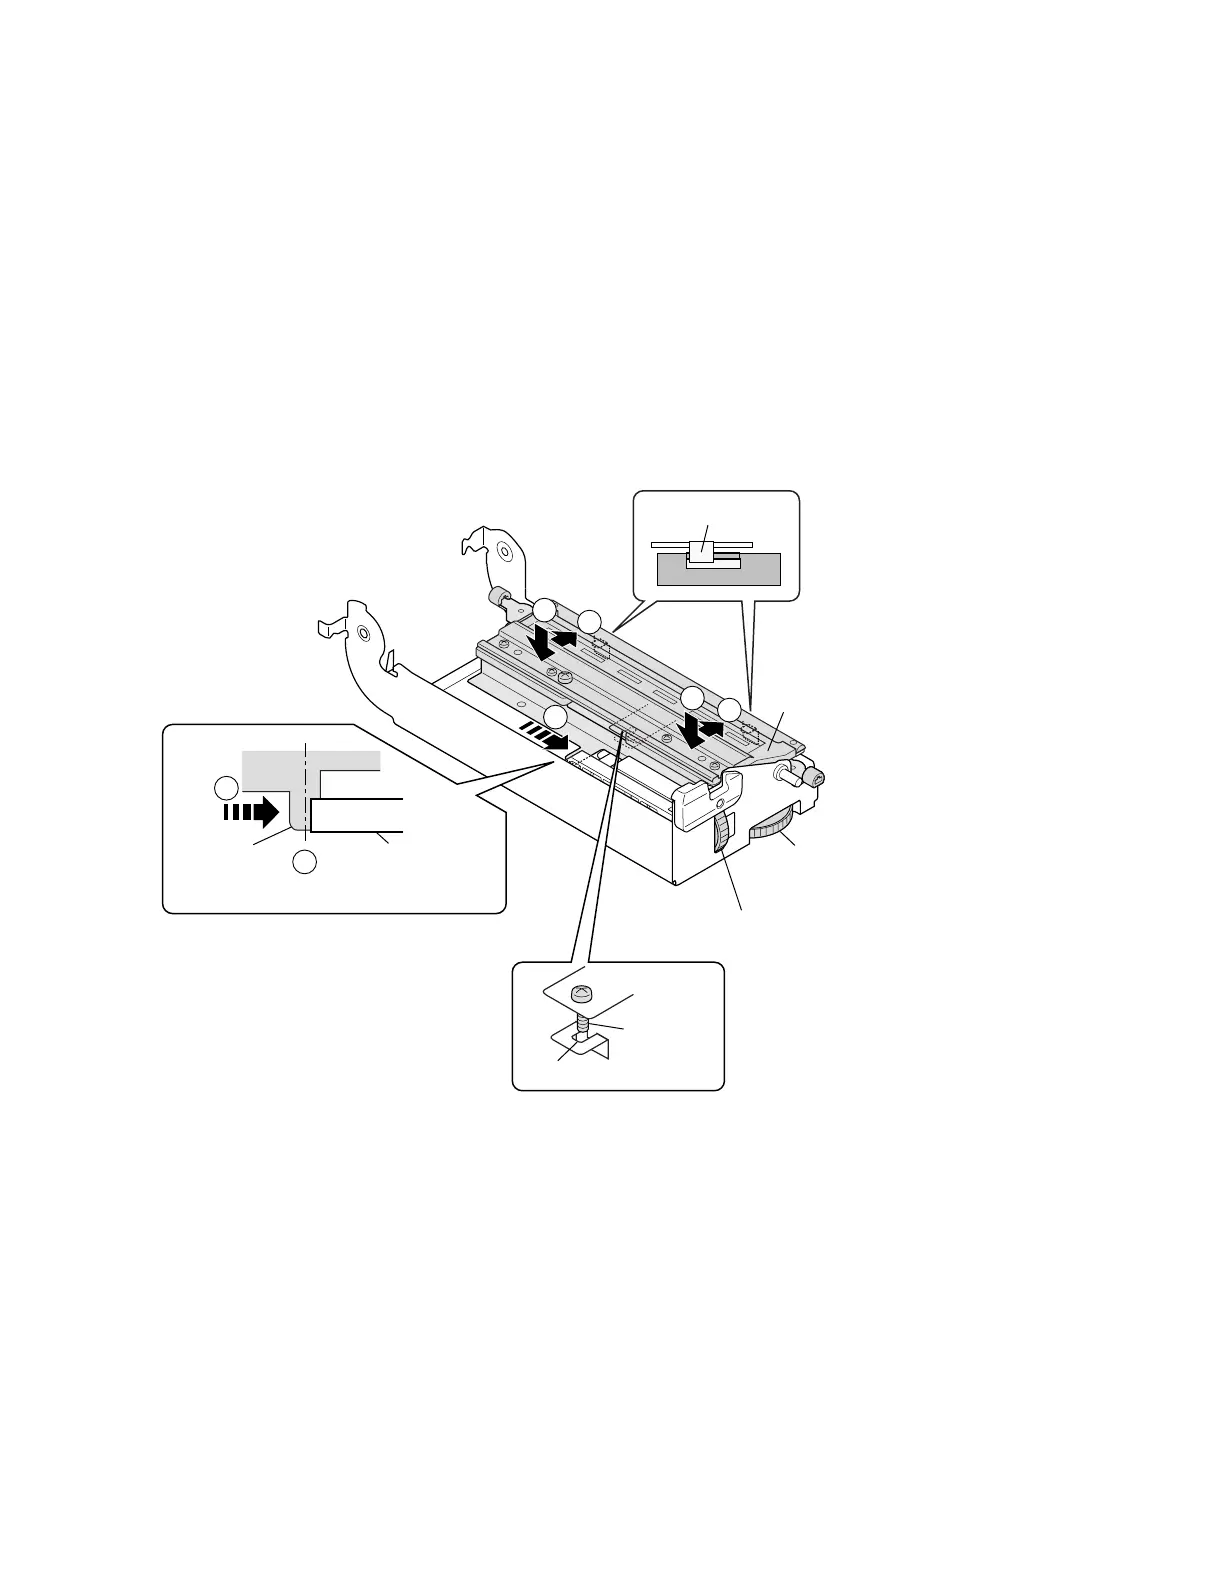
Notes on reassembling:
When assembling the Head Unit, follow the next steps:
1. Set the blue dials as follows:
Media width adjustment dial: Location “0” (for easier assembling)
Media thickness adjustment dial: Location “9”
2. Insert the end “A” of the Head Unit into the Head Adjust SA (c) and align its position as
shown in the figure (d). (In this position, the screw “B” of the Head Unit can be correctly
inserted into the slit “C” of the frame. If the screw “B” is not inserted into the slit “C”, the
Head Unit cannot be correctly seated.)
3. While lightly pressing down the Head Unit (e), move it toward the rear to hook its rear
sides on the claws “D” of the frame (f).
4. Set the media width adjustment dial to the location “5” to give tension to the Head Unit.
(Unit, Head)
Cam, Head Balance
(Media Width Adjustment Dial)
(Media Thickness Adjustment Dial)
Claw D
1
3
3
4
4
"0"
"9" to "5"
Screw B
Slit C
Align like this.
2
End A
1
SA, Head Adjust