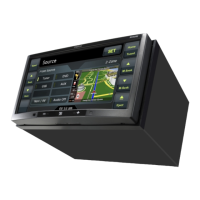
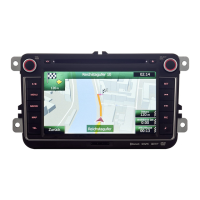
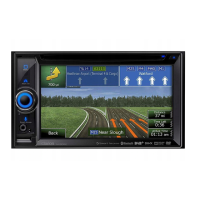
36 NX505E
English
Using the rear camera
When the rear colour camera (sold
separately) is connected to the unit, the
rear of the vehicle can be viewed on the
monitor. To connect it, you need the camera
input cable (CCA-644). Consult your dealer
before buying the rear colour camera (sold
separately).
WARNING
• Never reverse the vehicle while
viewing only the monitor screen. Be
sure to check the safety of the area
around the vehicle directly with your
eyes and drive at a slow speed.
• Before adjusting the image quality
and adjusting, for example, the guide
display, be sure to stop the vehicle
at a safe place and then proceed
with these operations.
Notice
•Therangeprojectedbytherearcamera
islimited.Also,theguidesdisplayed
ontherearcamerascreensometimes
differfromtheactualvehiclewidthand
actualdistancebetweencars.(Guidesare
straightlines.)
•Usetheimageintherearcameraasan
aidforcheckingforobstructions,etc.The
qualityoftheprojectedimagemightget
worsewhenwaterdroplets,etc.adhereto
thecamera.
•Besuretoadjusttheguidestomatchthe
caryouaredrivingwhentheguidesare
displayed.
Image in the rear camera
●
Actual distances and the impression from
the image in the rear camera is different
since it uses a wide-angle lens.
●
The image in the rear camera is a mirror
image. A “mirror image” is an image
obtained by inverting the left and right
of an image like in a rear mirror or side
mirror on a vehicle.
●
The image in the rear camera cannot be
seen or is difficult to view at night or in
dark locations.
●
The camera is in a drip-proof sealed
structure to prevent condensation on the
lens.
●
Never loosen the screws on the camera
body or disassemble the camera. This
will impair the drip-proof performance
and cause malfunction, etc.
●
Clear images cannot be obtained when
the lens front cover is dirty. When water
droplets, snow, mud, etc, is adhering to
the cover, wipe the cover clean with a
soft cloth, for example, moistened with
water. Wiping the lens cover firmly with a
dry cloth, for example, with dirt, etc. still
on the cover will sometimes scratch it.
Displaying the image in the
rear camera
Notice
•Theguidescanbedisplayedandadjusted
onlywhenthegearleverisat
R
(reverse).
1
Turn the engine key to the “ON”
position.
14
button
This pauses play depending on the
source.
If this button is pressed during a pause,
play is resumed from the place where it
was stopped.
Long press time:
This resume stops DVD video and DivX.
If this button is long pressed during
a resume stop, play is completely
stopped.
15
button
When radio is playing:
Preset channel increment
Long press time:
Channel seek increment
When other audio sources are selected
✽
1
,
✽
2
:
Track/chapter
increment
, track/chapter fast
forward
✽
1
With DVDs, keys other than on the disc
menu cannot be operated on the remote
control. Touch the unit to operate them.
✽
2
With DVDs, slow play during a pause is
possible by pressing
.
2
Set the gear lever to
R
(reverse).
The display switches to the image in
the rear camera.
Display priority is given to the image
in the rear camera even when audio-
related items are displayed.
Only volume adjustment by the rotary
volume knob can be operated during
camera display.
Adjusting the image quality of
the monitor (rear camera)
Preparations
●
Before adjusting the display, select
night or day with Day/Night Mode on the
Settings menu.
P.42
1
Touch the screen while the rear
camera image is displayed.
2
Display Adjustment
If five seconds elapses
without you touching the
screen, Display Adjustment will be
hidden.
3
or of item to adjust
Adjust the image quality while viewing
the video image on screen.
4
Back
This sets the newly adjusted image
setting.
Image quality adjustments can be set
for both the day and night screens.
 Loading...