INSTRUCTIONS FOR USE ENGLISH
9100000394 - RA40 13
01/2015
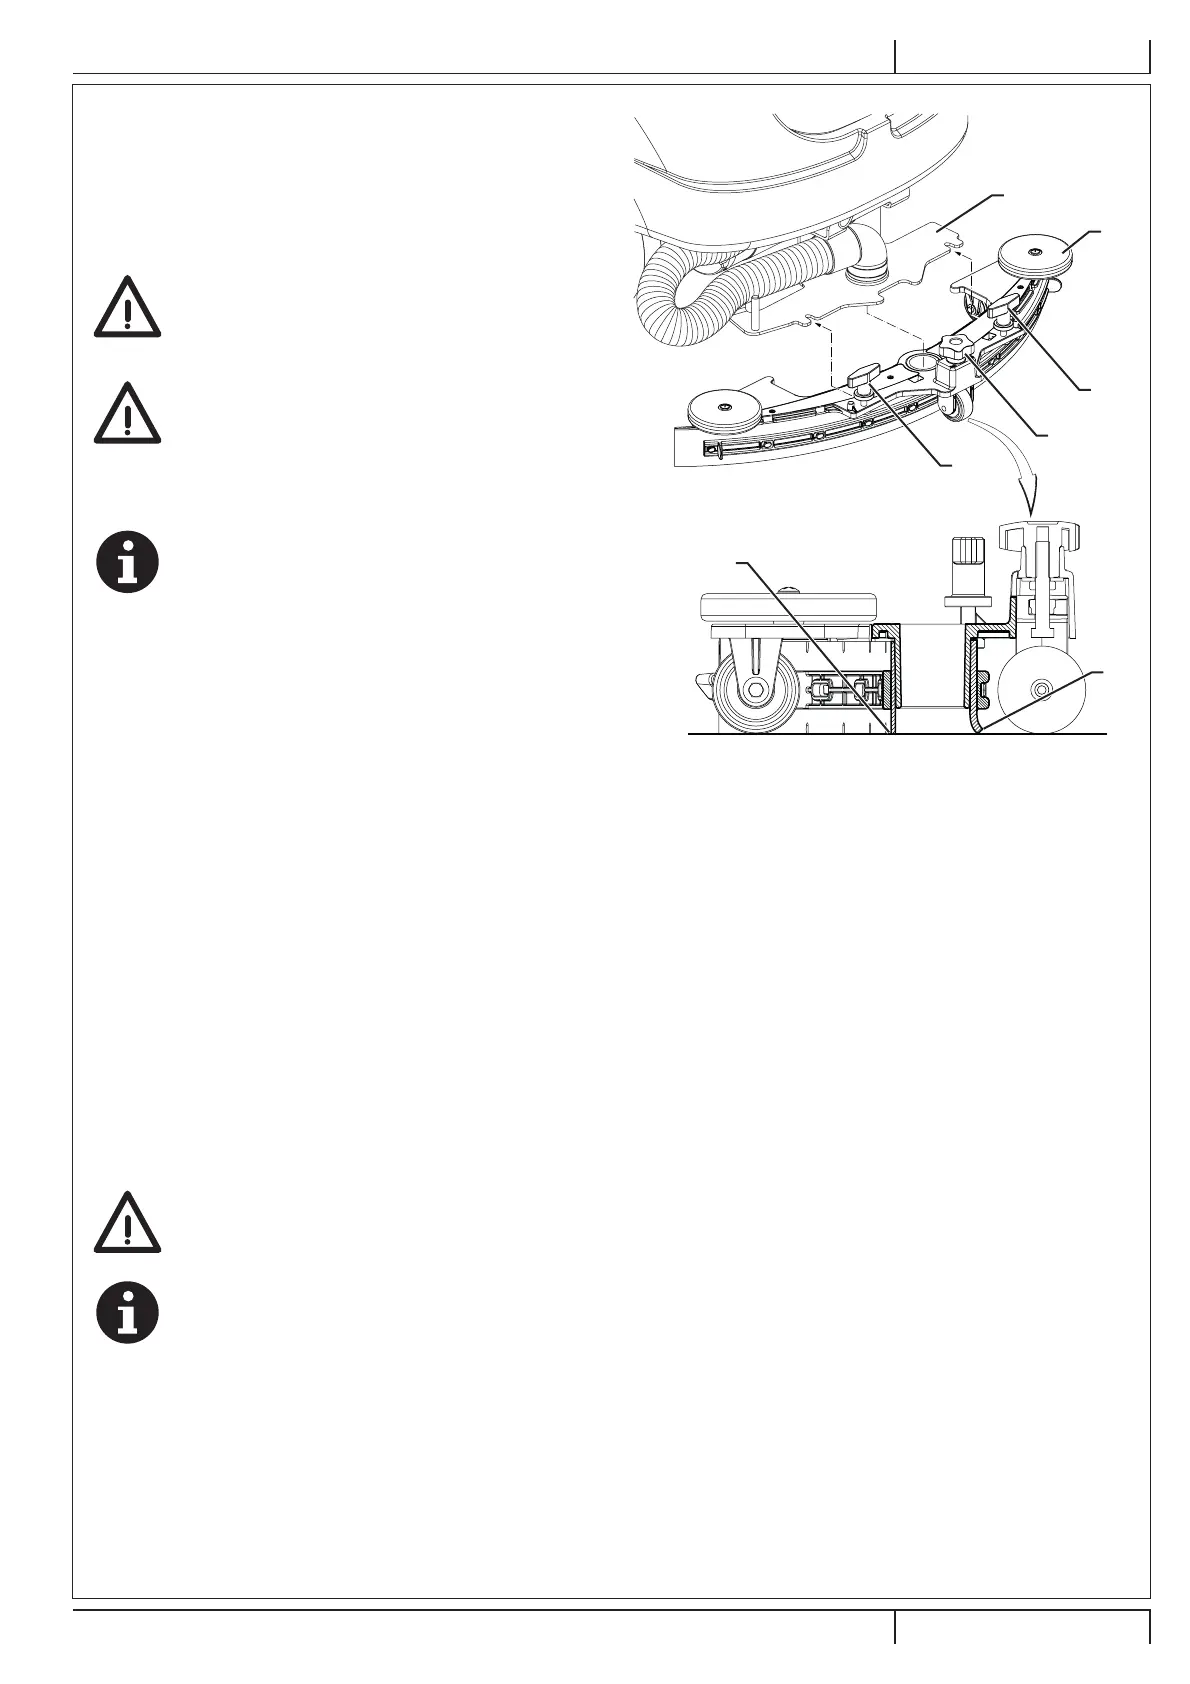
Squeegee installation
1. Install the squeegee (A, Fig. 3) and fasten it to the bracket
(C) with the handwheels (B).
2. If necessary, adjust the squeegee with the knob (D) so that
the rear blade (E) and front blade (F) touch the oor as
shown in the gure.
Solution tank lling
CAUTION!
Use only low-foam and non-ammable
detergents, intended for automatic scrubber
applications.
WARNING!
When using oor cleaning detergents, follow
the instructions on the labels of the detergent
bottles.
To handle oor cleaning detergents, wear
suitable gloves and protections.
NOTE
If the machine is equipped with Detergent Mixing
System (optional) pour clean water in the tank,
otherwise pour solution.
1. Ensure that the solution valve (9) is open (9-A).
2. To ll the solution tank (15) open the cap to access the ller
neck (25).
A
B
D
F
B
C
Figure 3
P100865
(For machines without Detergent Mixing System)
3. Fill the tank (15) with a solution suitable for the work to be performed.
Do not ll the tank completely, leave a few inches from the edge. Use the level hose (16) as reference.
Always follow the dilution instructions on the label of the chemical product used to prepare the solution.
The solution temperature must not exceed 40 °C.
(For machines with Detergent Mixing System)
4. Fill the tank (15) with clean water. If equipped, use the water ller hose (optional) located in the ller neck (25).
Do not ll the tank completely, leave a few inches from the edge. Use the level hose (16) as reference.
The water temperature must not exceed 40 °C.
Detergent tank replacement (For machines with Detergent Mixing System)
5. Lift the cover (18) and check that the recovery tank (17) is empty, otherwise empty it with the drain hose (26).
6. Close the cover (18).
7. Grasp the handle (35) and carefully lift the recovery tank assembly (17).
8. Unscrew the plug with hose on the detergent container (38).
9. Remove the empty container from its housing and replace it with a new one.
10. Insert the hose properly and screw down the plug on the detergent container.
CAUTION!
For the supply and the type of detergent to use, contact an authorized Service Center.
NOTE
In case of new system, system emptied for cleaning, etc., wait for the hoses to ll up completely before turning on. In
order to ll the Detergent Mixing System quickly it may be useful to drain it once or several times (see the procedure in
Maintenance chapter).
9100000394(D)07-2017.indb 13 21/06/2017 11:54:55
 Loading...