INSTRUCTIONS FOR USE ENGLISH
9100000394 - RA40 21
01/2015
SQUEEGEE CLEANING
NOTE
The squeegee must be clean and its blades must be in good conditions in order to get a good drying.
CAUTION!
It is advisable to wear protective gloves when cleaning the squeegee because there may be sharp debris.
1. Drive the machine on a level oor.
2. Ensure that the machine is off and the operator key (41) is turned to “O”.
3. Loosen the handwheels (32) and remove the squeegee (13).
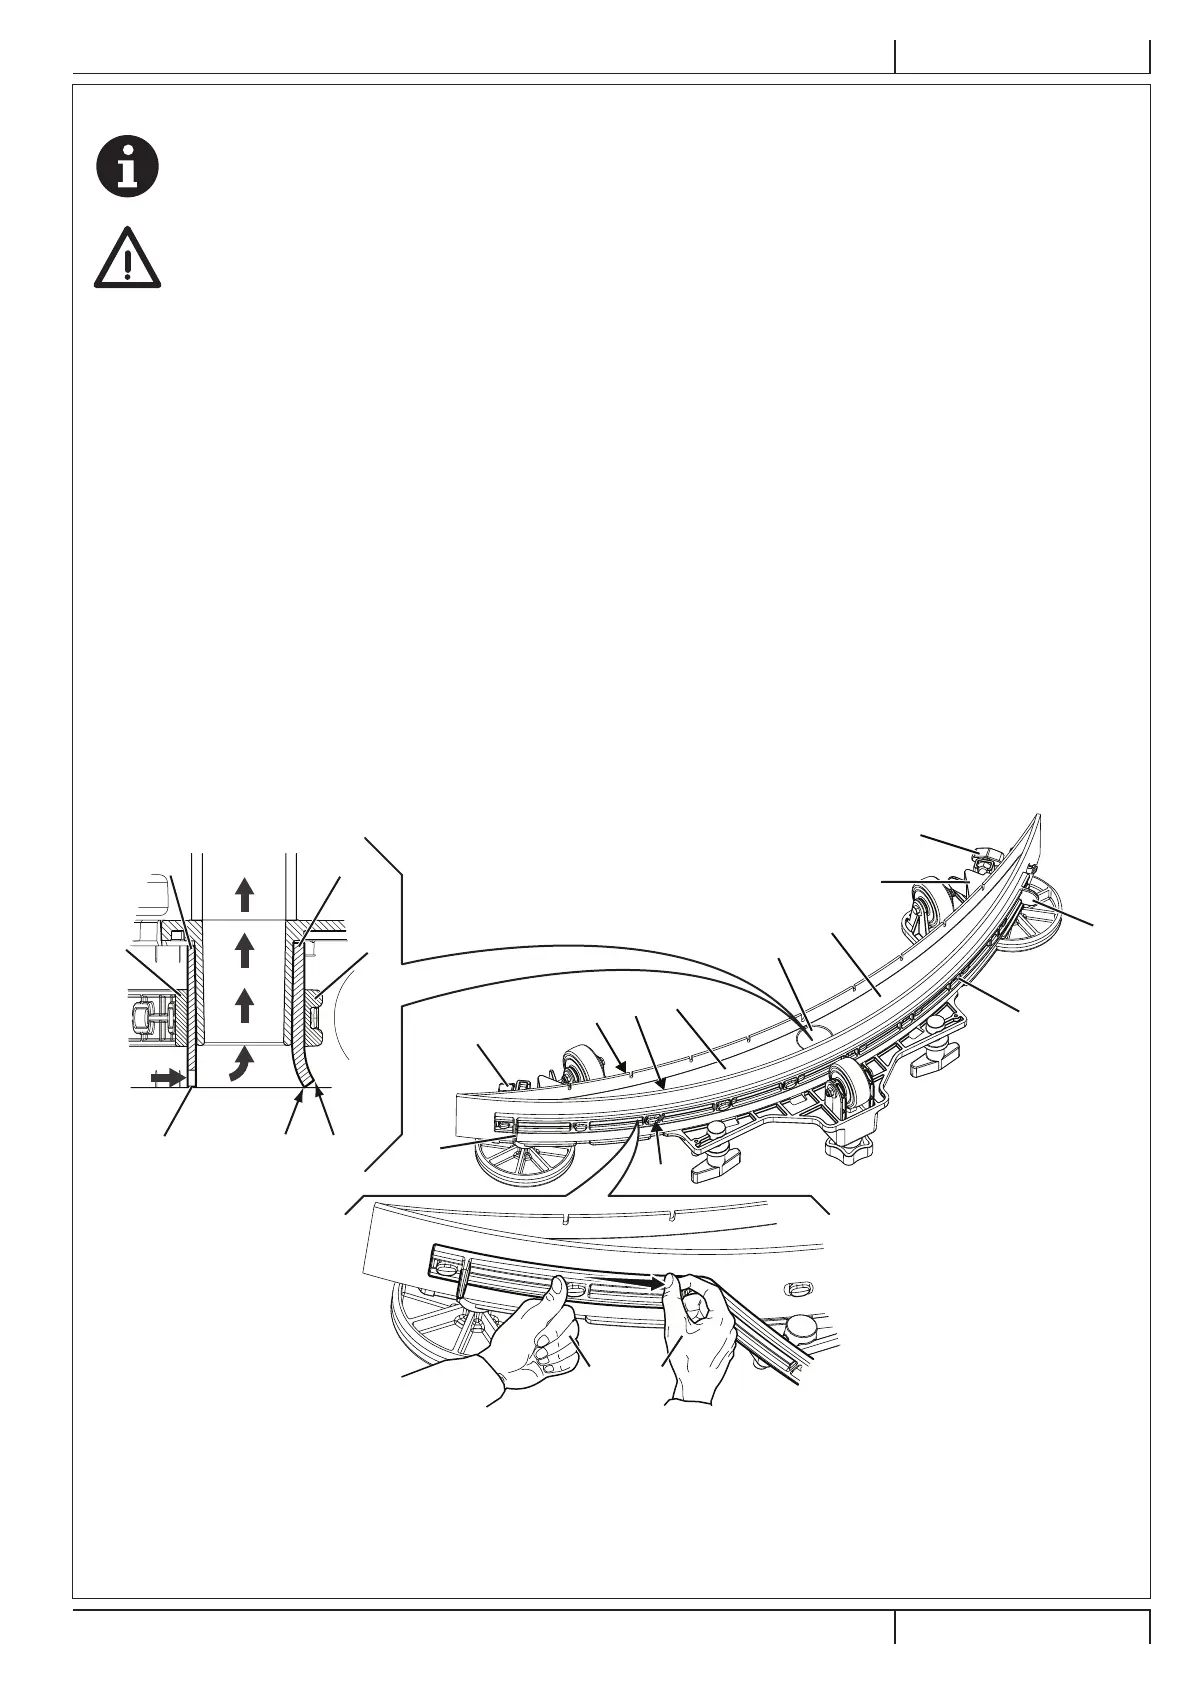
4. Wash and clean the squeegee. In particular, clean the compartments (A, Fig. 8) and the vacuum hole (B). Check the condition
of the front (C) and rear (D) blades, ensuring there are no cuts and tears; if necessary, replace them as shown below.
5. Install the squeegee in the reverse order of removal.
SQUEEGEE BLADE CHECK AND REPLACEMENT
1. Clean the squeegee as shown in the previous paragraph.
2. Check the condition of the front (C, Fig. 8) and rear (D) blades, ensuring there are no cuts and tears; if necessary, replace
them as shown below. Check that the front corner (E) of the rear blade is not worn; otherwise, turn the blade to replace the
worn corner with one of the three remaining intact corners. If the other corners are worn too, replace the blade according to the
following procedure:
• Using the tab (F), release and remove the elastic strap (G) from the fasteners (H), then turn or replace the rear blade (D).
• Install the blade in the reverse order of removal. Fasten the elastic strap (G) to the fasteners (H) starting from one side. To
make the fastening procedure easier, secure the fasteners one at a time, by locking the strap before the fastener with one
hand (M) and pulling it with the other hand (N).
• Unscrew the handwheels (I) and remove the strap (J), then turn or replace the front blade (C).
• Install the blade in the reverse order of removal.
3. Install the squeegee (13) and screw down the handwheels (32).
4. Lower the squeegee to the oor to check the height of the blades, proceeding as follows:
• Check that the lip (K) of the front blade (C) and the lip (L) of the rear blade (D) are resting as shown in the gure.
• Use the knob (33) to make adjustments.
A
I
A
B
D
C
G
KEL
D
C
J
H
G
F
MN
I
Figure 8
P100872
revised 07/2017
9100000394(D)07-2017.indb 21 21/06/2017 11:54:57