Disassembly
2 - 9
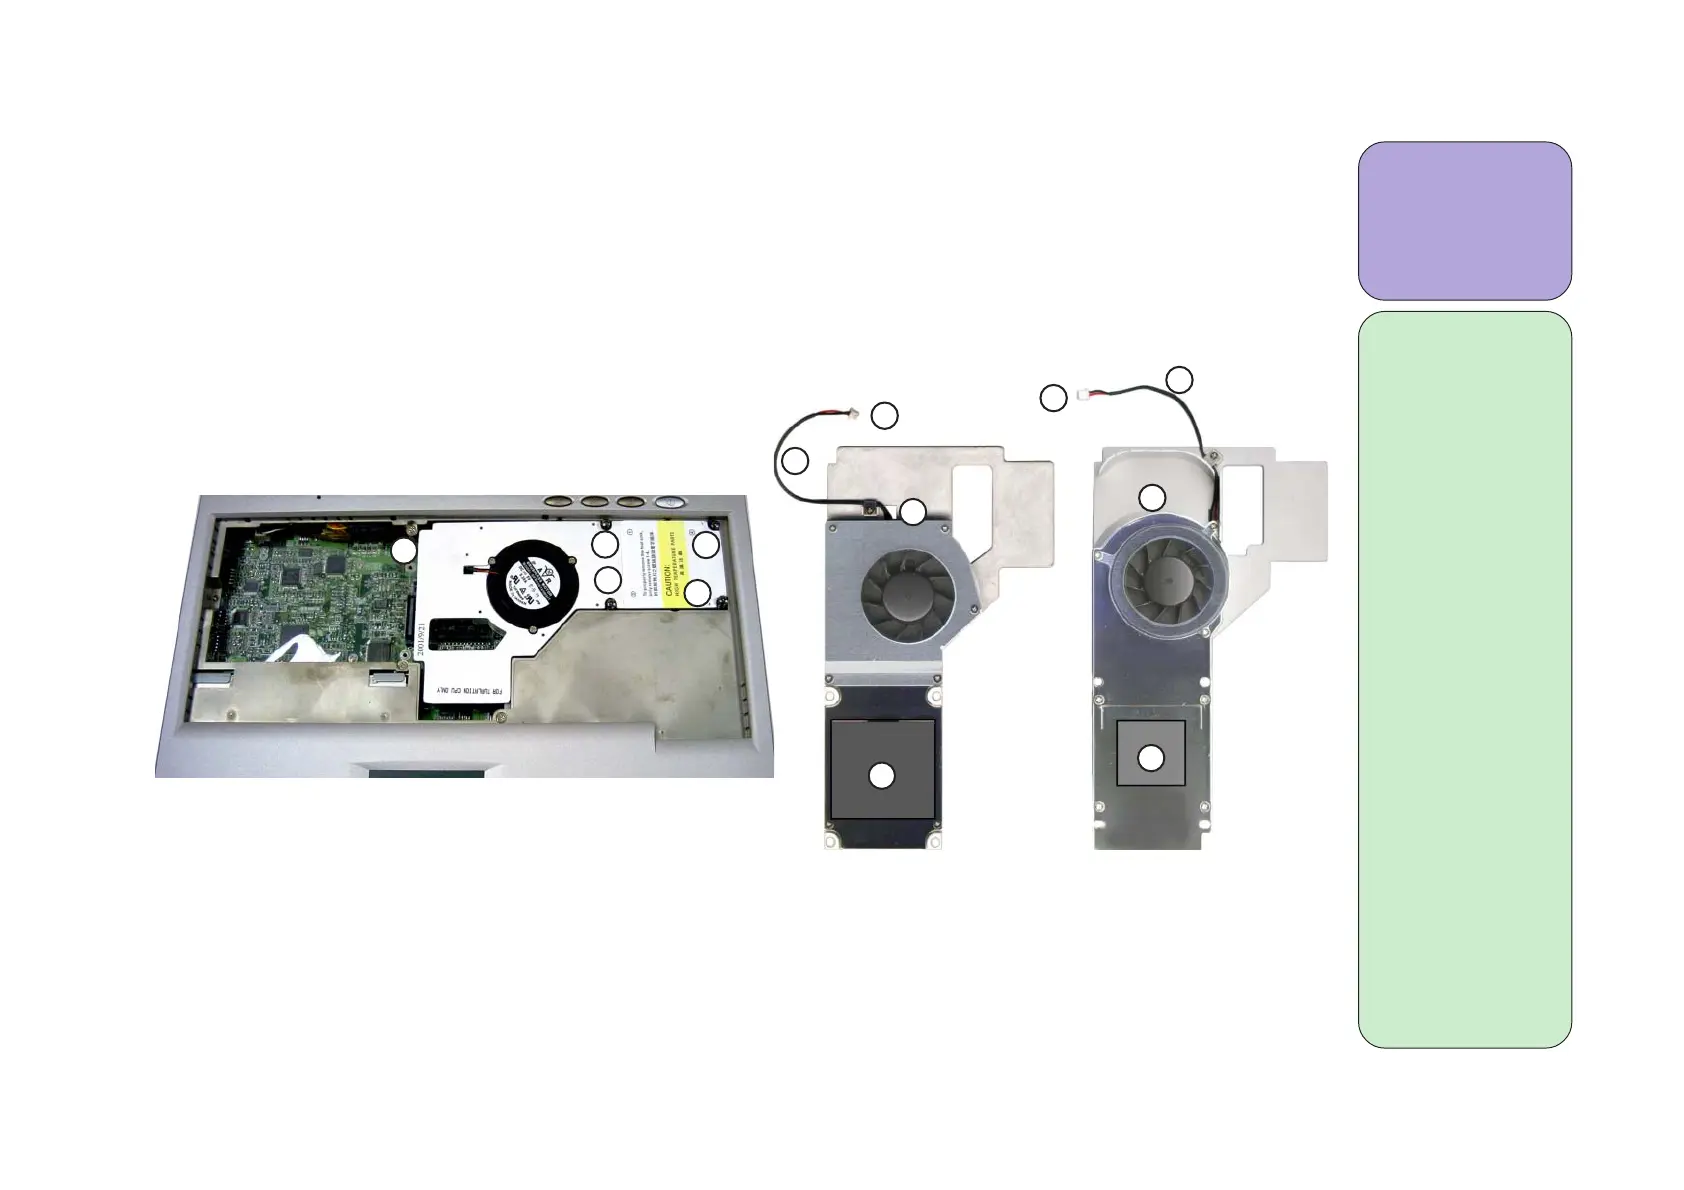
Remove the heat sink
1. Unscrew the 4 screws (P) securing the heat sink to the mainboard (figure 2-8).
2. Lift up the heat sink part way until you see the heat sink cable. Disconnect the cable from the
mainboard (figure 2-9).
3. Place the heat sink aside.
Applying a heat sink pad
1. When the heat sink has been removed you will need to apply a new heat sink pad before rein-
stalling it. To do so simply peel off the old pad and adhere a new one to the same area.
1 Philips screw-
driver
4 screws
1a)Heat sink
(for FC-PGA
Pentium III
and Celeron
CPUs)
Part no.: 31-
22C0N-10X
1b)Heat sink
(for FC-PGA2
Pentium III-S,
Pentium III
and Celeron
CPUs)
Part no.: 31-
22T0N-10X
2) Cable connec-
tor
3) Cable
4) Heat sink pad
1a
1b
2
2
2
4
3
4
3
figure 2-8
figure 2-9
P
P
P
P