Core
Access
Panel
Lid
MAINTENANCE
25
SeeleyInternationalPtyLtd
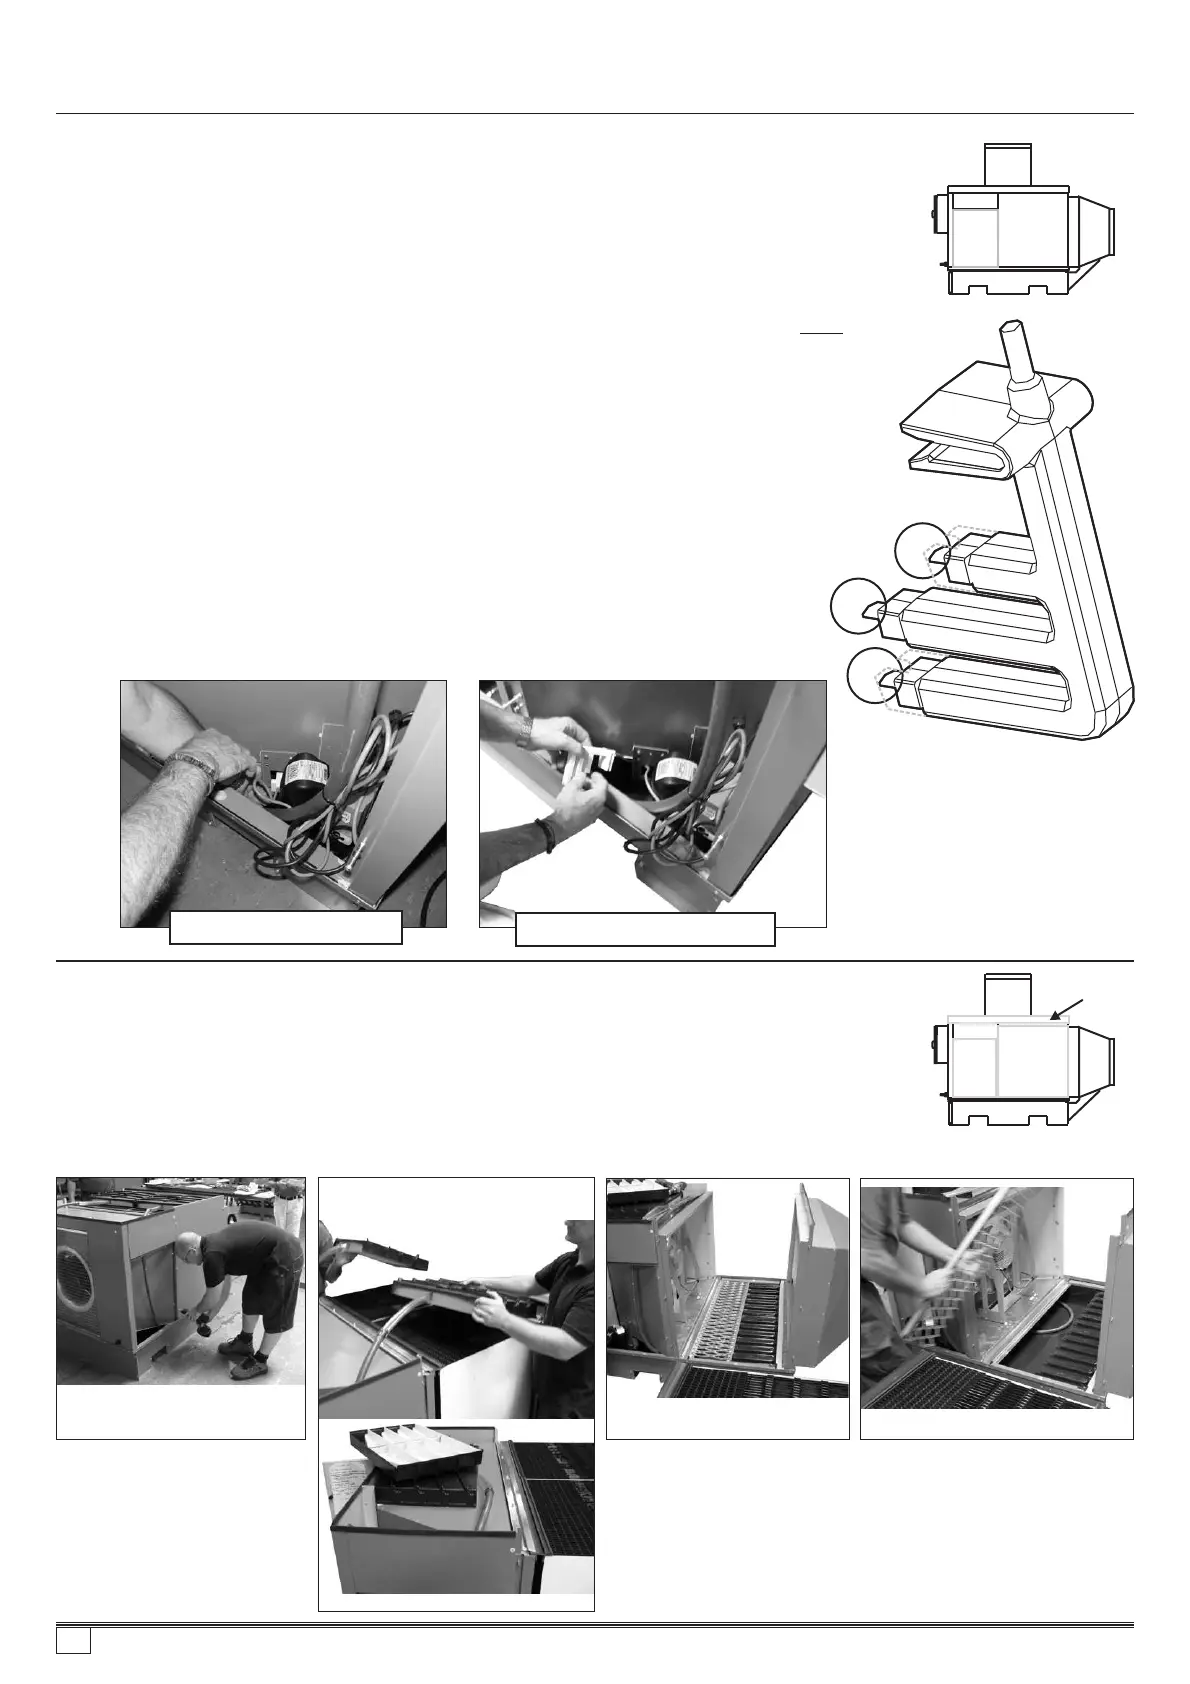
CleaningtheReservoir(Tank)
1. Toaccessthereservoir;theLid,PumpandCoreaccesspanelsmustberemoved.
2. Removethewaterspreaderassemblies(referPg.24).
3. Removethecorestoexposethecorebasegrate.
4. Removethecoregratetogainaccessintothereservoirunderthecorelocation.
5. Removethepumpaccesspanelstoaccessthereservoirintheseareas.Clean
thebottomreservoirthoroughlyusingawetclothorbrush.Flushwithminimal
watertoremoveanyremainingresidue.
Removethecoregratetogainaccess
RemovethecoresRemovetheaccesspanels
Laythewaterspreadertrays(temporarily)fromthe
topsofthecoresbackabovethefanhousing.
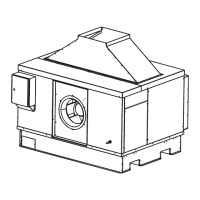
CleaningorreplacingtheWaterManagementProbe
1. Toaccessthewatermanagementprobe,openthepumpaccesspanel.Cutthecabletie
securingtheleadtothepumphose.
2. Unclipthewatermanagementprobefromthebracket,pulltheleadthroughtheopening
inthebracketandpulltheprobeoutfromtheenclosure(Thereissufficientleadlength
toclearthepumpenclosure).Removethesmallplasticshroudsfromthefirstandthird
pins.
3. Cleanthewaterlevelprobesbywipingthecontactsurfaceswithasoftcloth-do
useabrasives.
4. Refittheshroudsoverpins1&3.Refittheprobetothebracket,makingsuretheclipis
fullyengaged(theclipmakesa“click”soundwhenproperlyengaged).
Toremoveandreplacethewatermanagementprobe,
1. Removethe3screwssecuringthebrackettothecoolersidewall. Thecentrescrew
fixestheheightforthebracketmountandhasbeenfactoryset.
2. Uncliptheprobefromthemountingbracket,unplugtheprobeleadfromthemainPCB,
(refertothewiringdiagramadheredtothecontrolboxdoor)removetheleadfromthe
cableglandatthebaseofthecontrolbox,pulltheleadthroughtherubbergland
mountedbelowthecontrolboxfromtheaccesspanelopening.
3. Refittheassemblybackintothecooler.Useanewcabletietotidyandsecureallthe
cablesagainandre-assemblefollowingthereverseorderasabove.
NOT
Besuretoreturnthe
brackettothesamemountheightpositionforpropercontrolofwaterlevels
withinthecooler.
Pump
Access
Panel
Pump
Access
Panel
SideView
Pinshroudsshown
indottedlinefor
clarity
Cleanthewaterlevelprobesbywipingthecontact
surfaceswithasoftcloth.
Cutthecabletie
UncliptheWaterManagementProbe
Pulltheleadthroughtheopeninginthebracket
859736-A AU1007