CAUTION! Alwaysmakesuretherearenoelectricalcables,gasorwaterpipes,orthelike,behindwhere
youintendtodrill.
INSTALLATION
WallControlInstallation
Locating the wall control
(Stand Alone & Supplementary Cooling)
The wall control should be placed approximately 1.5 metres above the floor, in the general area of the cooled zone.
:
•Avoid direct sunlight exposure.
•Avoid mounting on external walls.
•Avoid mounting the wall control near heat sources such as room heaters, stoves and TV’s.
• Do not locate in the direct airflow from the duct outlets.
• Do not locate in strong drafts or in dead spots such as corners and confined spaces.
• Alwayssealthecableentryholeinthewall.Hotaircomingthroughthewallmayinterferewiththetemperature
measurement.
Placement of the Wall Control is critical for correct functioning of the inbuilt thermostat (incorporated in the wall control). The
following points must be taken into consideration
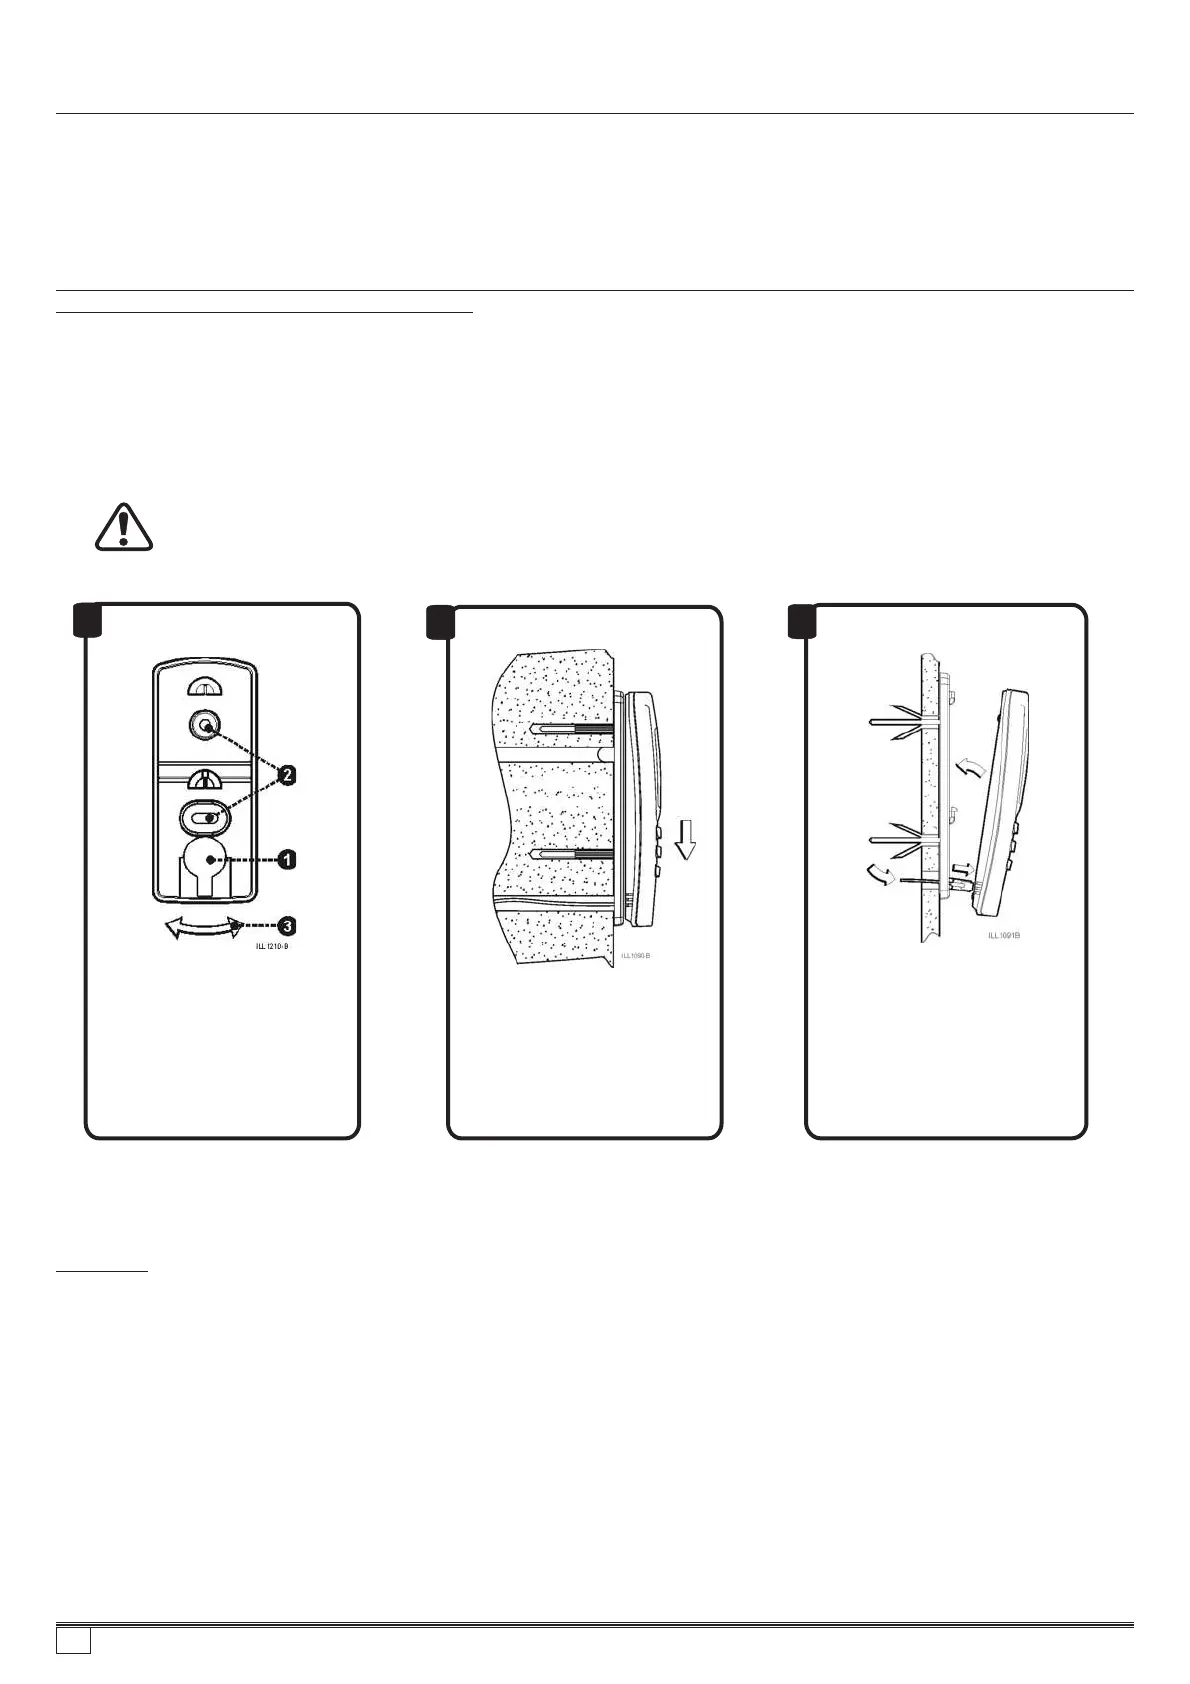
Fixingthewallcontrolbracket
toaplasterboardwall
Usethebracketasatemplate.
1.Drillthe16mmholeforthewall
controlcable
2.Drillthe5mmholesforthewall
plugs.
3.Insertthewallplugsintothe
holes. Alignandscrewthe
bracketintopositionusingthe
suppliedscrews.
Fixingthewallcontrolbracketto
abrickwall
Tomountthewallcontrolbracket
onabrickwall,followtheprevious
instructions(Fig1)usingthewall
plugsandscrewsprovided.
Notethatthewallplugsrequire
6mmholes.Mountthewall
followingtheprocedureinFig3.
control
1.Pullthewallcontrolcablethrough
thelargerholeandplugitintothe
wallcontrol.
2.Feedtheexcesscablebackinto
theholeandseal.Slidethewall
controlovertheprotrudingbracket
tabs.
3.Pullthewallcontroldownsothe
brackettabsengageandlocate
withthekeywayslotsontherear.
Fittingthewallcontroltothe
mountingbracket
1
2
3
Running the wall control cable to the wall control
!
Using the loop on the end, draw the cable through the wall cavity to the hole made at the wall bracket. Carefully remove the
tape from the cable loops and check that the plug has not been damaged. Connect the cable to the wall control and mount the
wall control onto its bracket.
Important Take care not to damage the cable or plug during this process. Always seal the cable entry hole.
17
SeeleyInternationalPtyLtd
859736-A AU1007