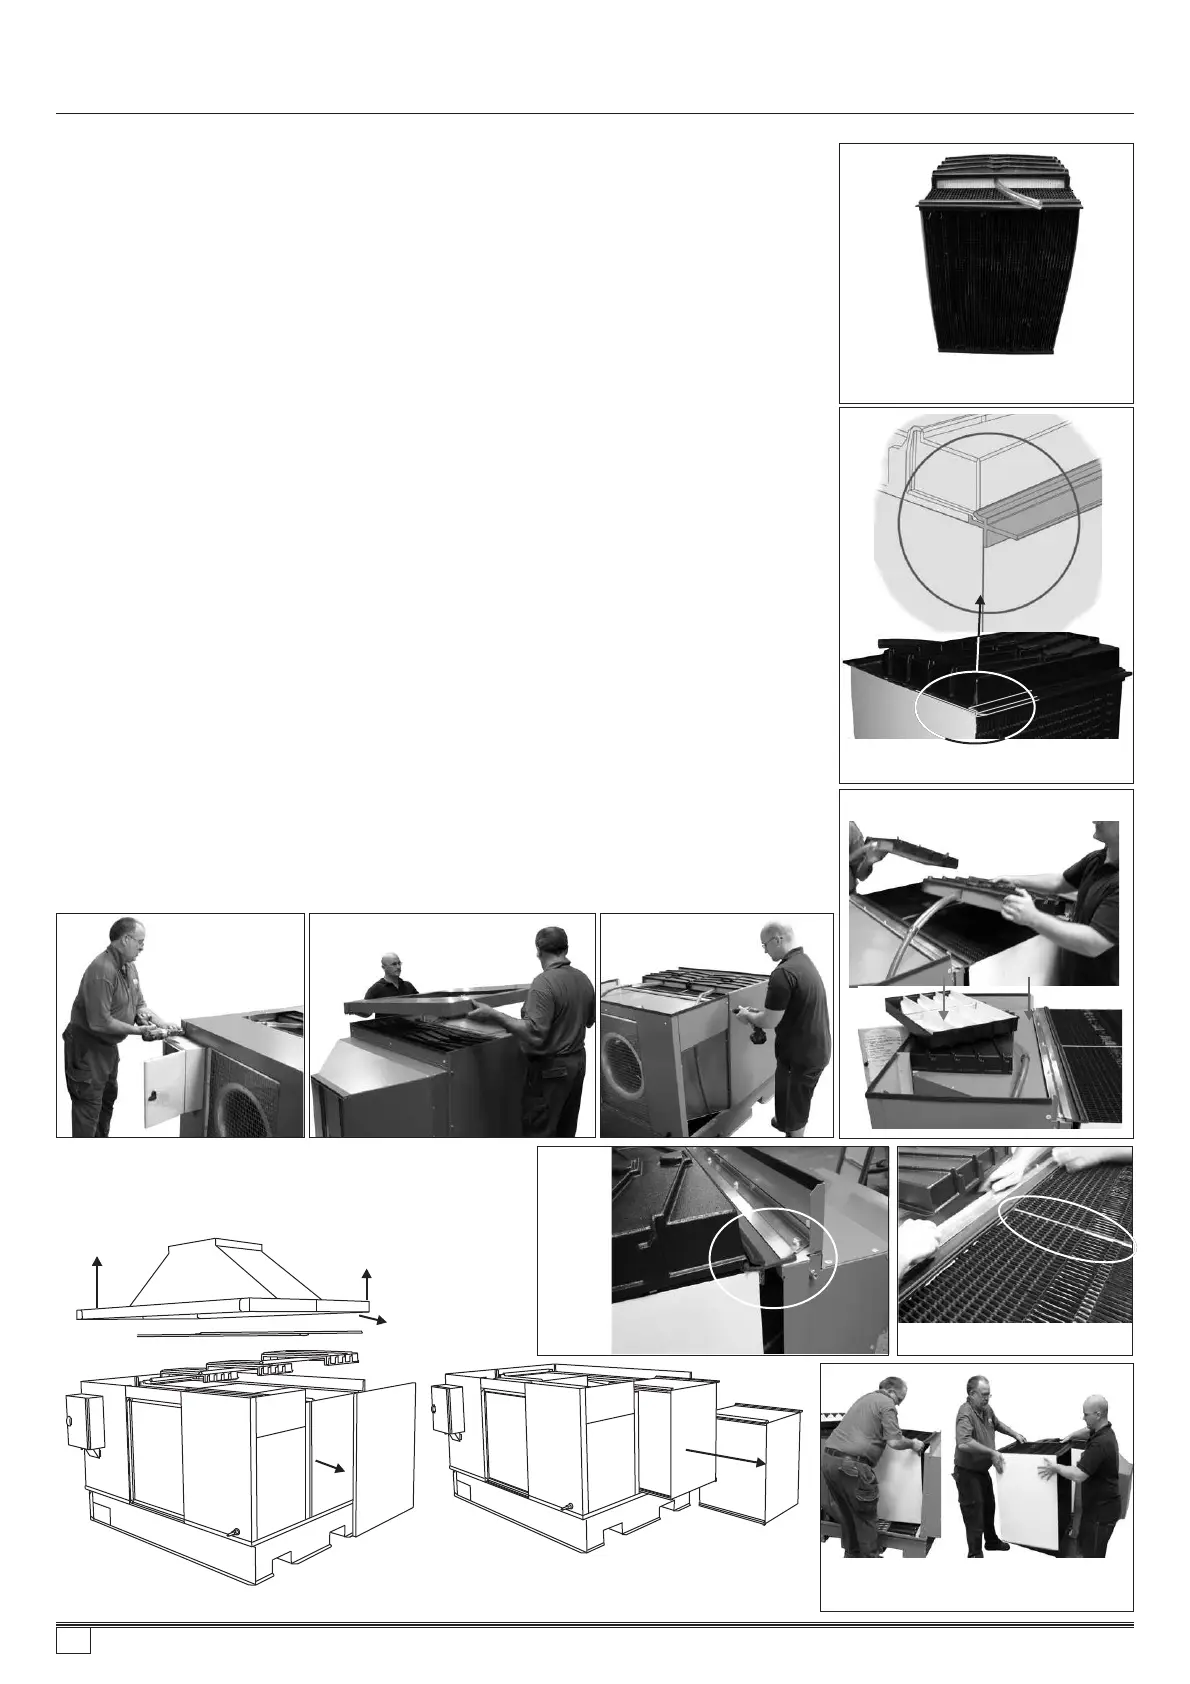
MAINTENANCE
27
SeeleyInternationalPtyLtd
Core&WaterSpreader
Assembly
(RearView)
Removeaccesspanels
(bothsides)
Interchangecoresthroughthe
accesspanelopening.
(bothsides)
Laythewaterspreadertrays(temporarily)fromthe
topsofthecoresbackabovethefanhousing.
RemoveLid/ExhaustTransitionassembly
Releasethecoreclamps
securingthecores
Locatetheflangeofthespreaderhousing
intotherecessoftheextrusionattherearof
thecore.
Removingscrewssecuring
thecoolerlid
Removingthelid Removingthecore
accesspanels
Graspthecoresaroundthetop
sectionwhilstmovingthem.
Coreclamp
stripbefore
removal.
Notethe
rubber
extrusionis
fullyinserted
underthe
clampstrip.
Inspectingandchangingcores
1. PowerOFF,waterOFF
2. Disconnectandremoveanyfixedductingfromtheexhaustoutletofthecooler(if
fitted).
3. Removetheexhausttransition/lidassemblyfromthecooler.
4. Openthecoreaccesspanelsoneithersideofthecooler.
5. Removethemetalcoreclampstrips
6. Disconnectthespreaderassemblyfromtherubbercoreextrusionsandremovethe
waterspreaderassemblies. Theycanbeplacedasideontothelidofthecooler
cabinetwhilststillremainingconnectedtotheplumbingsystem.
7. Thecorescannowbeslidoutfromeithersideofthecoolerthroughtheaccesspanel
openings.
8. Tore-assemble,positionthecoresintothecoolerstartingatthecentre.Forallcores
thefrontofthecoremustfacethecooledairoutletofthecooler(seeadjacentpic.&
Pg.25fororientationguide)
9. Locatethewaterspreaderassemblyfrontflangeintotheextrusionattopfrontof the
cores.
10.Checkthecoresfitsnuglyandsquarelyacrossthewidthofthecoreplatformandare
firmlybuttedtogether.Checkforauniformgapateithersideofthecoolerbetweenthe
sidewallsandthecore. Thecoreaccessdoorhasasealtotakeupanyresultant
gap.
11. Refitthecoreclampstripsclampingovertheextrusionlocatedatthetopofthecores.
12.Ensureagoodsealbetweenthecoresandtheaccessdoorwhenclosing.Whenre-
securingtheaccessdoors,startfromthebottomscrewsandworkup.
13.Refittheexhausttransition/lidassemblytothecooler.
14.Refitanyfixedductingtothe exhaustoutletofthecooler.
15.Turnwaterandpowerbackontothecooler.
Takecaretoensurethecoresarenotdamagedduringremoval.Theycanbe
heavyandfragilewhenwet.(Ifwet,runthecooleronventforaperiodoftime
beforeremoving.)Graspthecoresaroundthetopsectiontoensureno
delaminationofthecoreoccurswhilstmovingthem.
Checkthecoresarebuttedtogetherwithno
gapsbetweenthem.
859736-A AU1007