OPERATING MANUAL
800.749.2761 www.coachcomm.com
47
2. Open X-Ware Advanced Settings window by tapping on the Gears icon.
3. Save a backup copy of the current conguration le by selecting
Save File As...
from the File menu. A Windows
directory will display where you can choose a le location and name for the saved backup le.
Important: Saving a backup copy of the current conguration le is helpful in case you need to revert
back to it for any reason.
4. Select
Upload File...
from the File menu.
5. Follow the X-Ware prompts to complete the upload. While uploading, X-Ware will notify you of any conguration
exceptions (for example, any RPs needing to be repaired).
6. During the upload, X-Ware will disconnect.
7. Acknowledge all X-Ware prompts, then reboot your X-System CUs when prompted by the CU LCD. Once rebooted,
X-Ware will reconnect.
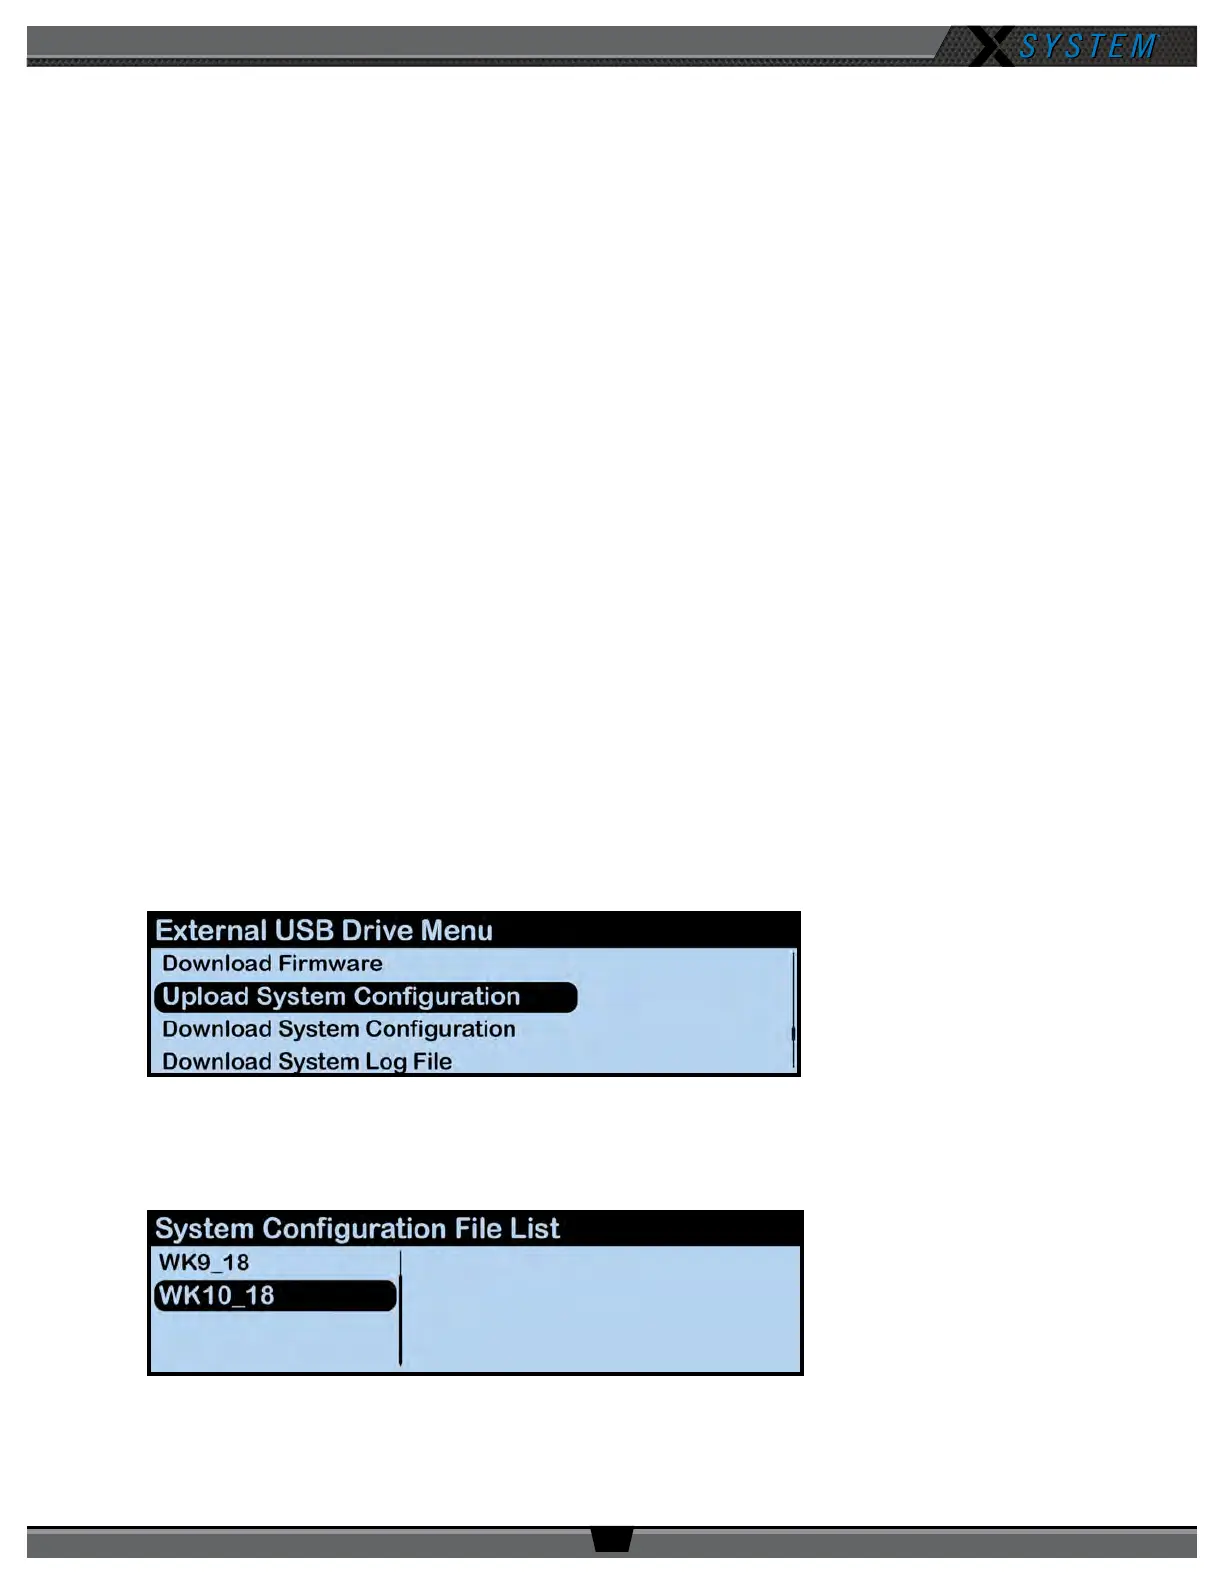
Loading a System Conguration File via USB Drive
Follow these procedures when uploading a previously saved conguration le to your system via USB Drive. See “Opening a
System Conguration File Ofine” on page 56 for instructions on how to work with a saved conguration le.
Important! Be sure you have saved a backup copy of your current conguration le prior loading a new
one, in case you need to revert back to it for any reason.
1. Make sure each Control Unit (CU) is powered on and has completed loading the current conguration le, then
plug the USB drive into the front of the top (master) CU. An External USB Drive menu screen will display on the CU
LCD.
2. Use the CU’s navigation buttons to scroll through the list of menu options on the top CU’s LCD until
Upload
System Conguration
is highlighted
.
Important! Only load your CoachComm conguration le to the top CU. Loading the le to the bottom
(secondary) CU may cause system malfunction.
3. Press the top CU’s enter button and scroll until you nd the conguration le you wish to use, then press enter to
select it.
Figure 57: CU LCD Upload Conguration File Prompt
Figure 58: CU LCD List of Available Conguration Files