OPERATING MANUAL
800.749.2761 www.coachcomm.com
77
6. Connect a USB to Micro USB cable from the PC to the top (master) CU (micro end goes into X-Device).
NOTE: CoachComm recommends updating CUs and RTs one device at a time; however, a powered USB hub
may be utilized to connect multiple RPs to your PC to update several at a time. If you are doing this,
be sure all RPs are connected prior to Step 7.
7. Click the
Scan For Devices
button at bottom of the tab. If you are updating a Control Unit, proceed to step 7.A
below. If you are updating an RT or RP, each connected device will display on the tab along with their current
rmware version; skip to Step 8 on page 78.
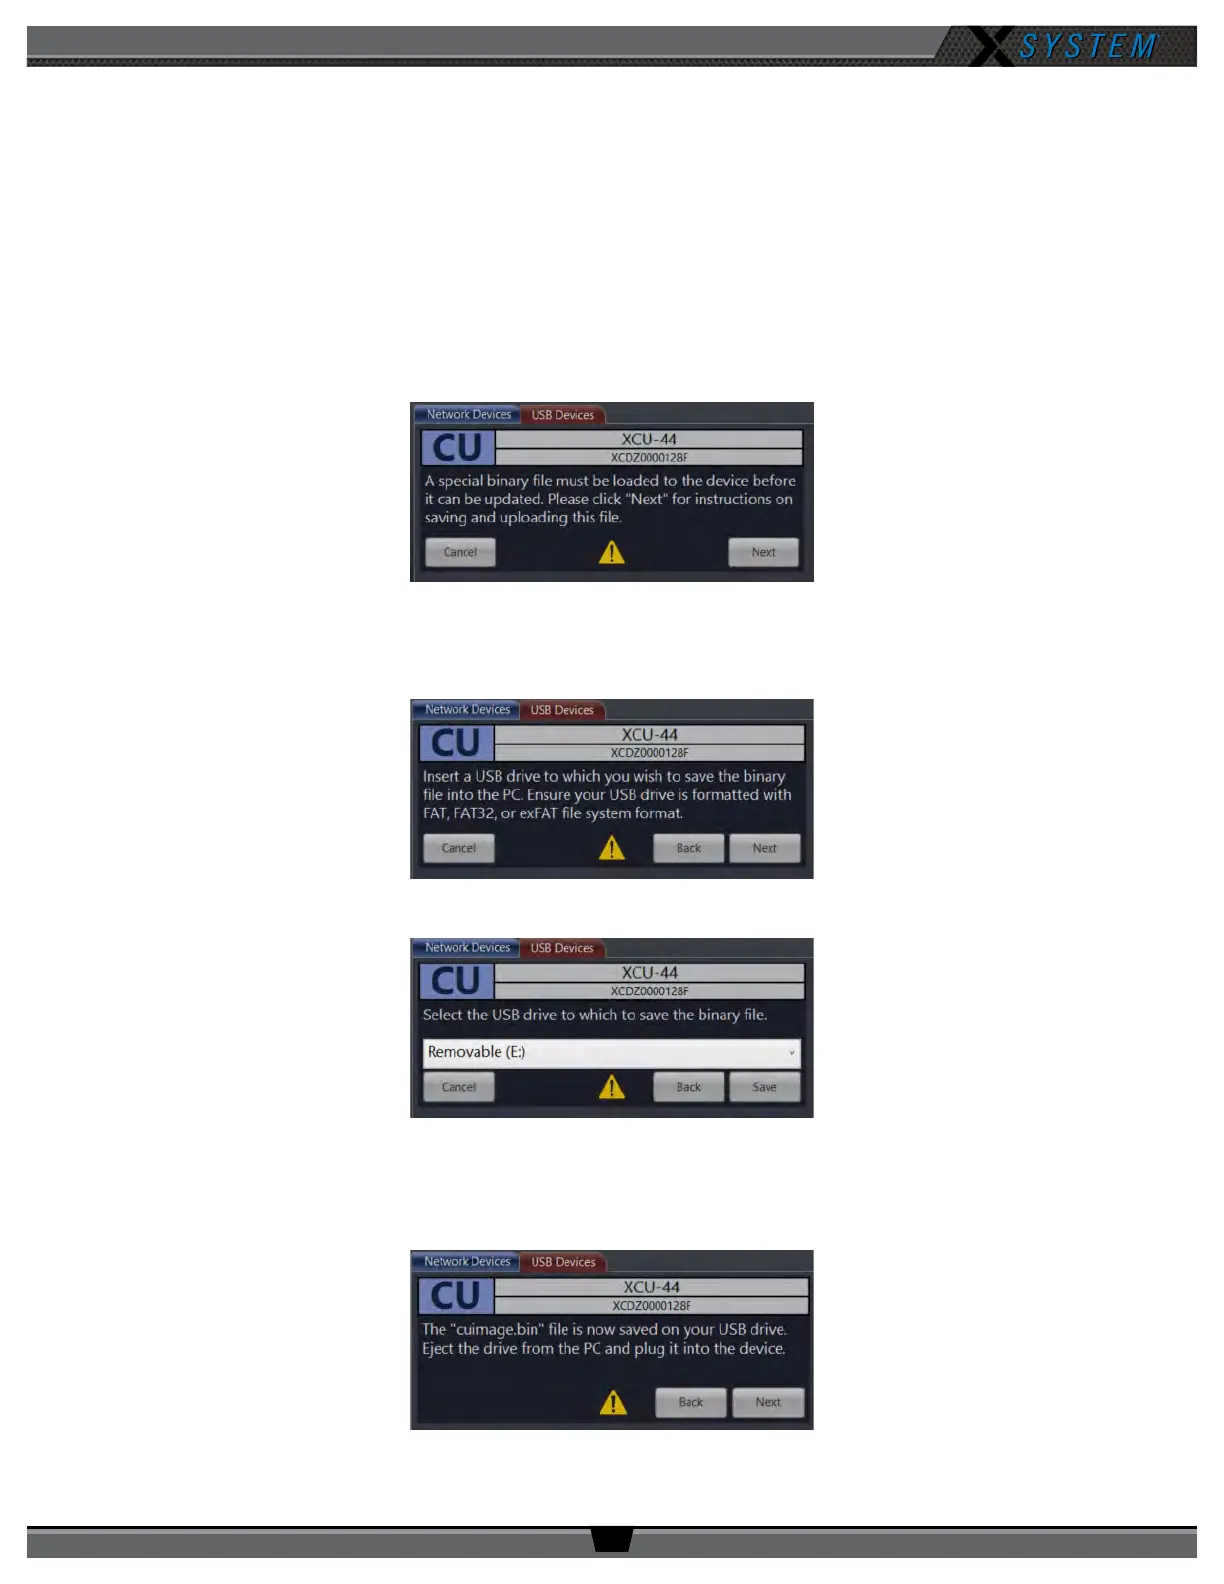
A. In version 1.9, the connected CU will display on the tab with an alert message about the front-panel USB le
update procedure. Click
Next
B. Connect a USB drive to your PC. (USB drive should be formatted with FAT, FAT32, or exFAT format). Click
Next
.
C. Select the USB drive from the drop down box, then click
Save
.
D. When the le is saved to the USB drive, eject the drive from your PC and plug it into the front panel of the CU.
(You may click
Next
in X-Ware to view instructions for the next steps in this procedure in addition to reading
them below.)
Figure 106: CU Front-Panel File Update Prompt
Figure 107: Select USB Drive Prompt
Figure 108: Select USB Drive Prompt