HGA-7001
Installation Manual
Document: 862-A0089_IM issue 1.6
COMPANY CONFIDENTIAL
Page 33 of 45
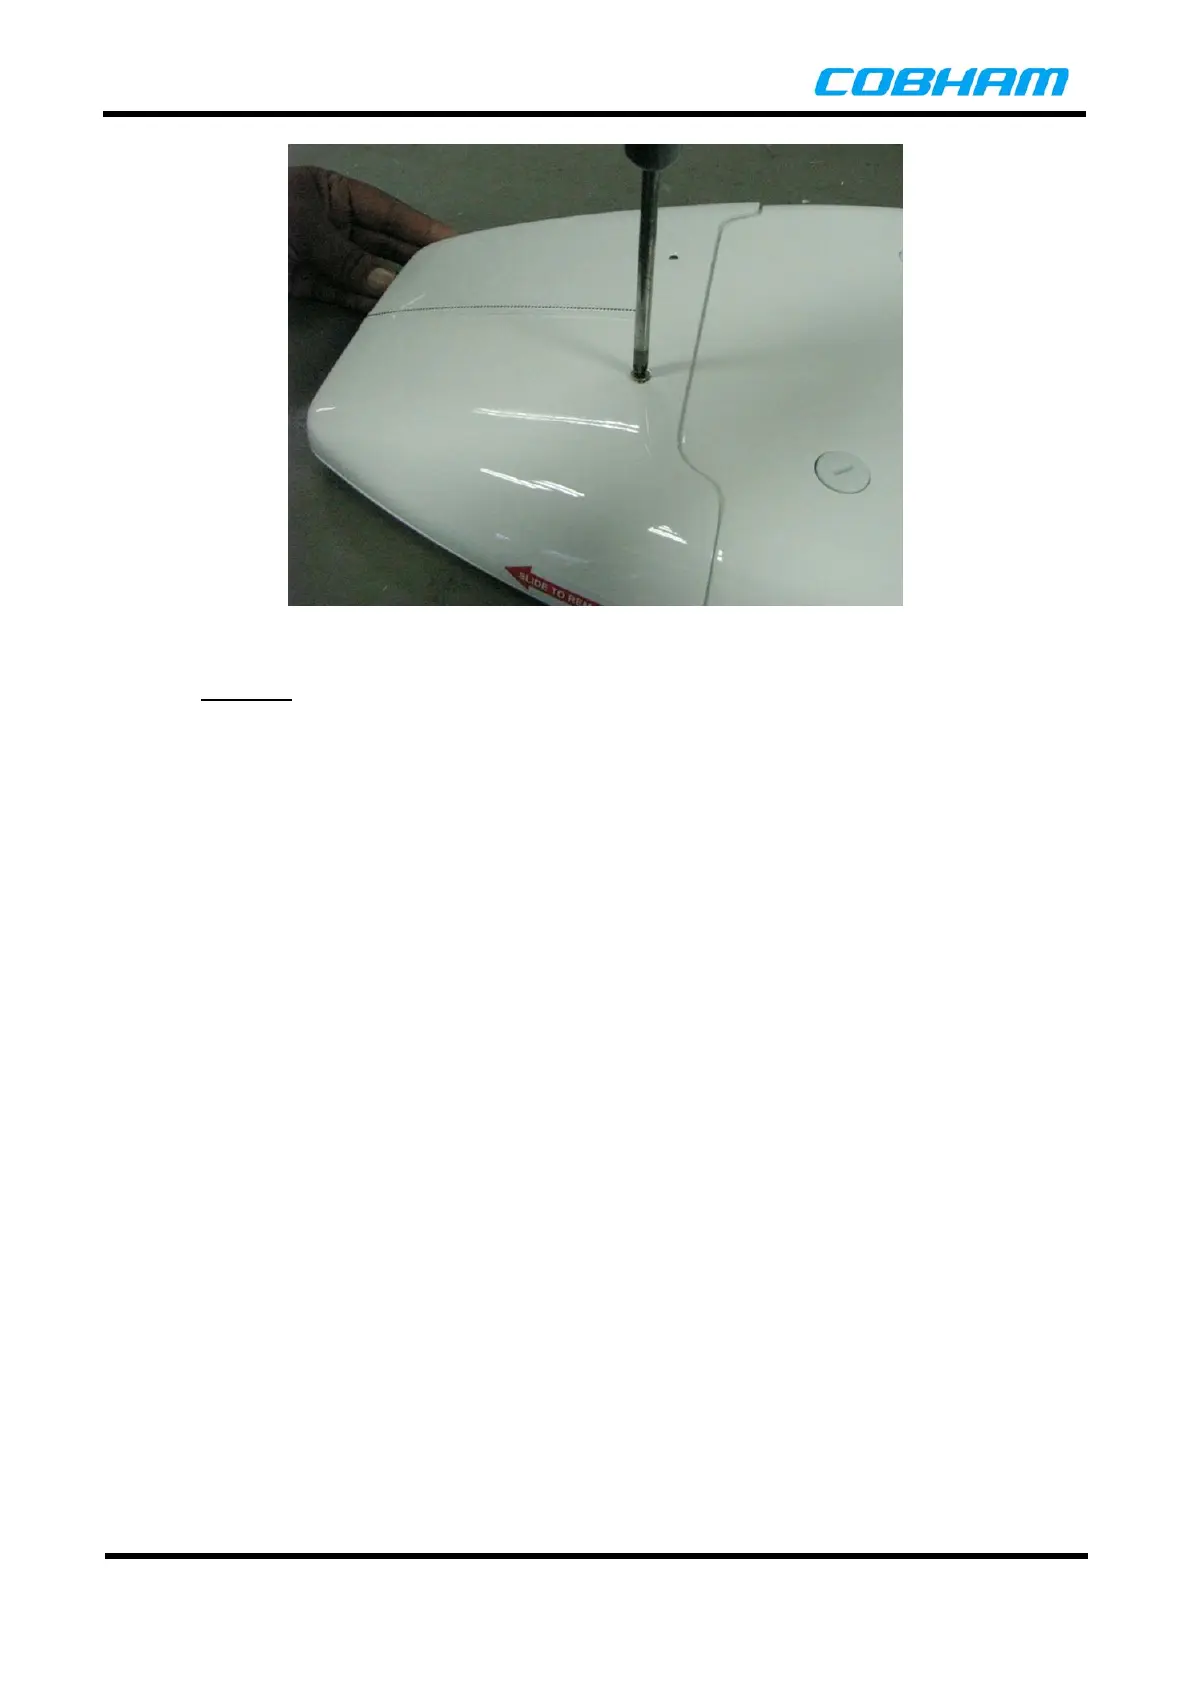
Figure 15: Fitting of Tail Cap Screws
CAUTION: THE JOINT SEALING DESCRIBED BELOW FORMS AN INTEGRAL PART OF THE
LIGHTNING PROTECTION OF THE ANTENNA AND SHOULD THEREFORE NOT BE
OMITTED.
(14) Use a syringe to apply a bead of a quick cure, non-acidic RTV silicone sealant to the gap
between the antenna and the Tail Cap (Alternatively, a non-curing Mastic-type sealant may be
used). Smoothing down the sealant bead will contaminate the surrounding painted surfaces
which may be cosmetically unpleasing. This can be overcome by masking both surfaces prior
to sealant application.
(15) Allow the sealant to cure as per manufacturer’s instructions.
(16) Refer to Figure 16:
(a) Inspect the caps, plugs and O-rings [IPL 20-5/10/15] for damage. Replace if necessary.
Remove any traces of sealant before refitting.
(b) Check that the O-ring [IPL 20-15] is in place on the sealing cap.
(c) Insert the foam plugs [IPL 20-10] into the cap and apply a quick cure, non-acidic RTV
Silicone around the edge of the sealing cap as shown in Figure 16 (Alternatively, a non-
curing Mastic-type sealant may be used).
(17) Use an 8 mm flat bladed screw driver and a torque wrench to tighten the caps [IPL 20-5] to 1
Nm (0.7 ft-lb).
 Loading...