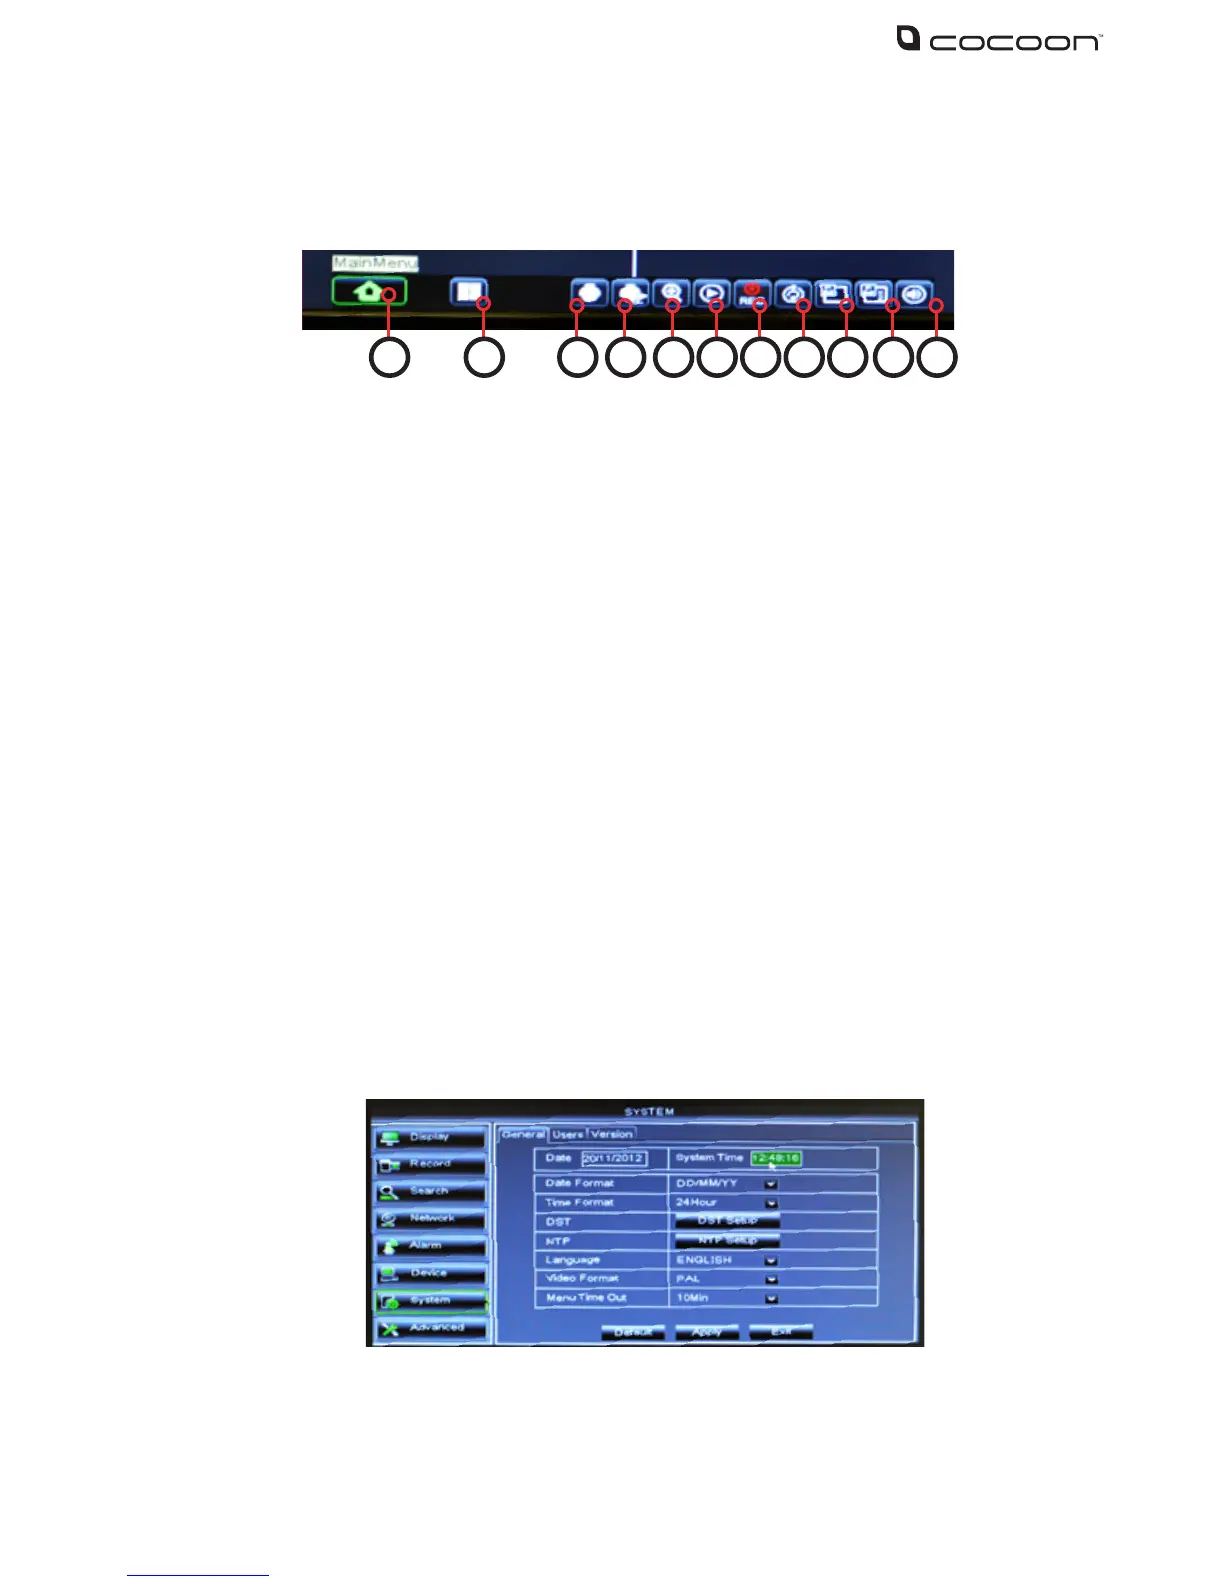
3.6 Quick Popup Menu
Hovering the mouse near the bottom of the screen will show the popup menu for quick access to
basic functions. For advanced functions see section 4 - DVR unit Menu
1. Main Menu – Access to system main menu
2. View 4 – Switch between single viewing mode to split screen. Alternatively, use the
mouse and double click on the image to switch between the two modes
3. PTZ control - access PTZ (Pant Tilt Zoom) controls via shortcut. Must have PTZ camera
installed and connected
4. Cruise Start / Stop – Toggle PTZ camera cruise mode on or o. Must have PTZ camera
installed and connected
5. Zoom – While in single camera view, click and drag a box to zoom in on the selection.
Double click to return to full screen mode
6. Record Search – Access record search menu
7. Start / Stop Record – Start and Stop recording all channels (default settings)
8. Start / Stop SEQ – When enabled this function will sequentially change channels in
full screen
9. PIP (Picture-in-Picture) 1 X 1 – PIP mode shows one full screen camera with a smaller
secondary camera. Click the displayed channel to change views between cameras. Click
and drag the small image to move it to another area of the display
10. PIP 1 X 2 - Switch on PIP mode with two secondary channels. See PIP explanation in 9 for
additional options
11. Volume – Adjust volume levels
3.7 Setting the Date and Time
Ensure your recordings are capturing the correct date and time. Access the menu and make
changes as necessary
a. Click - Main Menu > System > General
i. Change the current date and time by clicking on the date and time boxes and following
the on screen prompts
IMPORTANT NOTE: Always click “Apply” after making any changes in the menu. If you do not click
Apply your changes will not be saved
6
1 2 3 4 5 6 7 8 9
10
11