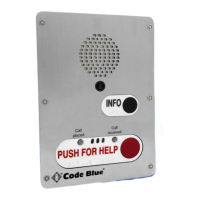
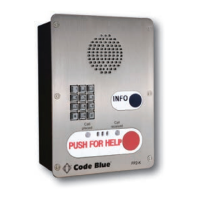
LS1000 VoIP Speakerphone
Administrator Guide
page 12 of 54 GU-164-B
Code Blue
• 259 Hedcor Street • Holland, MI 49423 USA • 800.205.7186 • www.codeblue.com
6 Installation Instructions
1. Drill and screws to mount unit to wall.
2. Code Blue Security bit and any 1/4” bit drive handle.
LS1000 faceplate tools needed for installation:
Tools Needed
Remove six security screws with Code Blue security bit and any 1/4” bit driver
tool.
Separate LS1000 from enclosure and set aside carefully. The flush mount
enclosure will come with no mounting holes. It can be mounted from the sides,
top or bottom. Once your mounting needs have been determined, drill the holes
needed for your specific installation requirements into the flush mount back box.
Mark the mounting holes onto the mounting surface. In order to comply with the
Americans with Disabilities Act (ADA) of 1990, the speakerphone button(s)
should be positioned between 34 and 48 inches from grade level. (Consult an
ADA specialist in your area to verify local and federal guidelines.)
Connect earth ground to the provided copper grounding lug using a minimum
14-gauge conductor.
Connect electrical and communications wiring using the wiring diagram below.
Follow all federal and local codes that apply.
Attach faceplate to enclosure using six security screws.
Basic Flush Mount Installation Instructions for use by Installers:
1.
2.
3.
4.
5.
6.
7.
Basic Surface Mount Installation Instructions for user by Installers:
1. Remove six security screws with Code Blue security bit and any 1/4” bit driver tool.
2. Separate LS1000 from enclosure and set aside carefully.
3. Mark the mounting holes onto the mounting surface. In order to comply with the
Americans with Disabilities Act (ADA) of 1990, the speakerphone button(s) should
be positioned between 34 and 48 inches from grade level. (Consult an ADA
specialist in your area to verify local and federal guidelines.)
4. Drill all marked holes.
5. Secure the housing to the wall – If you are securing to drywall, utilize drywall
screws and anchors. If you are securing to metal, utilize sheet metal screws. If you
are securing to brick, use Tapcon screws. Fasten all screws securely.
IMPORTANT: Ensure that conduit is aligned with wiring.
6. Connect earth ground to the provided copper grounding lug using a minimum 14-
gauge conductor.
7. Connect electrical and communications wiring using the wiring diagram below.
8. Follow all federal and local codes that apply.
9. Attach faceplate to enclosure using six security screws.