How to move the robot when the control unit is damaged
42
HS-RC-C5E-MAN_08.fm
00/0511
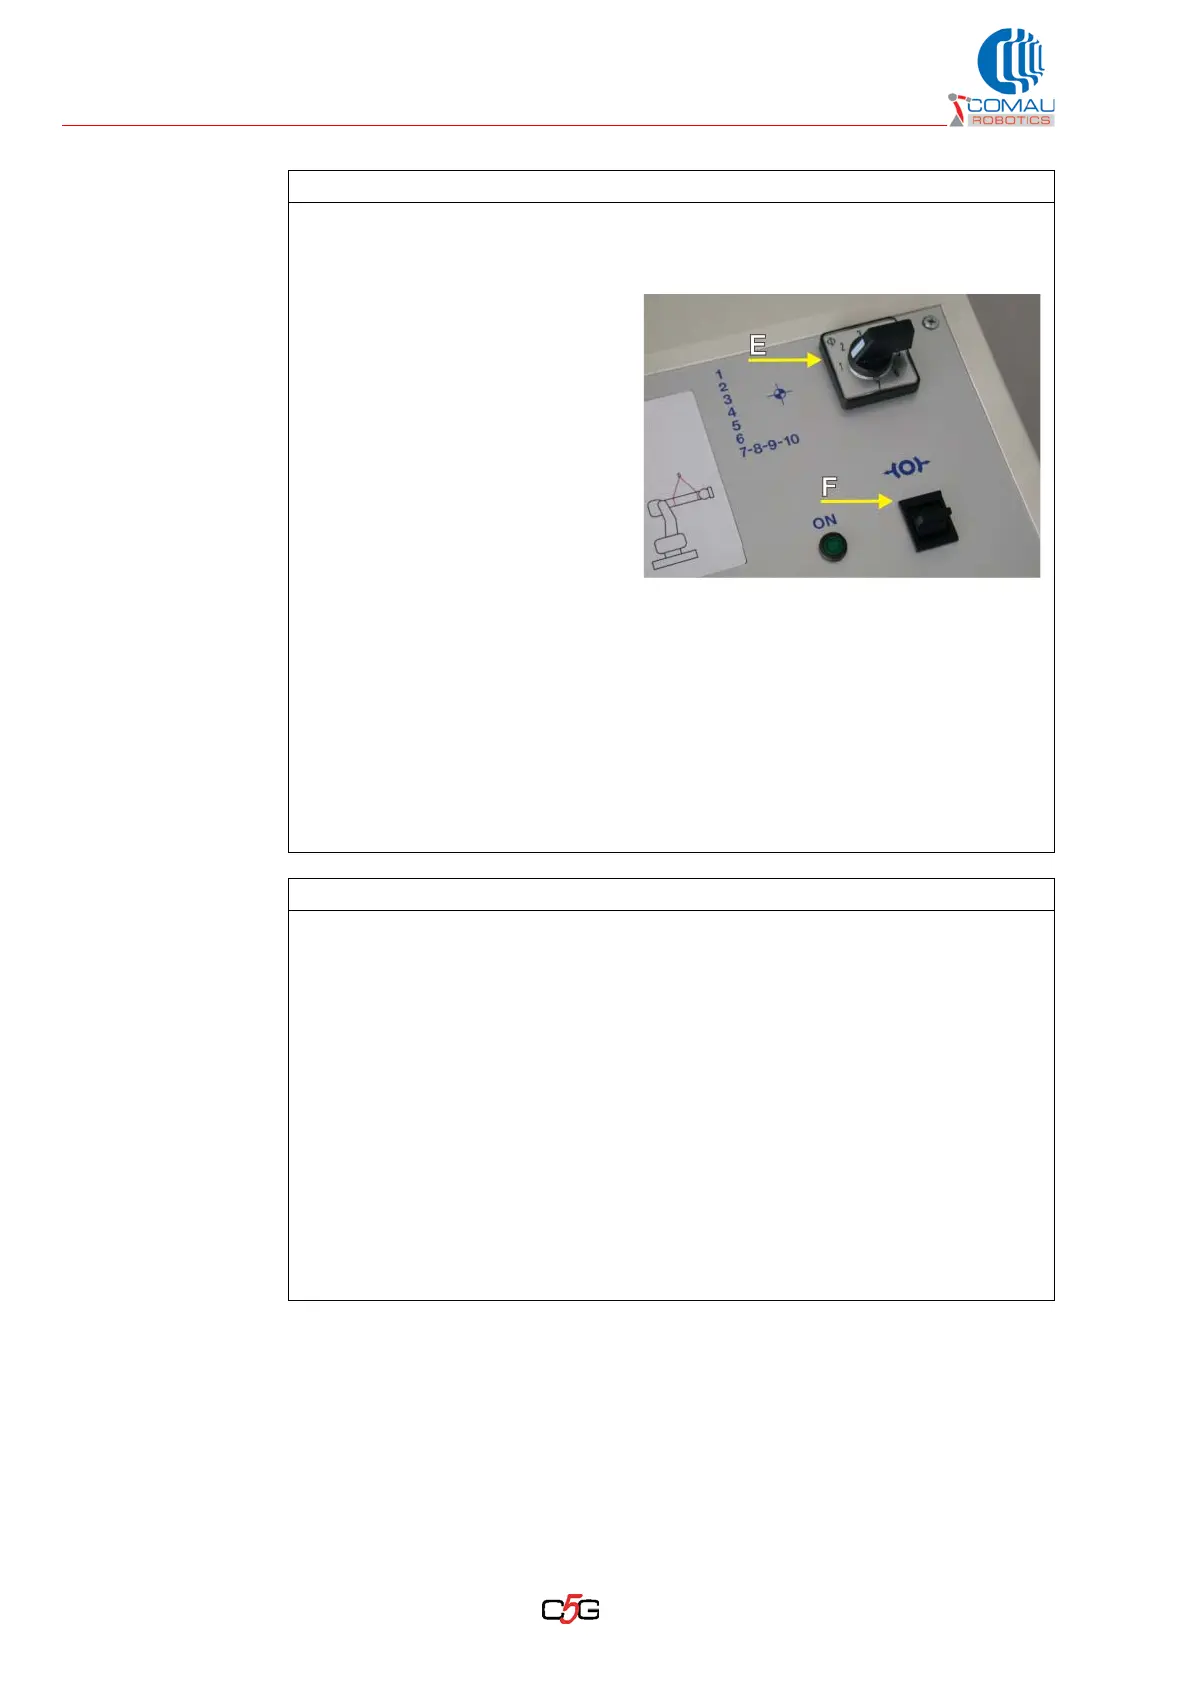
f. Select the axis to be released on the selector switch (E).
g. Keep tight the ropes that are used the support the axes subject to gravity.
h. To release Robot axes 1 to 6:
• Axes from 1 to 6 can be
selected singularly
together with the related
position.
i. To release axes from 7 to 10:
• Axes from 7 to 10 are
connected through a
dedicated connector, that
can be connected to one
axis at a time and
activated only with
selector switch in position
“7-8-9-10”.
j. Use the lever push button (F) to release the involved axis. Operate the push
button by pressing shortly and check the movement produced by the released
axis. At the same time, release gradually the rope used to support the axes
subject to gravity.
k. The motion stops when the push button is released, as the brake is applied
(control enabled by the user action).
Follow-up procedure
– Restore the power connector connections on the Robot and /or involved axes.
Restoring the Robot functionality after using the releasing device
If after using the releasing device the robot is still operating, the automatic cycle shall
not to be restarted, as the path recovery typical functionality may create
unpredictable paths.
To prevent possible impacts due to the path recovery performing at the interrupted
move point, act as follows:
a. disable the programmes and/or outstanding move instructions
b. have the robot moving to home (or out-of-range) position, acting on the
programming terminal
c. restart the programme and carry out some cycles at reduced speed to check the
robot behaviour.
Operating procedure (Continued)