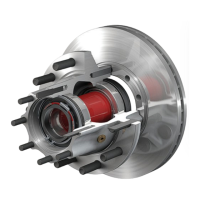
PreSet Plus Wheel Hubs – Recommended Service
30 ConMet
6. PreSet Plus Wheel Hubs – Recommended Service
7. Place a container under the
hubcap, or drive axle shaft
for a drive hub, to receive the
draining oil, then remove the
hubcap or drive axle shaft.
Do not reuse the oil. Correctly
dispose of the lubricant.
8. Remove the red locking ring.
Use caution not to damage the
locking ring. Do not remove the
spiral snap ring that holds the
spindle nut in the hub.
Do not loosen the axle spindle nuts by either
striking them directly with a hammer, or striking
a drift or chisel placed against them. Damage to
the parts will occur causing possible loss of axle
wheel-end components and serious personal
injury.
WARNING
!
9. Use a breaker bar to loosen the
spindle nut. PreSet Plus spindle
nut installation torque is 300 ft-
lbs for steer hubs and 500 ft-lbs
for drive and trailer hubs.
Use only 6-point forged sockets for installation
and removal of PreSet Plus spindle nuts.
NOTE
Socket Sizes for PreSet Plus
Spindle Nuts
Spindle Nut Socket Size (6 Point)
FF Flat 2"
FF Keyway 2"
FL 2.75"
R 3.75"
TN 3.125"
TP 4"
10. After the spindle nut is initially
loosened with a breaker
bar, loosen the spindle nut
to remove the hub from the
spindle. The internal snap ring
will act as a hub puller and will
aid in removal of the hub from
the spindle. Do not exceed 50
ft-lbs of torque when removing
the hub from the spindle. If the
hub will not come off of the
spindle without exceeding this
torque value, remove the spiral
snap ring (see gure 65) and
the spindle nut assembly and
use a conventional hub puller
to remove the hub from the
spindle.
106871b
Spiral Snap Ring Removal
FIGURE 65
11. Slide the hub off the spindle.
Remove and save the outer
bearing cone. Be careful when
you remove the hub that you do
not damage the outer bearing
by dropping it on the oor.
- If the hub is difcult to remove
because the seal is stuck on
the spindle, use a mechanical
puller to remove the hub (see
gure 66).
- If part of the seal remains on
the spindle, carefully remove
the part of the seal that
remains on the spindle.
This can be done by striking the remaining portion
of the seal with the round end of a ball-peen
hammer. Use caution not to damage the seal
journal on the spindle.
NOTE
105740a
FIGURE 66
12. Place the hub on its outboard
end and remove the seal.
Retain the seal if it needs
to be returned for warranty
consideration.
13. Remove the inner bearing cone
and spacer (see gure 67).
106804c
INNER
BEARING
CONE
SPACER
Hub Disassembly
FIGURE 67