PreSet Plus Wheel Hubs – Recommended Service
32 ConMet
6. PreSet Plus Wheel Hubs – Recommended Service
1. After components have been
properly cleaned, visually
inspect the cups, cones and
spacer for any wear or damage.
Reference materials for proper
bearing inspection procedures
are available from the bearing
manufacturers.
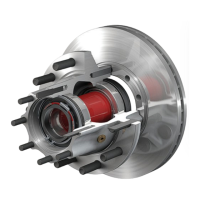
- Bearing spacers should be
visually inspected for signs
of wear or damage. Carefully
inspect the machined ends
of the bearing spacer. Wear
to the bearing spacer can
appear as a sharp ring of
standing metal at either edge
of the machined surfaces
(see gure 68). Replace the
spacer if it has visible wear
evidenced by a raised edge
on the machined end.
NEW WORN
SHARP
EDGE
Bearing Spacer Wear
FIGURE 68
2. If removal or replacement
is required, follow the steps
outlined below.
REMOVING CUPS IN
ALUMINUM HUBS
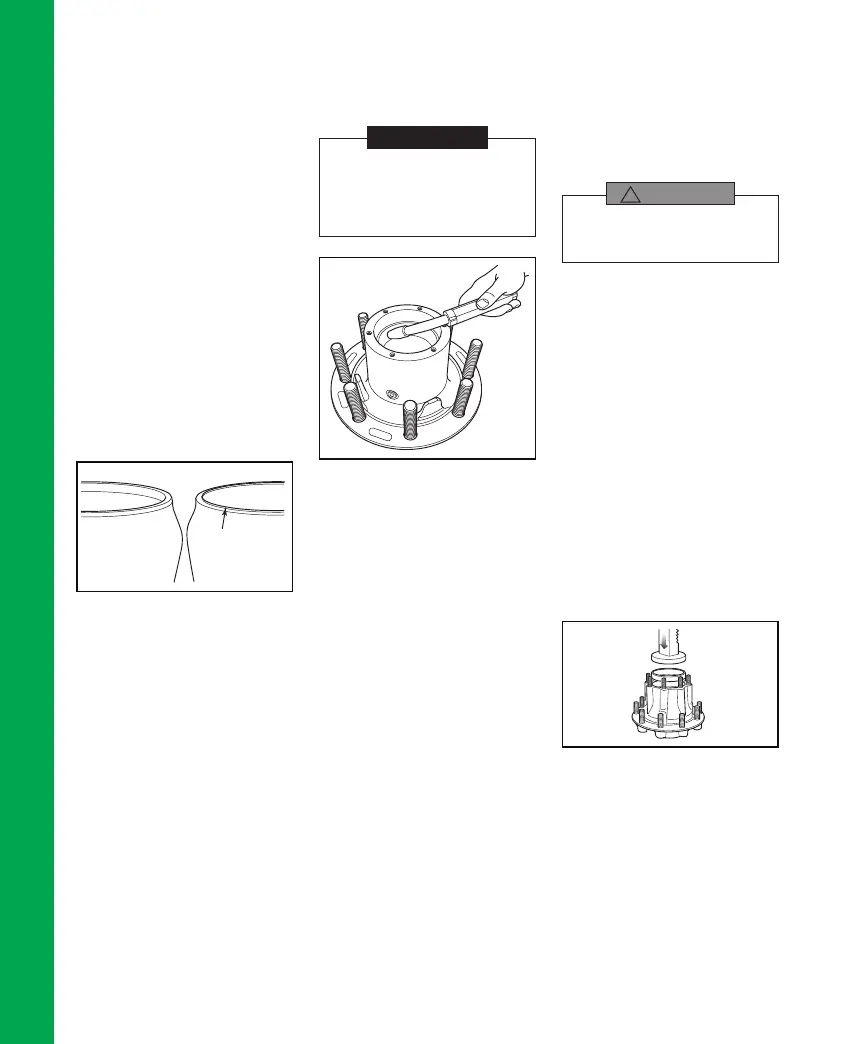
1. If the bearing cup must be
removed from an aluminum
hub, remove it by welding a
large bead around the bearing
surface of the steel cup,
letting the assembly cool, and
removing the bearing cup (see
gure 69).
If a welder is not available, heat the hub in an
oven to a temperature not to exceed 300°F and
pound out the bearing cups with a hammer
and mild steel bar, being careful not to damage
the hub.
NOTE
106856a
Welding Bead
FIGURE 69
2. Inspect the bearing cup bore
for evidence of cup rotation or
spun cups.
- If cup rotation exists, replace
the hub.
REMOVING CUPS IN
IRON HUBS
1. On an iron hub, remove the
bearing cup using a large
hammer and a mild steel bar
or a hydraulic press. Take
precaution to avoid damaging
the bearing cup bore and
shoulder.
2. Inspect the bearing cup bore
for evidence of cup rotation or
spun cups.
- If cup rotation exists, replace
the hub.
INSTALLING A NEW CUP
IN ALUMINUM HUBS
To install a new cup in an aluminum
hub, it is recommended that the hub
be heated in boiling water (212°F)
or in an oven at a temperature not to
exceed 300°F. Cooling the cup in a
freezer to 32°F or below will further
ease the installation.
Do not overheat the hub as it may degrade the
heat-treated strength of the hub. Do not heat the
hub with a torch or open ame.
WARNING
!
Remove the aluminum hub from the
oven or water and carefully drop in
the new bearing cup being certain
it is fully seated. If the cup is loose,
allow a few seconds for it to heat up
and secure itself before moving the
hub. Use a 0.001″ to 0.002″ feeler
gauge to ensure the cup is fully
seated against the shoulder of the
bearing bore.
INSTALLING A NEW CUP
IN IRON HUBS
Iron hubs do not need to be heated
for bearing cup installation. Press
the bearing cup into the hub, being
certain that it is fully seated (see
gure 70). Use a 0.001″ to 0.002″
feeler gauge to ensure the cup is
fully seated against the shoulder of
the bearing bore.
105742a
Bearing Cup Pressed into Hub
FIGURE 70
WHEEL STUDS
Replace all wheel studs that have
damaged or distorted threads,
are broken or bent, or are badly
corroded. Also, replace both
studs adjacent to the damaged
stud. If two or more studs have
damage, replace all the studs in
the hub. Broken studs are usually
an indication of excessive or
inadequate wheel nut torque.