PreSet Plus Wheel Hubs – Recommended Service
33ConMet
6. PreSet Plus Wheel Hubs – Recommended Service
STUD REMOVAL
Observe all warnings and cautions for press
operation provided by the press manufacturer
to avoid serious personal injury and damage to
components.
WARNING
!
1. Place the clean hub in a shop
press with the hub supported
evenly around and adjacent to
the stud being removed.
Failure to adequately support the hub can result in
physical injury and/or damage to the hub.
Some hubs are congured so it is impractical to
have supports to prevent the hub from tipping
when force is applied to the stud. In this case,
support the hub on wood blocks on the oor and
use a heavy hammer to drive the studs out with
several sharp blows. Be careful to avoid damaging
the hub and components, particularly the seal
bore and the ABS tone ring.
WARNING
!
2. Press the stud out of the hub.
STUD REPLACEMENT
On the ball seat wheel mounting system, always
use left-handed threaded studs, which are gold in
color and have an “L” stamped on the end, in the
hub on the driver’s side of the equipment, and use
right-handed threaded studs, which are silver in
color and have an “R” stamped on the end, in the
hub on the passenger’s side of the equipment.
The ConMet part number is located on the head
of the stud. The same part number must be used
for replacement unless changing the drum or
wheel type.
CAUTION
!
1. To install a new stud, support
the hub evenly around and
adjacent to the stud being
installed.
2. Press the new stud all the way
into the hub. Be sure the stud
is fully seated and that the stud
head is not embedded into the
hub.
Excessive force can cause the stud head to be
embedded into the hub, which can create a crack
in the hub, resulting in serious injury and property
damage. If a stud head is Embedded in a hub,
replace the hub.
WARNING
!
HUB, DRUM AND WHEEL
INSPECTION
1. Inspect the drum pilots, wheel
pilots, and mounting face on the
hub for damage. A damaged
drum pilot is usually caused
by improper drum mounting. A
damaged wheel pilot could be
the result of inadequate wheel
nut torque, allowing the wheels
to slip in service. Also, inspect
other surfaces of the hub for
signs of cracks or damage.
2. Inspect the wheels and brake
drum for damage.
Do not repair or recondition wheel-end
components. Replace damaged, worn or out-of-
specication components. Do not mill or machine
any components. Using repaired, reconditioned,
damaged or worn components can cause wheel
end failure, which can result in serious injury and
property damage.
WARNING
!
ABS TONE RING
INSPECTION (AS
APPLICABLE)
The Anti-Lock Braking System
(ABS) signals acts like any signal
generator where the magnet
passes a coil and generates a
current. On hubs, the toothed ring
passes a sensor and generates
a signal that is sent to the ABS
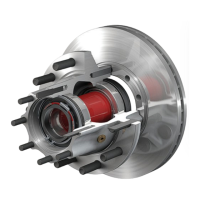
computer. There are three types of
ABS rings used on ConMet hubs —
machined, stamped steel and bolt
on (see gure 71).
106805b
MACHINED
ABS RING
STAMPED STEEL
ABS RING
BOLT ON
ABS RING
FIGURE 71
If the tone ring is damaged (for
example, if it is dropped, bent,
chipped or dinged), it must be
replaced. For a list of replacement
ABS rings, refer to the Service Parts
List in the back of this section.
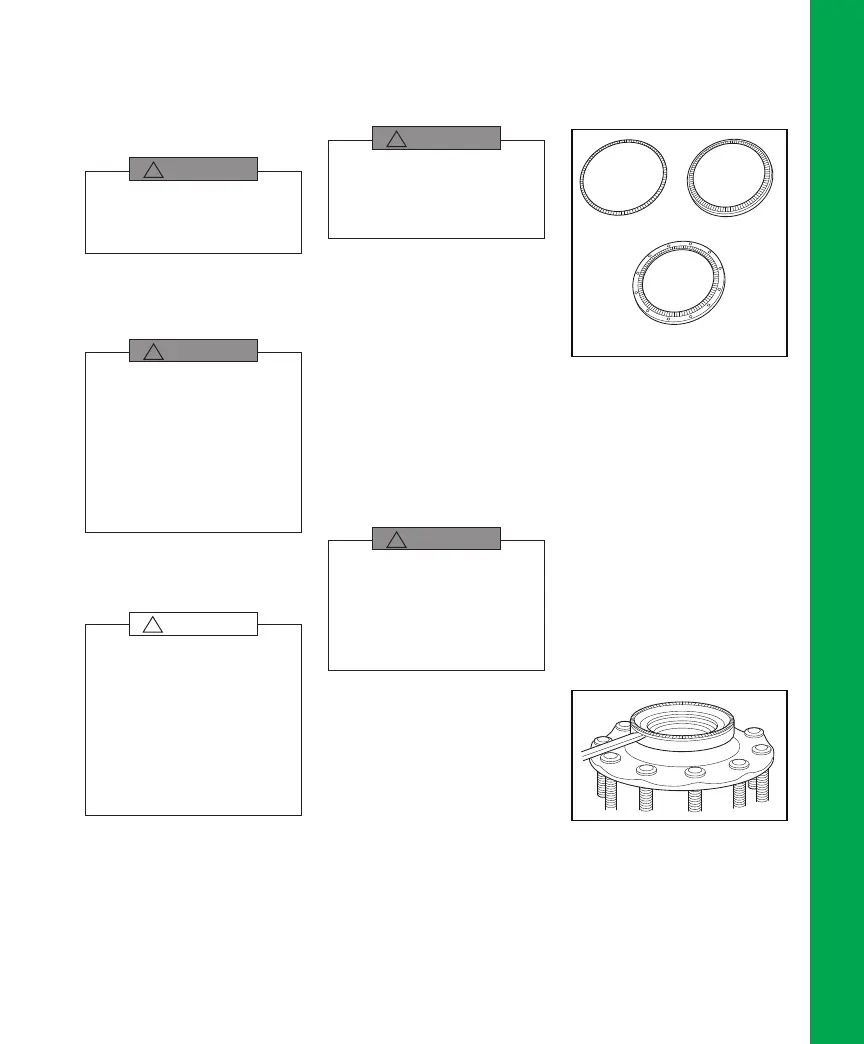
REMOVAL AND
INSTALLATION OF
MACHINED ABS TONE
RING
For a machined metal ring, remove
using a chisel, making sure not to
damage the hub (see gure 72).
Reinstall by heating the ring to
350°F in an oven and installing it on
the hub.
Machined ABS Ring
FIGURE 72