31
PUMP GROUP, MIXED DN 25 WITH WEATHER-COMPENSATED ACTUATOR
7.3 INSTALLATION
ON STAIR BOLTS
For the installation, we recommend the use of two stair bolts M8x160. The stair bolts
are not included in the scope of delivery.
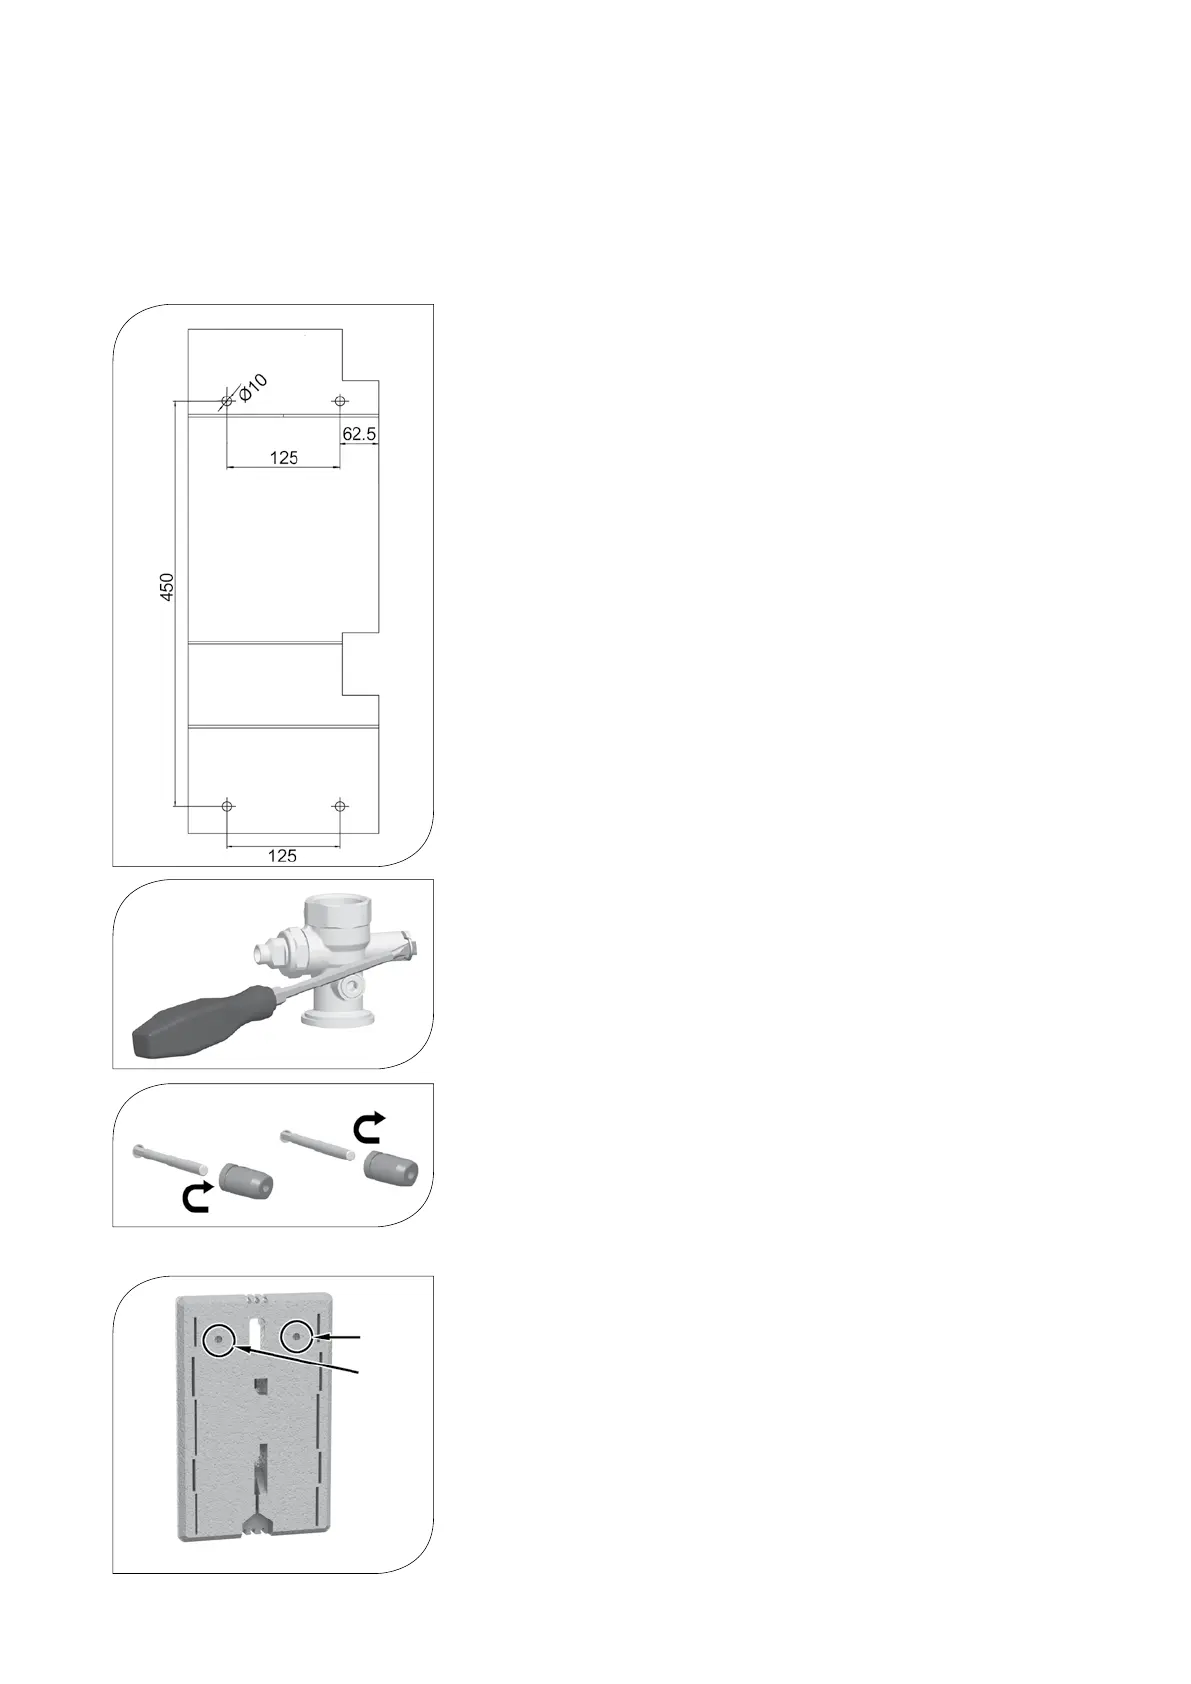
1. Determine the location of installation.
2. You will find a drilling template on the paper board next to the pump group
(see figure on the left).
3. Drill the holes and insert appropriate wall plugs.
4. Screw the stair bolts in such that exactly 9.6 cm of the bolts stick out of the wall.
5. Take the pump group out of the insulating back shell.
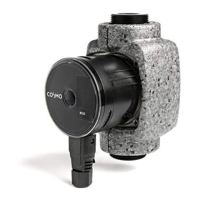
6. Pull out the clip springs laterally from the ball valves with a screwdriver.
7. Remove the acoustic decoupling elements from the ball valves.
8. Screw both acoustic decoupling elements on the stair bolts.
9. Push the clip springs laterally on the ball valves.
Rear view insulating back shell
10. Punch out the two pre-milled holes of the insulating back shell (see figure on the left).
11. Push the insulating back shell onto the wall bracket through the punched-out holes.
12. Mount the pump group on the stair bolts.
13. Put the pump group into operation as described in the chapter "8 Commissioning".
All dimensions in mm