2. Getting Started
Before using this gauge, it is recommended that the user read
this manual and understand the operation of the gauge.
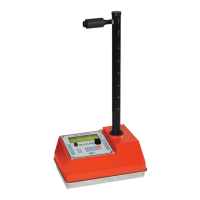
Operating your Model MC-3 Elite
This chapter covers the basic operation of your gauge from
powering on to taking a measurement. This manual should also
be used for Smart-MC electronic upgrade to older MC1 DRP
and MC3 gauges.
Important: In order to use this gauge, the operator is required to
meet and understand the provisions of the radioactive
materials license under which he/she is authorized to operate
this gauge.
Charging the Batteries
When the gauge is powered on, check for the low battery
warning (“N” or “NA” displayed). If the low battery warning
does not appear on the display, the gauge is ready for use and
does not require additional charge.
The MC-3 Elite contains 6 welded AA NiMH batteries. The
batteries are charged at the factory prior to calibration. Life of
rechargeable batteries depends on the number of
charge/discharge cycles. For best results, only charge your
batteries, when the battery low warning is displayed. The
gauge will display an “N” in the top right when the battery is
getting low. The gauge will display “NA” when the NiMH
batteries have been drained and the gauge has switched to
the alkaline backup.
The provided DC charger can be used for emergency charging
in the field. Plug this charger into your vehicle charger outlet
and charge the gauge for 30 minutes. This should provide
enough battery power to your gauge to complete your testing