Ripping
Ripping Set-up Procedure
Follow these stepsbefore ripping.
These steps must be repeated each time a
different thickness workpiece is ripped. A
kerf must be made for each different
width cut. Also see the special notes for
bevel set-up that follow this section.
1. Prepare table:
- insert solid (no kerfs) fence (Note:
Use auxiliary fence when blade is set
1/2 to 2"from fence (See Cutting
Aides)
- tighten table clamps.
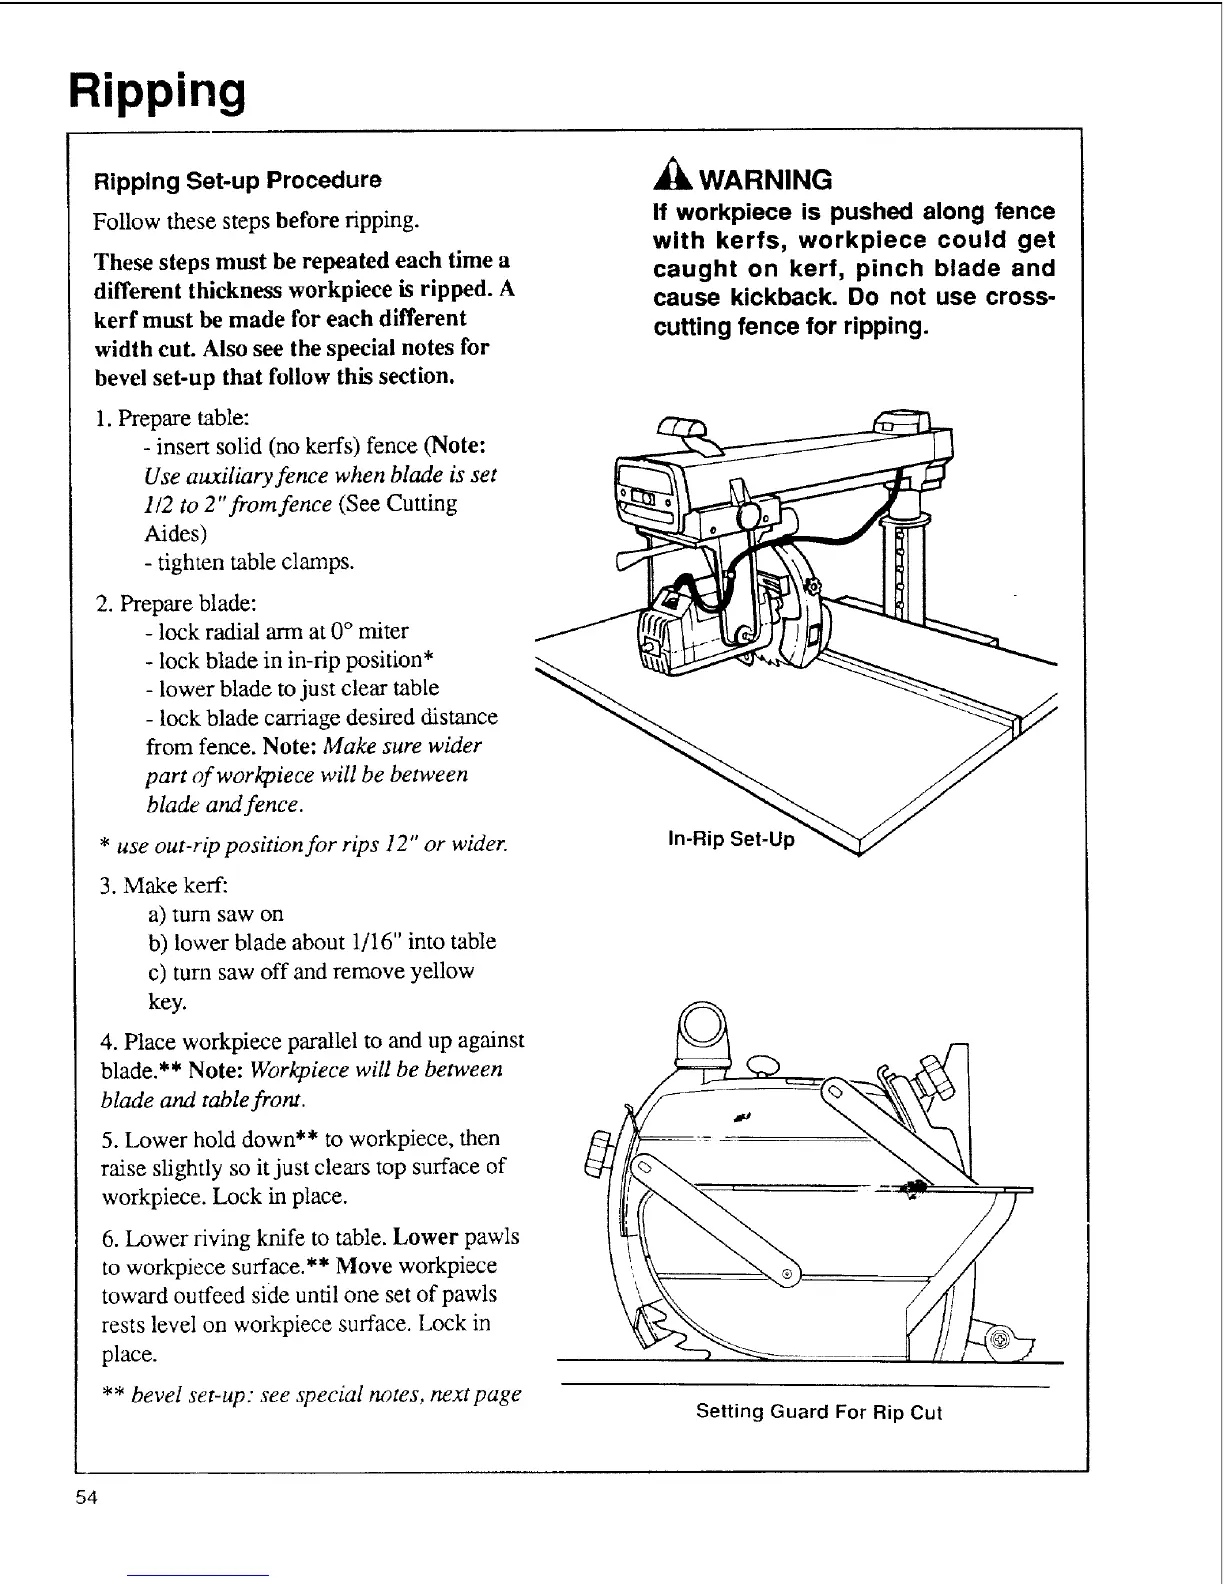
2. Prepare blade:
- lock radial arm at 0 ° miter
- lock blade in in-rip position*
- lower blade to just clear table
- lock blade carriage desired distance
from fence. Note: Make sure wider
part of worlqoiece will be between
blade and fence.
* use out-rip position for rips 12" or wider.
3. Make kerf:
a) turn saw on
b) lower blade about 1/16" into table
c) turn saw off and remove yellow
key.
4. Place workpiece parallel to and up against
blade.** Note: Workp&ce will be between
blade and table front.
5. Lower hold down** to workpiece, then
raise slightly so it just clears top surface of
workpiece. Lock in place.
6. Lower riving knife to table. Lower pawls
to workpiece surface.** Move workpiece
toward outfeed side until one set of pawls
rests level on workpiece surface. Lock in
place.
** bevel set-up: see special notes, next page
54
WARNING
If workpiece is pushed along fence
with kerfs, workpiece could get
caught on kerf, pinch blade and
cause kickback. Do not use cross-
cutting fence for ripping.
In-Rip Set-Up
Setting Guard For Rip Cut