assembly
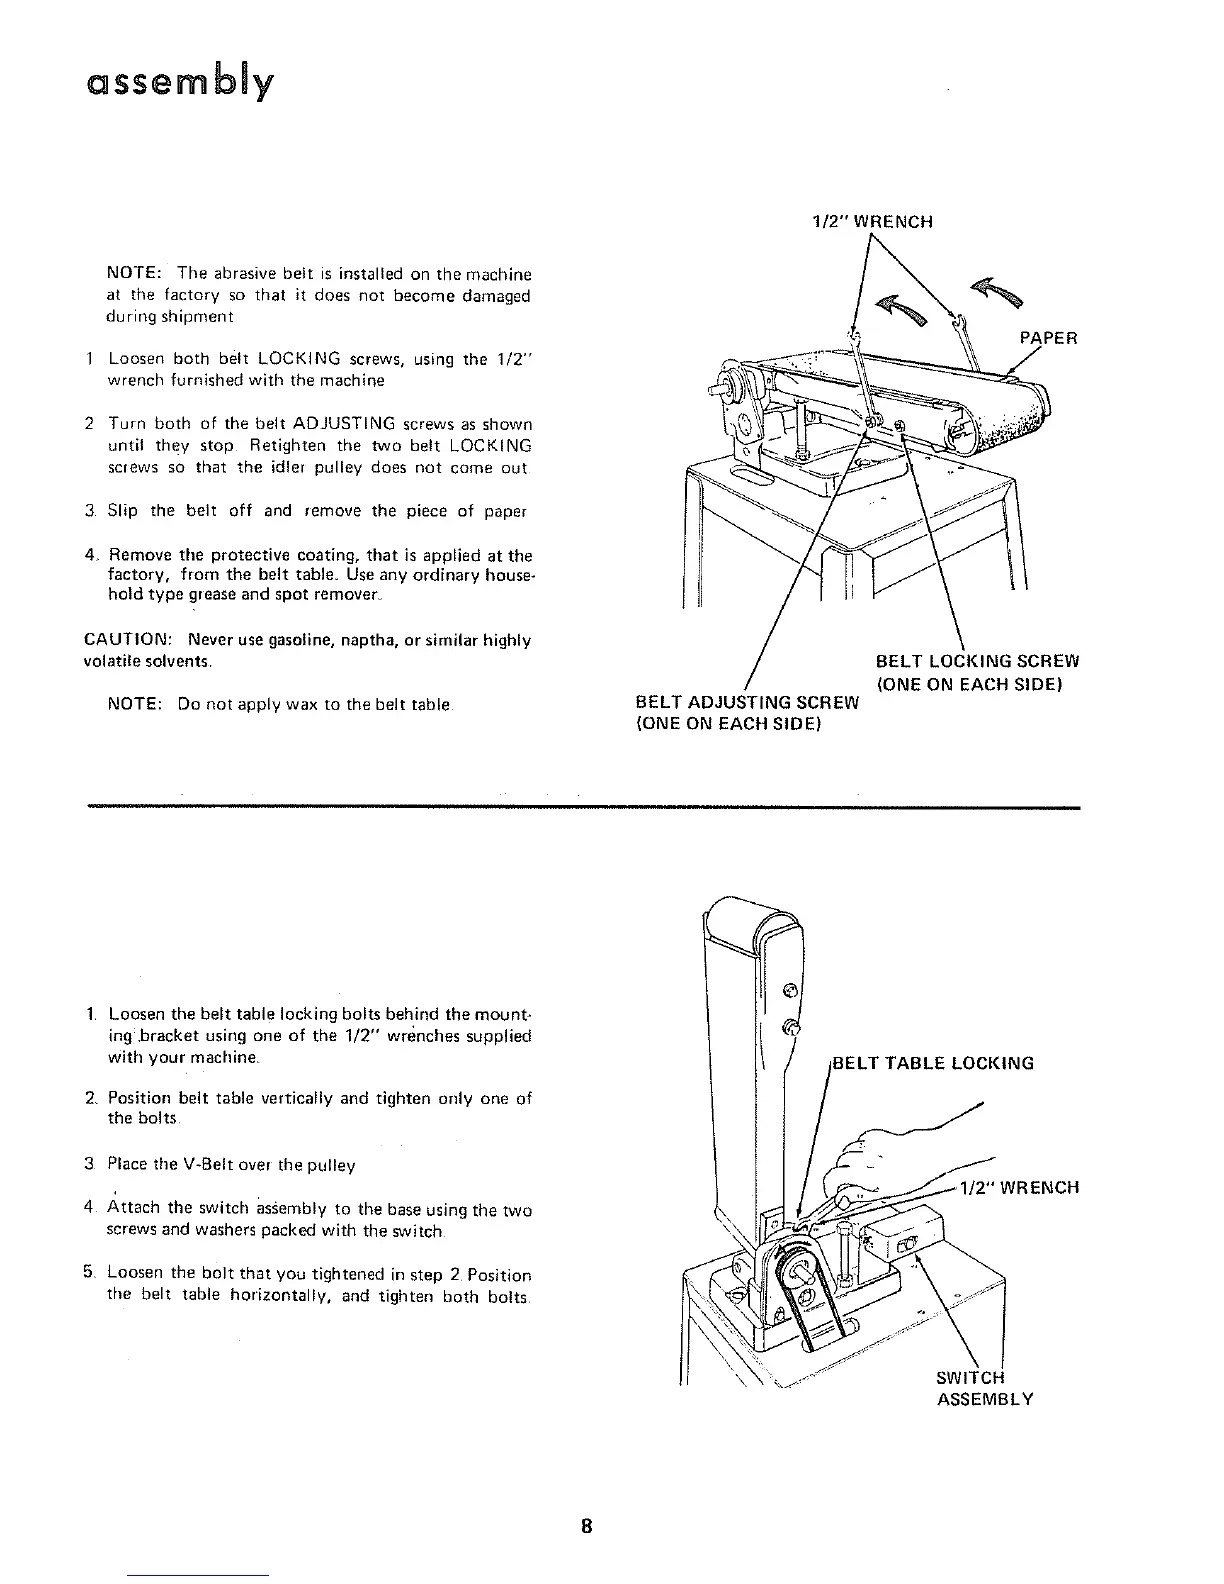
1/2" WRENCH
NOTE: The abrasive belt is installed on the machine
at the factory so that it does not become damaged
during shipment
Loosen both belt LOCKING screws, using the 1/2"
wrench furnished with the machine
2 Turn both of the belt ADJUSTING screws as shown
until they stop Retighten the two belt LOCKING
screws so that the idler pulley does not come out
3 Slip the belt off and _emove the piece of paper
4. Remove tile protective coating, that is applied at the
factory, from the belt table. Use any ordinary house-
hold type greaseand spot remover.
CAUTION: Never use gasoline, naptha, or similar highly
volatile solvents.
NOTE: Do not apply wax to the belt table
BELT ADJUSTING SCREW
(ONE ON EACH SIDE)
PAPER
BELT LOCKING SCREW
(ONE ON EACH SIDE)
1 Loosen the belt table locking bolts behind the mount-
ing,bracket using one of the 1/2" wrenches supplied
with your machine,
2. Position belt table vertically and tighten only one of
the bolts
3 Place tile V-Belt over the pulley
4 Attach the switch assembly to the base using the two
screws and washers packed with the switch
5 Loosen the bolt that you tightened in step 2 Position
the belt table horizontally, and tighten both bolts
BELT TABLE LOCKING
-" _ RENCH
SWITCH
ASSEMBLY
8