Chapter 3 Management Quick Start
Chapter 3. Management Quick Start
3.1 Introduction
The information here is only a brief introduction to the management interfaces and methodologies for managing
the FRM220. For in-depth use of the management features of the FRM220, please refer to the FRM220 Network
Manager Controller User Manual.
3.2 Management Methods
The management methods for the FRM220 include textual based serial console, IP based textual console
(Telnet), web based GUI management through web browser, SNMP management through proprietary MIB and via
CTC Union's Element Management System (EMS).
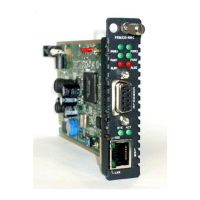
3.3 Console Terminal
The NMC card has a DB9F RS-232 serial console port for local management purposes. The console provides
a menu driven display, with simple keyboard item selections and the ability to control all aspects of management in
the FRM220. The console interface also provides the initial provisioning to setup the TCP/IP interface (the Ethernet
RJ-45 10/100Base-TX port) for remote management by Telnet, Web, SNMP and EMS.
3.3.1 Terminal Connection & Settings
The DB9F port on the NMC is a DCE (Data Communications Equipment) wired device that allows for direct 1:1
cable connection to the DTE (Data Terminal Equipment) of PC's COM port. The FRM220 includes the 1:1 DB9F to
DB9M serial cable for connection to PC's COM port or laptop's USB to RS-232 adapter. Any VT100 terminal
emulation program for Windows may be used, including HyperTerminal™, TeraTerm, or PuTTY.
The terminal settings must follow these communication parameters:
115200 data rate
8 bits
No parity bit
1 Stop bit
No Flow Control
3.3.2 Terminal Login
Connect the console cable to PC and power up the FRM220. Start your favorite terminal emulation program.
The terminal screen is refreshed every few seconds. By default, no password is set from the factory, so you should
immediately see a screen similar to that below.
Items of interest:
1. This is the display header. The version shown reflects the currently installed 'romfs.gz' or file system version (2.12).
2. These rows indicate which chassis in a cascaded stack is being managed. The default is the local chassis zero (0).
3. This block supports selecting any of the installed cards, numbered in slots 1~20.
4. In this block of commands is the all important 'SNMP System Configuration Setup'. The TCP/IP settings are done through
this selected menu.
****************************************
*** CTC UNION TECHNOLOGIES CO., LTD. ***
*** FRM220 NMC VER. 2.12 ***
****************************************
This Chassis ID:[00] Cascaded:[Yes] Monitored Chassis ID:[00]
Chassis List:[Master]
#0:[X] #1:[ ] #2:[ ] #3:[ ] #4:[ ] #5:[ ] #6:[ ] #7:[ ] #8:[ ] #9:[ ]
<1>:SLOT #01 > NMC & Chassis <B>:SLOT #11 > FRM220-SERIAL
<2>:SLOT #02 > FRM220-10/100I <C>:SLOT #12 > FRM220-1000EDS
<3>:SLOT #03 > FRM220-10/100I <D>:SLOT #13 > FRM220-1000EAS
<4>:SLOT #04 > FRM220-10/100I <E>:SLOT #14 > FRM220-155MS
<5>:SLOT #05 > FRM220-10/100I <F>:SLOT #15 > FRM220-155MS
<6>:SLOT #06 > FRM220-10/100I <G>:SLOT #16 > FRM220-E1/T1
<7>:SLOT #07 > FRM220-10/100I <H>:SLOT #17 > FRM220-E1/T1
<8>:SLOT #08 > FRM220-10/100IS-2 <I>:SLOT #18 > FRM220-FXO/FXS
<9>:SLOT #09 > FRM220-10/100A <J>:SLOT #19 > FRM220-FXO/FXS
<A>:SLOT #10 > FRM220-10/100AS-2 <K>:SLOT #20 > FRM220-FXO/FXS
<->:Monitor Previous Chassis <+>:Monitor Next Chassis
<L>:SNMP System Configuration Setup
<M>:SNMP Manager Configuration Setup
<P>:Password Setup
<R>:Reboot <Z>:Logout
Please select an item.
1
2
3
4
39

 Loading...