Cybex Sport+ Treadmill Owner’s and Service Manual
5. Replace the lower control board and bracket.
NOTE: Wear an ESD strap for the rest of this procedure.
A. Position the lower control board bracket in place on the base. NOTE: The elevation
motor connector and ground stud will be orientated toward the back left corner.
B. Using a Phillips head screwdriver, secure the four screws that hold the bracket to the
base.
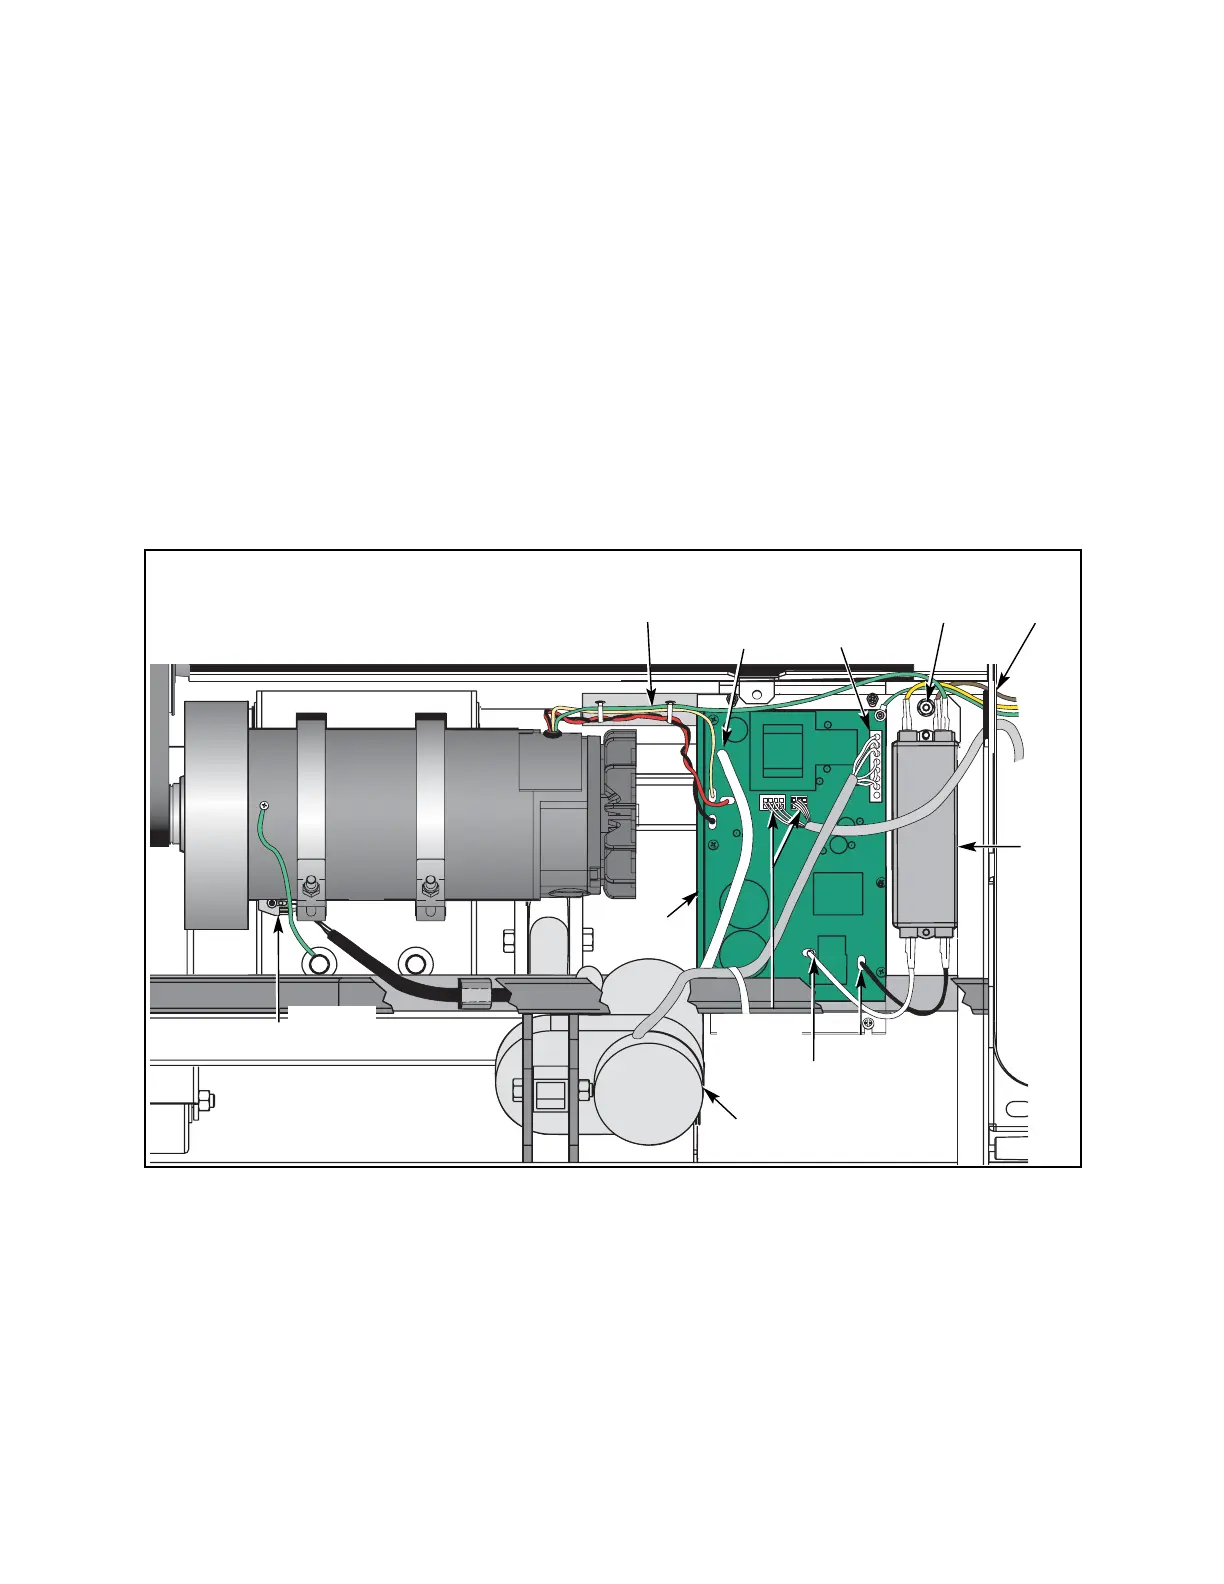
6. Connect the cables to the lower control board.
A. Connect the cables to the lower control board. This includes: the elevation motor
cable; display cable (P1 and P2); AC line 1 (black); AC line 2 (white); drive motor
(black, red, yellow) and speed sensor cable. See Figure 21.
B. Put the ground wire terminal on the stud on the lower board bracket.
C. Using a 3/8” nutdriver, secure the one nut over the ground wire terminal.
7. Secure the wires.
A. Check to see that all of the cables are connected firmly in their proper place.
Figure 21
Access
Hole
Elevation
Motor
Cable
Display
Cable
Speed
Sensor
Speed
Sensor
Cable
Line
Filter
Elevation
Motor
AC Line 1
AC Line 2
Lower
Board
Ground
Wire
Drive Motor Cable
(Red Black Yellow
and Green)
Service
Page 7-25