Cybex Pro+ Treadmill Owner’s & Service Manual
Service
Page 7-21
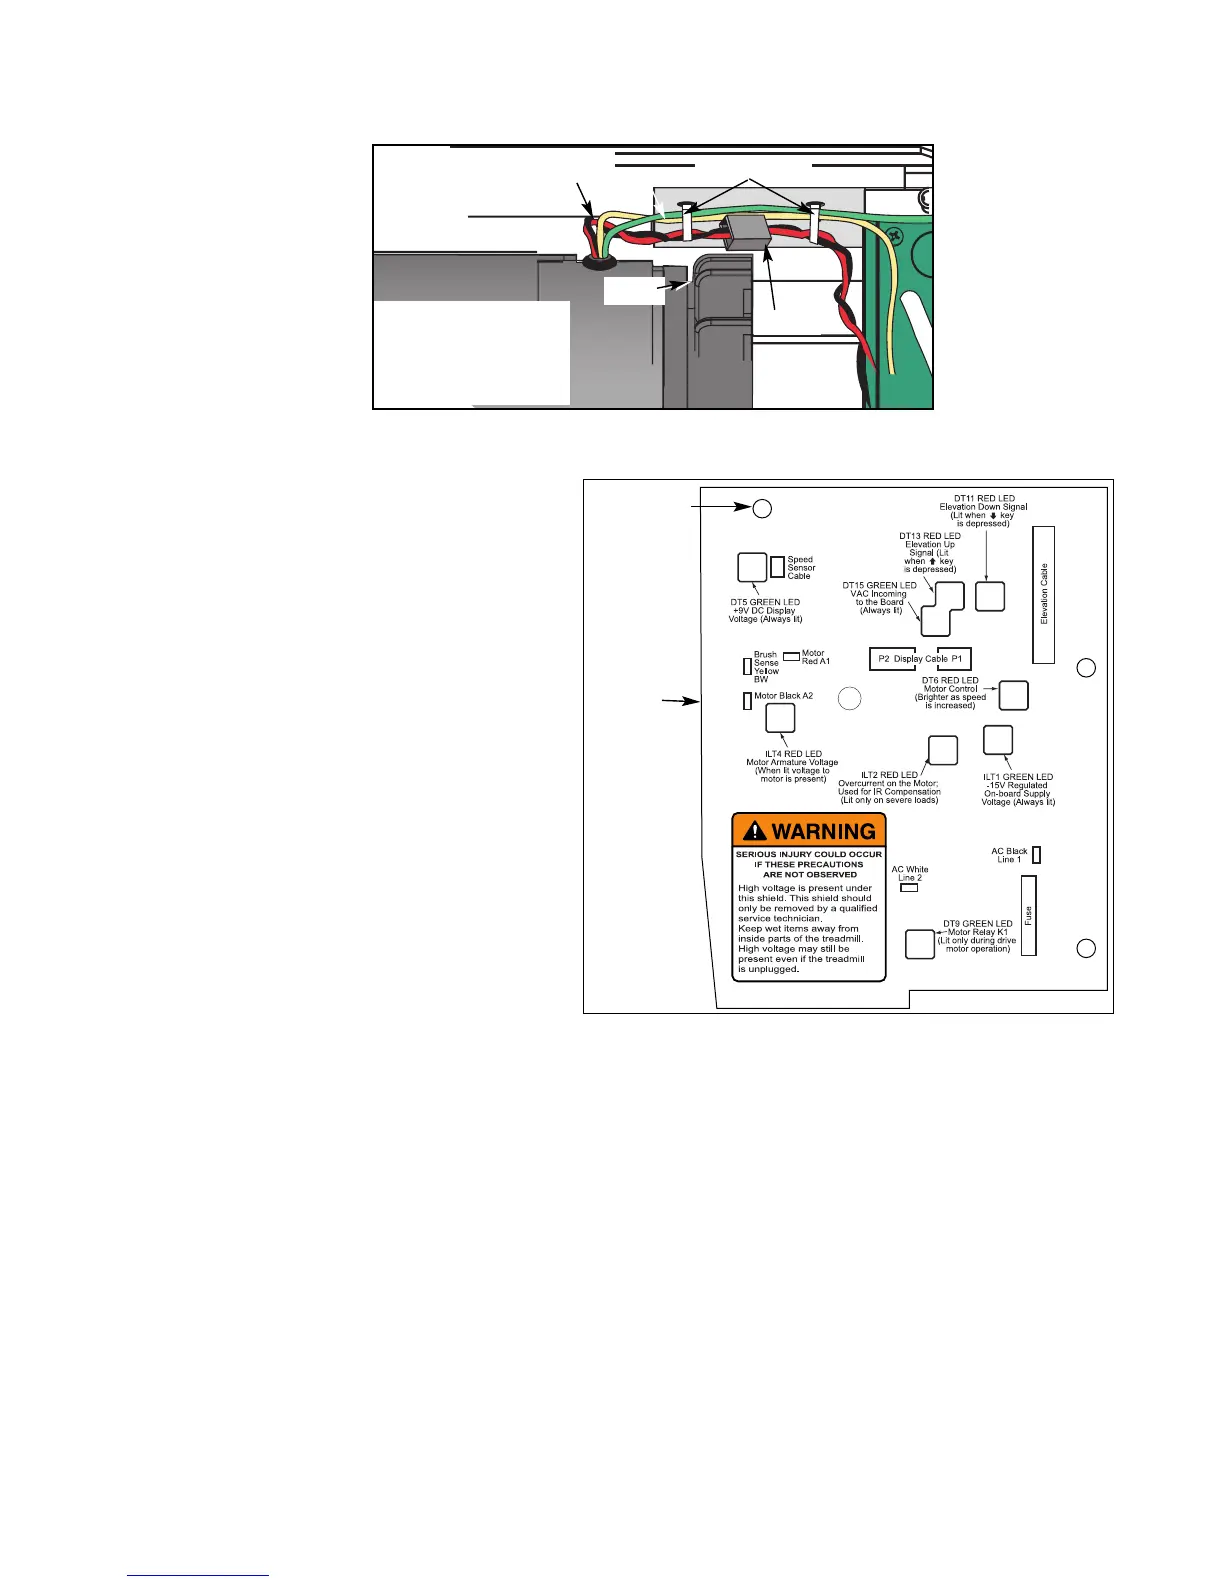
E. Refer to the lower board shield to
confirm the locations for
the connectors and check to see
that all of the cables are connected
firmly. See Figure 19.
F. Place the lower board shield in
position and push the clips down.
NOTE: The clips will snap in. See
Figure 19.
20. Secure the motor cover.
A. Lower the motor cover center into
position. See Figure 2.
B. Using a Phillips head screwdriver,
tighten the three screws on each
side. NOTE: Be sure the screws
are catching the center motor
cover's holes.
21. Perform the appropriate
procedures.
A. Follow the Speed Calibration procedure located in this chapter (required).
B. If you replaced the motor follow the IR Compensation procedure located in this chapter.
C. If you loosened the tension on the running belt (step 8A) follow the Tension and Center the
Belt procedure located in the Preventive Maintenance chapter.
Figure 19