IM 1227 • MODELS DC THERMOSTATS 24 www.DaikinApplied.com
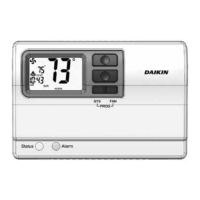
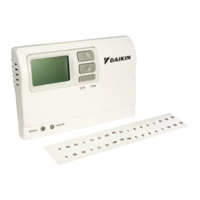
7-Day Programmable CommerCial DigiTal ThermosTaTs
Heating and Cooling System Runtime—
Energy Watch
(Setup Steps 8–10)
Current Heat Runtime Hours (Setup Step 8) – This counter
keeps track of the number of hours the system has run in
Heating. Press OUTDOOR to reset.
Current Aux Strip Heat Runtime Hours (Setup Step 9) – This
counter keeps track of the number of hours the system has run
in Auxiliary Heating. This setup step is only available when the
thermostat jumpers are congured for Heat Pump and Electric
Heat. Press OUTDOOR to reset.
Current Cool Runtime Hours (Setup Step 10) – This counter
displays the number of hours the system has run in Cooling.
Press OUTDOOR to reset.
Current Override Hours (Setup Step 11) – This counter
displays the number of hours the system has run in Override.
Press OUTDOOR to reset.
UV Lamp Runtime
(Setup Steps 12, 16)
Current UV Lamp Calendar Days (Setup Step 12) – number
of calendar days that have elapsed to help the user track UV
lamp runtime. Press OUTDOOR to reset.
Set UV Lamp Calendar Days (Setup Step 16) – This timer
allows the user to specify the number of calendar days the UV
Lamp will operate before the “Replace UV Lamp” alert will be
displayed. Press DOWN continuously until OFF appears to
disable this alert.
Humidier Runtime
(Setup Steps 13, 17)
Current Humidier Calendar Days (Setup Step 13) – This
counter displays the total number of calendar days that have
elapsed to help the user track the Humidier runtime. Press
OUTDOOR to reset.
Set Humidier Calendar Days (Setup Step 17) – This timer
allows the user to specify the number of calendar days the
Humidier will run before the “Service Humidier” alert will be
displayed. Press DOWN continuously until OFF appears to
disable this alert.
Time Period Programming
To enter Time Period
Programming screens, Press
and hold PROGRAM until the
scrolling prompt appears.
OFF – Time Period Program
is off.
RUN – Time Period Program
is running.
HOLD TO SET – Press and hold PROGRAM to make Time
Period Programming changes.
Programming a Daily Schedule
Select number of Occupied time periods – Press the UP or
DOWN buttons to choose the maximum number of Occupied
time periods to program. (1-3) Press MODE to advance to the
next step.
Select Occupied 1 Cool Setpoint – Press the UP or DOWN
buttons to adjust the cool setpoint desired. Press MODE to
advance to the next step.
Select Occupied 1 Heat Setpoint – Press the UP or DOWN
buttons to adjust the heat setpoint desired. Press MODE to
advance to the next step.
Select Unoccupied Cool Setpoint – Press the UP or DOWN
buttons to adjust the cool setpoint desired. Press MODE to
advance to the next step.
Select Unoccupied Heat Setpoint – Press the UP or DOWN
buttons to adjust the heat setpoint desired. Press MODE to
advance to the next step.
Select Day of Week to program – Press the UP or DOWN
buttons to choose the day of the week to be programmed.
Press MODE to advance to the next step.
Select Occupied 1 Start Time – Press the UP or DOWN
buttons to adjust the time of day desired. Press MODE to
advance to the next step.
Select Occupied 1 Stop Time – Press the UP or DOWN
buttons to adjust the time of day desired. Press MODE to
advance to the next step.
Select Occupied 1 Enable – Press the UP or DOWN buttons to
choose to enable the program to run on that day. Press MODE
to advance to the next step.
Copy Current Day to Next – Press the UP button to choose to
Copy the current day to another day. Press the UP or DOWN
buttons to choose which day to copy to. Press MODE to
conrm. Continue to Press MODE to copy to more days. Press
the DOWN button to program another day with a different
schedule.
Program Another Day – Press the DOWN button to choose to
program another day with a different schedule. Press MODE.
Press the UP or DOWN buttons to choose the desired day.
Press MODE to advance to the next step.
Press Program Button to exit Time Period Programming