24
03-05-2023
50400 >
In the event of new product developments, Dancutter reserves the right to change the technical description without advance notice.
Authorised Representative in the United Kingdom: Mini-Cam Limited Unit 33, Ravenscraig Road, Little Hulton, Salford, M38 9PU.
© Copyright 2021 Dancutter A/S. Dancutter A/S is a Halma Company. Dancutter A/S, Livøvej 1 A, DK-8800 Viborg, +45 9651 2150, info@dancutter.dk, dancutter.com
DC Control Unit 2.0
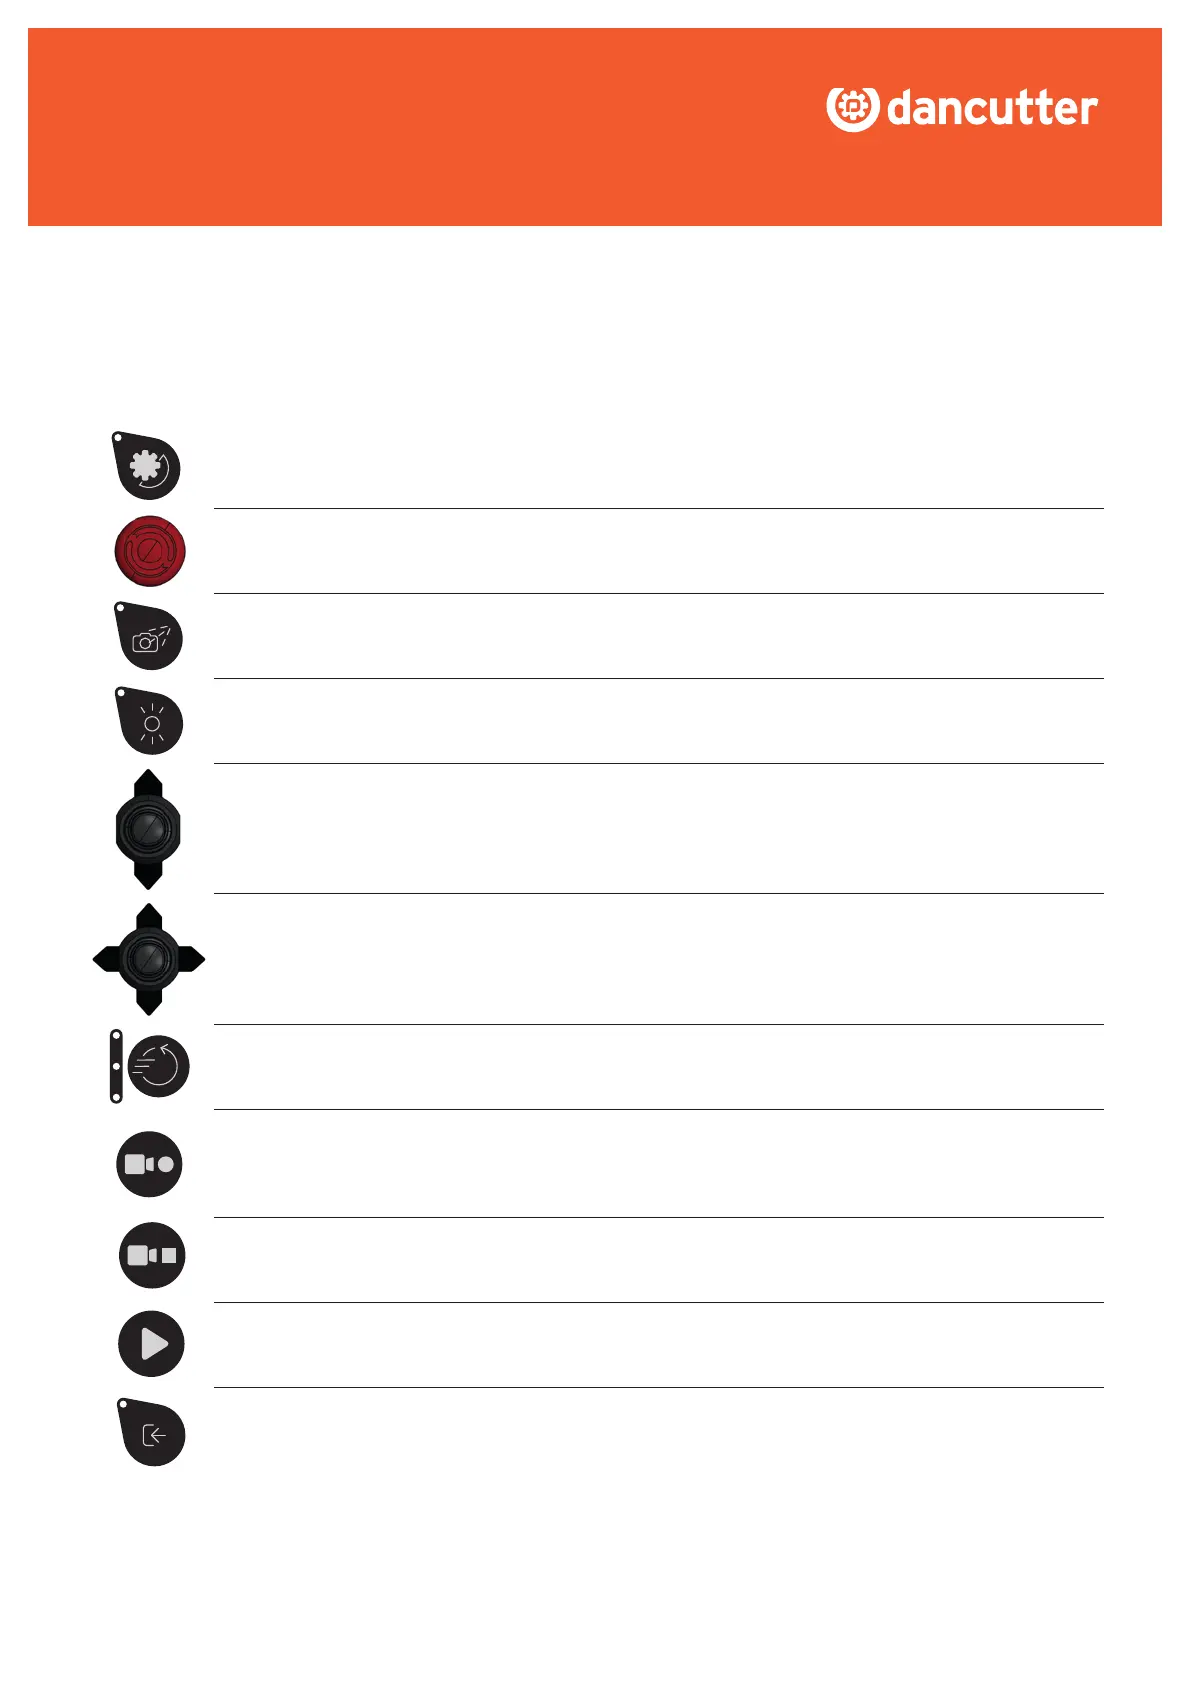
GRINDER: Press to start and stop the grinder. The grinder is on when the green light is on.
STOP: To halt all movement of the cutter, press this button. To return to the normal operating state, rotate the
button. It is important to note that even after releasing the stop button, the grinder will remain inactive.
CAMERA CLEAN: To clean the camera lens, press the button briefly to dispense a small amount of sprinkler
fluid or air. Alternatively, press and hold the button for 3 seconds to activate the sprinkler, which will remain on
until the button is pressed again. You will know the camera cleaning function is active when the green light is on.
LIGHT: Press to turn the camera light on and off. The camera light is on when the green light is on.
LEFT JOYSTICK: Use this to operate the cutters forward/backward movement. How far the forward/
backward section is extended is shown on the bar at the bottom of the screen.
RIGHT JOYSTICK: Use the up/down to raise and lower the grinder on the cutter. Use the right/left to rotate
the cutter.
ROTATION SPEED: Press this button to adjust the rotation speed of the cutter in three levels. 1 light on:
low speed. 2 lights on: medium speed. 3 lights on: high speed.
START RECORDING: Press to begin recording a video. It’s important to ensure that a USB stick has been
properly inserted into the corresponding USB socket, as the recording will be automatically saved to the stick.
You will know that the control unit is recording when the “REC” indicator blinks in the lower left corner of the
screen.
STOP RECORDING: Press to stop the recording.
PLAY: While in normal mode, press the PLAY button to take a snapshot of the screen. The snapshot is saved
directly onto the USB stick. When you take a snapshot “SNAP”isdisplayedbrieyonthescreen.
EXTERNAL VIDEO SOURCE: Press this button to switch between video sources on the screen. When the
light is off, the video feed is sourced from the camera built into the cutter. Conversely, when the light is on,
the video feed is sourced from an external video source that has been connected to the “video in” socket on
the control unit. Note, the settings for “reverse forward/backward” and “reverse rotation” are saved inde-
pendently for each video source, and will automatically switch back to their saved state when the video
source is changed back.