Chapter 2 – Printer Setup 3
2
2
2
P
P
P
r
r
r
i
i
i
n
n
n
t
t
t
e
e
e
r
r
r
S
S
S
e
e
e
t
t
t
u
u
u
p
p
p
2
2
2
.
.
.
1
1
1
I
I
I
n
n
n
t
t
t
r
r
r
o
o
o
d
d
d
u
u
u
c
c
c
t
t
t
i
i
i
o
o
o
n
n
n
This section explains how to connect your printer and load media (including ribbon, if equipped for thermal
transfer operation).
2
2
2
.
.
.
2
2
2
C
C
C
o
o
o
n
n
n
n
n
n
e
e
e
c
c
c
t
t
t
i
i
i
n
n
n
g
g
g
t
t
t
h
h
h
e
e
e
P
P
P
r
r
r
i
i
i
n
n
n
t
t
t
e
e
e
r
r
r
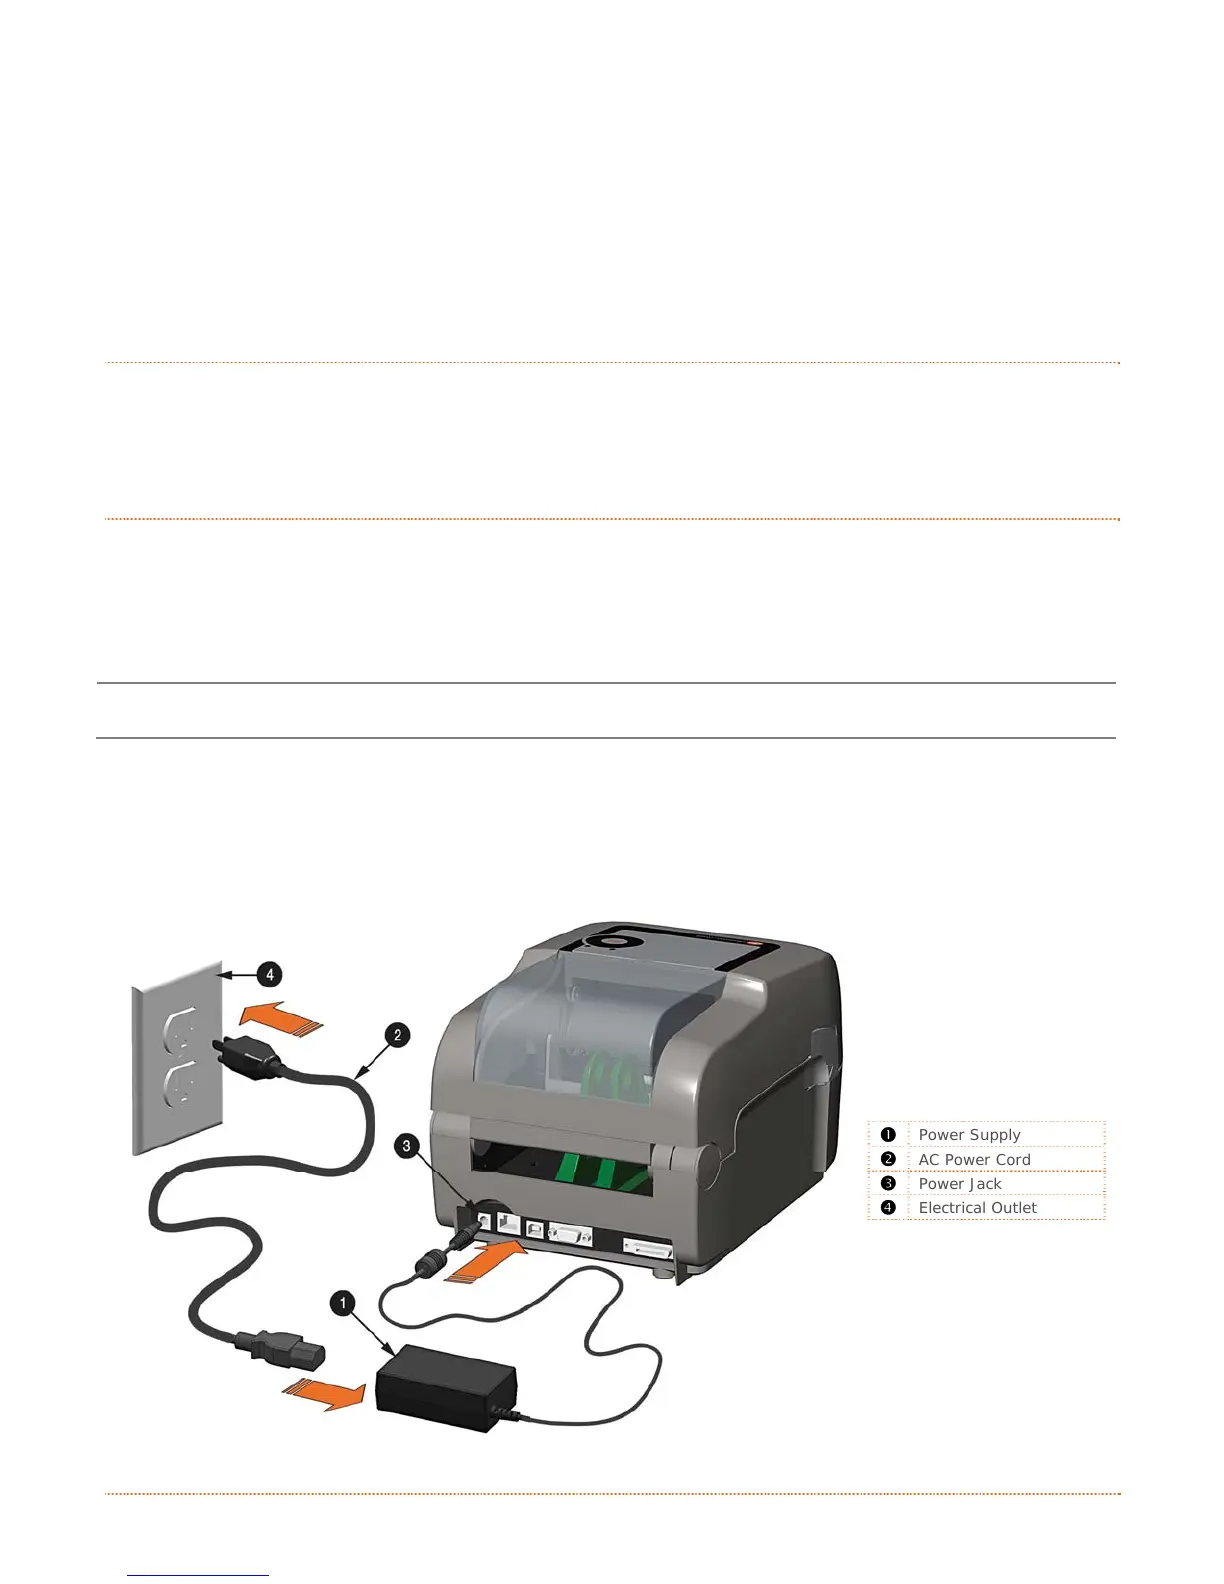
2.2.1 Power Connections
The printer is powered by an external auto-ranging power supply, which connects between the printer and an
electrical outlet. Ensure that the operating ranges of the power supply are compatible with your electrical
service, (see Appendix A for details) then connect power as follows:
Before connecting power to the printer, ensure that the Power Switch is in the OFF (O) position.
1) Connect the Power Supply to Power Jack of the printer.
2) Connect the AC Power Cord to the Power Supply.
3) Connect the AC Power Cord to an Electrical Outlet.
312
Power Supply
AC Power Cord
Power Jack
Electrical Outlet