Console Location
5
Table & Shelf Placement
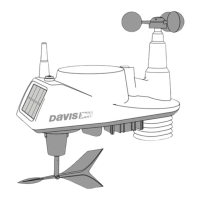
The console comes with a kickstand so that the
console can be displayed on any flat surface. To
install the kickstand:
1. Locate the two keyholes on the back of the
console.
2. Place the two round tabs on the kickstand into
the two keyholes and slide the kickstand up
into place.
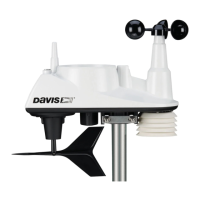
3. Install the two round rubber feet on the
bottom of the console.
4. Install the two rubber channel feet on the
kickstand.
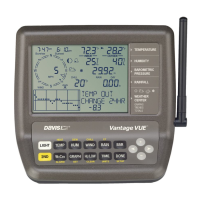
Wall Mounting
The console mounts to the wall using two keyholes located on the back of the
case (the same two keyholes are used to hold the console kickstand in place)
and two #6 x 1'' pan head self-threading screws included in the hardware kit.
To mount the console on a wall:
1. Use a ruler to mark two mounting
hole positions on the wall 4
15
/
16
''
inches (125 mm) apart. Use the
guide holes on the kickstand as a
template for the keyhole spacing.
2. Use a drill and a
3
/
32
” or
7
/
64
'' (2.4
or 2.8 mm) drill bit to drill two
pilot holes for the screws.
3. Using a screwdriver, drive the
two #6 x 1'' pan head self-
threading screws into the wall.
Leave at least
1
/
8
'' (3 mm) between
the wall and the heads of the
screws.
4. Guide the two keyholes on the
back of the console over the two
screws.
Securing the kickstand
Installing the rubber feet
Mounting the console on a wall
 Loading...