Do you have a question about the Defender PHOENIXM2 and is the answer not in the manual?
Instructions for product support and returns before contacting the store.
Explanation of the product's one-year warranty terms and coverage.
Critical warning about the risk of electric shock and not opening the unit.
Details on the device's adherence to FCC rules regarding interference.
Statement on product liability and non-endorsement of illegal activities.
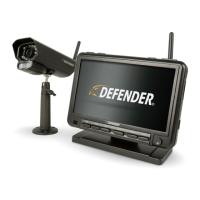
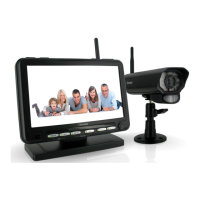
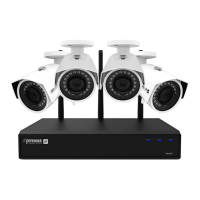
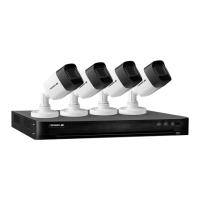
Description of the system's main features like wireless technology and night vision.
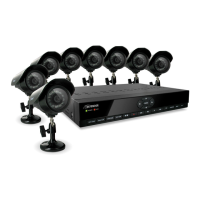
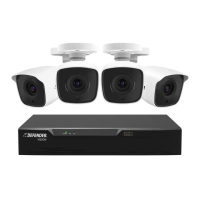
List of all items provided in the product package.
Explanation of the purpose and operation of each button on the monitor.
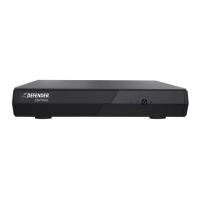
Identification of the monitor's input/output ports and indicators.
Identification of external camera parts and their functions.
Information regarding the camera's IR Cut Filter and its audible notification.
Important factors to consider before installing the camera, like placement and range.
Step-by-step guide for initial setup of the monitor and camera.
Guidance on how to mount the camera securely on a wall or surface.
Steps for connecting the camera's power adapter after mounting.
Configure the length of time recording continues after motion detection.
Steps to navigate to the record schedule interface.
Explanation of days, time, camera selection, and color-coded record status.
Steps to modify the recording schedule for specific times and days.
Steps to set recording schedules for individual cameras by time and day.
How to activate motion recording and the associated indicator.
Setting the sensitivity level for motion detection for each camera.
Enabling the overwrite function for recorded files when the memory card is full.
Steps to connect additional cameras to the monitor.
Navigating the menu to start the camera pairing process.
Steps for physically pairing the camera using the tool and confirming success.
How to enable or disable individual cameras through the monitor menu.
How to turn cameras on or off from the monitor settings.
Steps to adjust the brightness level for each camera.
Detailed instructions for adjusting the brightness level of selected cameras.
How to change the video resolution for each camera.
Choosing between QVGA and VGA resolutions for camera output.
Table showing frame rates based on the number of connected cameras.
How to adjust the current date and time displayed on the monitor.
Detailed steps for changing the date and time, including hours and minutes.
Process for resetting the monitor to its factory default settings.
Steps to confirm and apply the default settings reset.
Steps to format the SD card, erasing recorded footage.
How to select the correct time zone for accurate timekeeping.
Navigating the menu to choose the appropriate time zone.
How to enable or disable automatic clock adjustment for daylight savings.
Steps to activate the automatic clock adjustment for daylight saving time.
Steps for transferring firmware to the SD card using an adapter and reader.
Inserting the SD card into the monitor to begin the firmware installation.
Navigating the menu to select the firmware upgrade option.
Steps to confirm the firmware update and the system's reboot.
Warning not to remove power supply during the firmware update.
How to set up audible alerts for motion detection and button presses.
Steps to access and view recorded video files from the SD card.
How to select dates and cameras to find specific recorded footage.
Instructions on how to play back individual recorded video clips.
Steps to select and delete individual recorded video files.
Solutions for issues related to no picture or signal loss.
Troubleshooting steps for audio problems and device pairing failures.
Solutions for night vision not working and footage not recording.
Technical details of the monitor, including screen size, resolution, and power input.
Technical details of the camera, including image sensor, night vision, and operating temperature.
| Power Source | AC Adapter |
|---|---|
| Number of Zones | 4 |
| Screen Size | 7 inches |
| Operating Temperature | -10°C to 50°C |
| Battery Backup | Up to 8 hours |
| Detection Range | Up to 40ft |