9
INSTRUCTION
INSTALLING CAMERAS
1 . Decide if the camera will be wall-mounted or
sitting on a desk/tabletop. The camera can
be adjusted for many mounting scenarios by
rotating it to the required position.
• Keep in mind that the camera is
microphone equipped. If you would like
to record audio, make sure the camera
is within a close enough range to record
sound (within 6 ft).
• For best results be sure to mount the camera
no further than 100ft away from your
monitor.
• Be sure to mount the camera no further
than 8ft away from a power source.
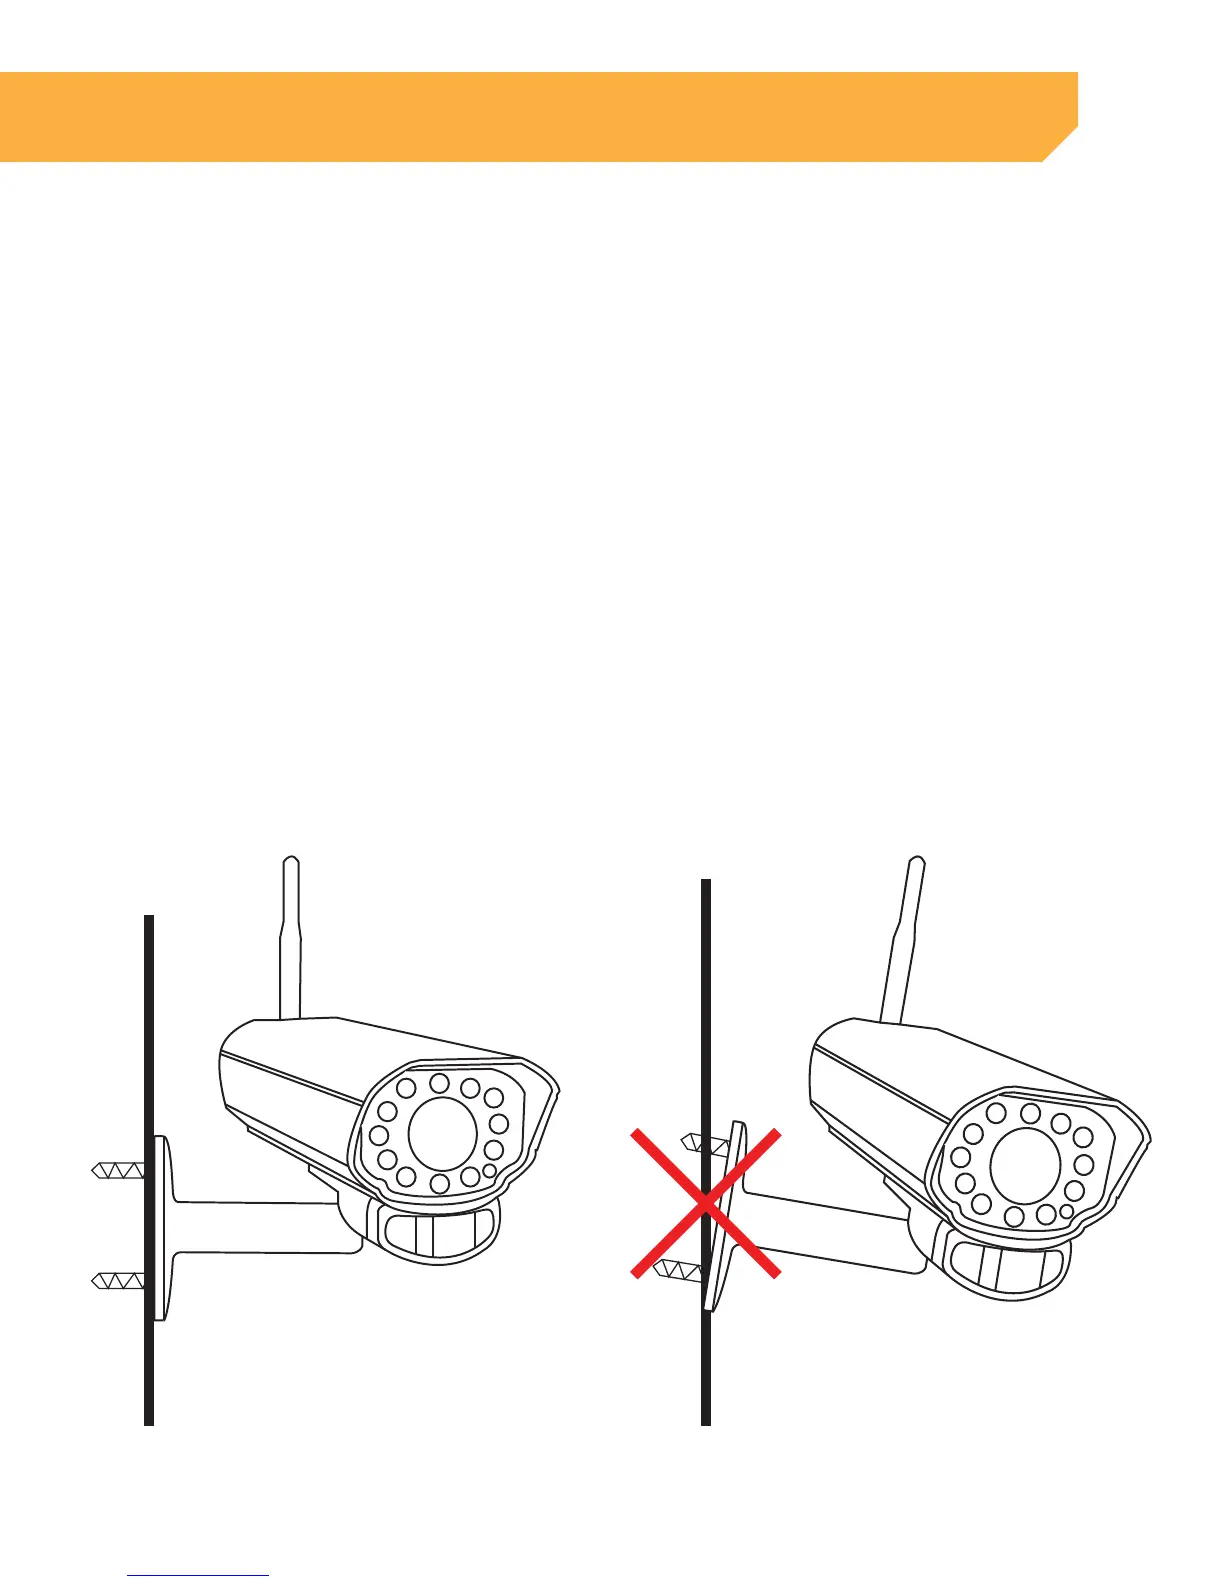
2 . Screw the mounting bracket into the camera’s
mounting hole, turning it clockwise.
3 . Ensure that the camera is strongly secured into
the wall.
4 . Adjust the camera to the desired viewing angle.
5 . For additional help with mounting the camera,
please see the drilling template located at the
back of the manual.
6 . Once you have mounted the camera and
placed it at the desired viewing angle, plug the
camera’s power adapter (marked for camera)
into the cord on the camera and then plug the
adapter into a power source (a surge protected
power source is recommended).
7 . If you purchased a kit with additional cameras,
repeat the above steps for all additional
cameras.