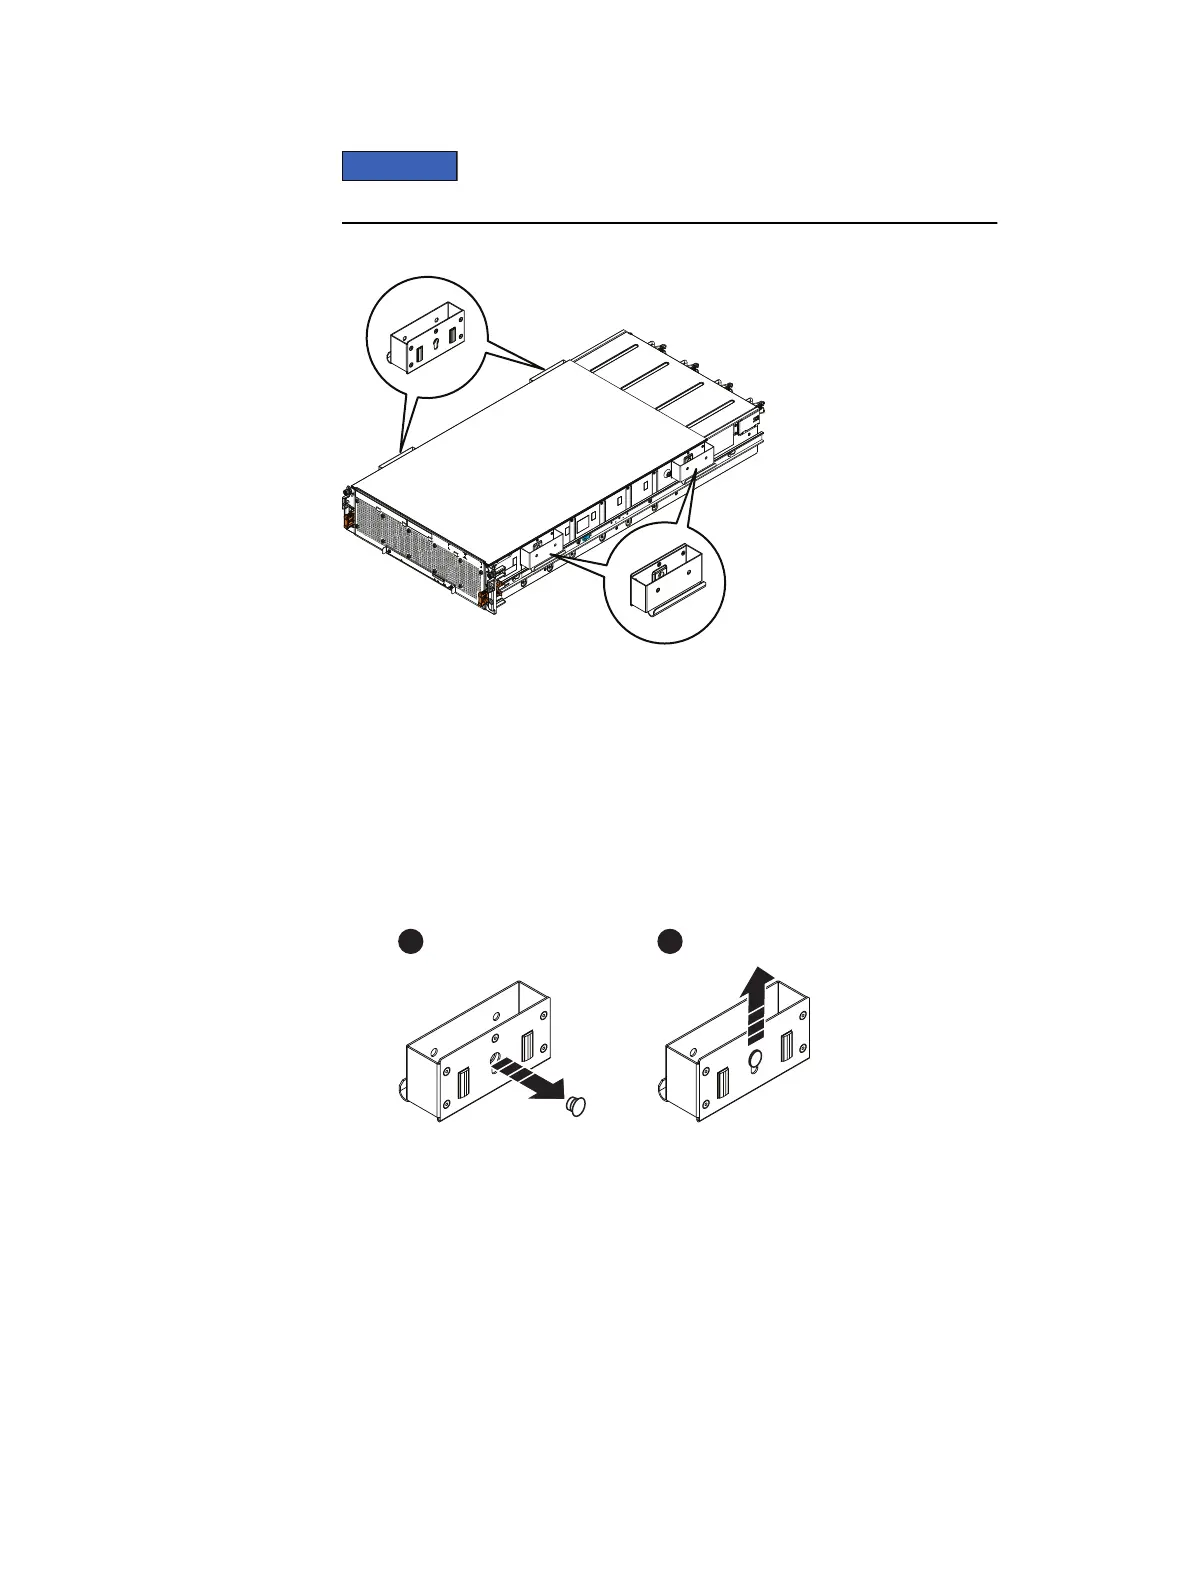
Remove these handles before fully inserting the enclosure into the cabinet.
Figure 1 Location of removable handles when installed
Procedure
1. To install the handles:
a. Position the handle (with the curved edge down) over the chassis pin where
you want to install the handle.
b. Push the handle inward and upward to lock it into place.
c. Repeat these steps for the remaining handles.
Figure 2
Installing the removable handles
2. To remove the handles:
a. Push the handle downward to unlock it and outward to separate it from the
chassis.
b. Repeat these steps for the remaining handles.
Working with the portable lift
If the DAE with all of the FRUs removed is being installed, the chassis can be installed
without using the lift. If the DAE is populated with FRUs prior to installing, then this
task requires the use of a portable lift.
The portable lift commonly used by service personnel is manufactured by Alum-A-Lift.
Instructions for this lift are included in the lift kit. Refer to "http://
www.corkc4.isus.emc.com/wiki/index.php/Lift_Tool". which describes the Lift
Field Upgrade Procedure
10 Unity All Flash and Unity Hybrid Field Upgrade Procedure

 Loading...


