Procedure
1. Grasp the right side of the console.
2. Pull the console to swing it open.
Removing the front bezel
Figure 19 Removing the front bezel
Procedure
1. If the bezel has a lock, insert the key that shipped with your enclosure into the
lock, and turn the key to unlock the bezel.
2. Press the two latch buttons on the bezel surface to release the bezel from the
cabinet.
3. Pull the bezel off the cabinet and put it on a clean, static-free surface.
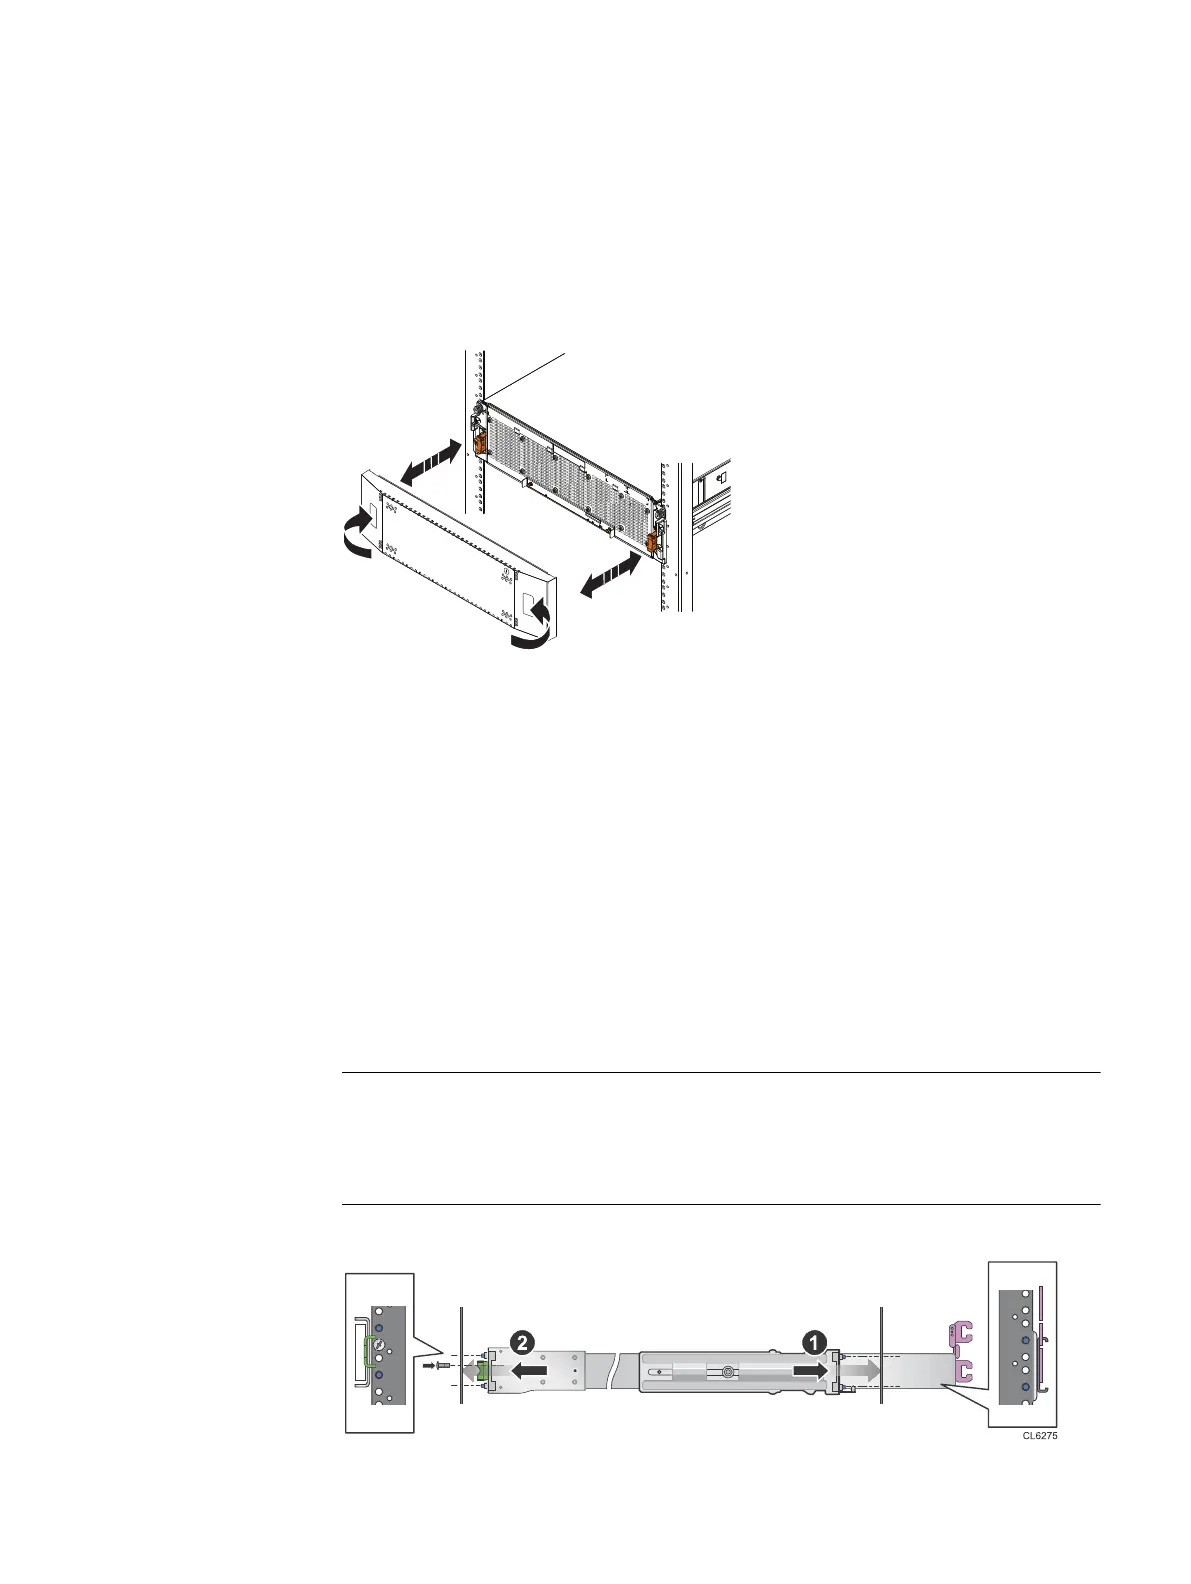
Installing the DAE rails
Install the rails from the front of the cabinet into which you are installing the
enclosure. The 3U DAE enclosure includes inner rails that slide into the cabinet rail
assembly. The rails are dedicated left and right, and cannot be interchanged. The front
side of each rail is labeled L or R (for left or right side) when the rail faces the cabinet
front.
When installing rails into a Dell/EMC cabinet, insert the interlock tab on the left rail
into the lockout rail. The lockout rail prevents multiple DAE drawers from being pulled
out simultaneously.
Figure 20 Installing the DAE rails
Field Upgrade Procedure
22 Unity All Flash and Unity Hybrid Field Upgrade Procedure

 Loading...


