3. Select Installable Options, and select the options that have been installed on
the printer, and then click Apply Changes.
4. Click Apply, and then click OK.
Mac OS 9 1. Select a desktop printer related to the model.
2. Click Printing on the System menu bar, and select Change Setup.
3. Select Memory Capacity on the Change menu.
4. Select the option that has been installed on the printer on the To menu, and
then click OK.
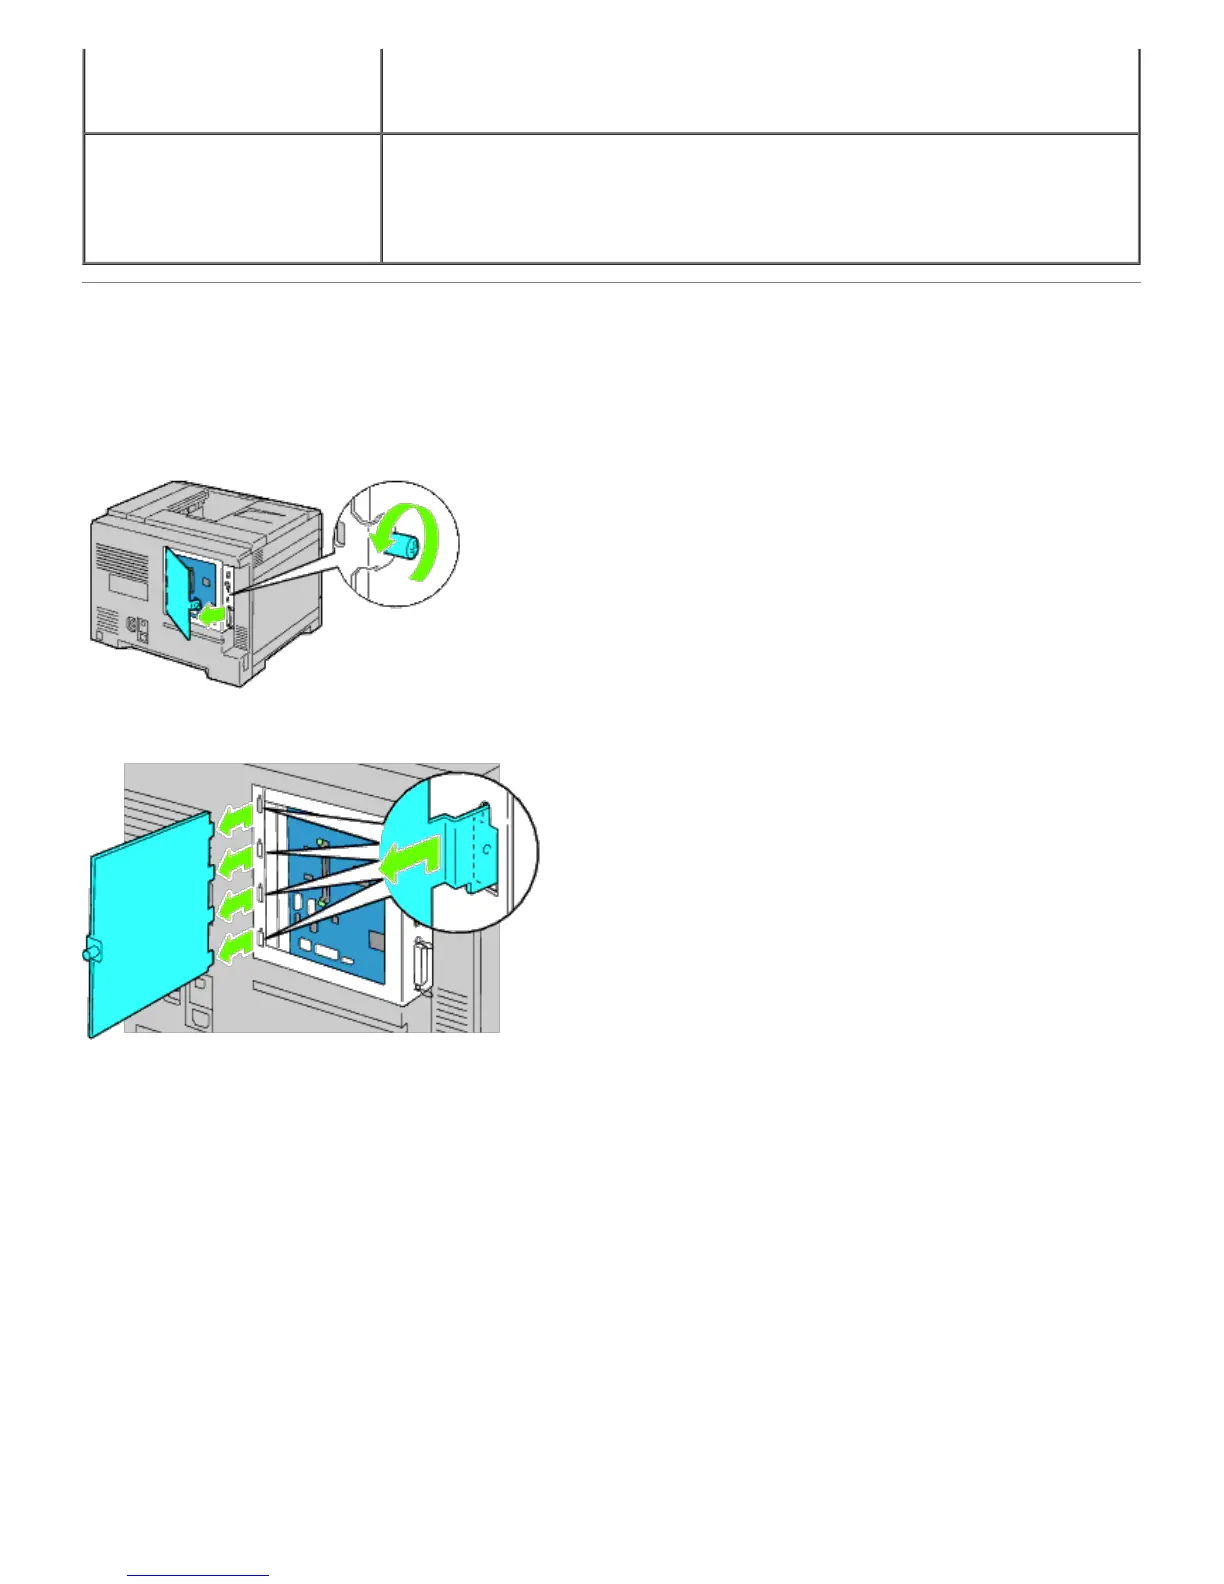
Installing a Hard Disk
1. Ensure that the printer is turned off.
2. Rotate the screw counterclockwise on the metal casing to open the cover.
3. Remove the control board cover.
4. Insert the two plastic pins on the hard disk into the metal casing holes.