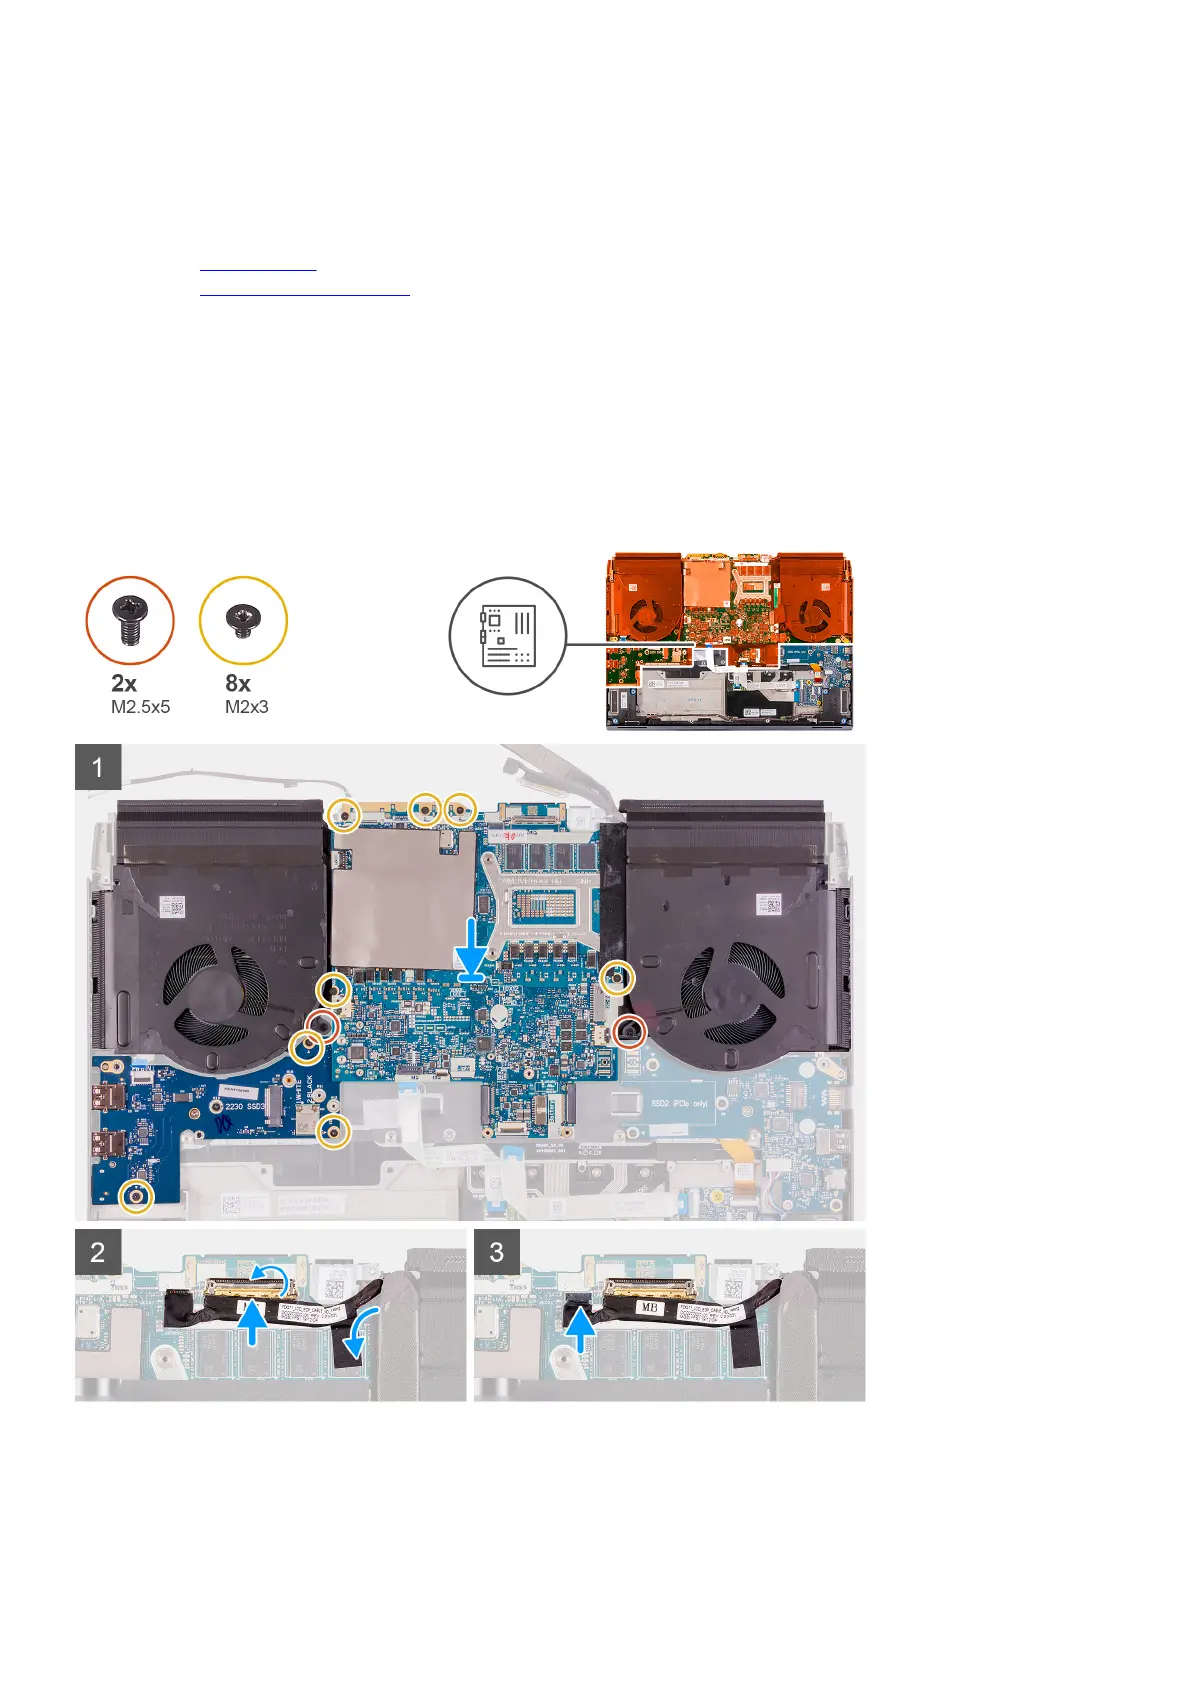
17. Remove the two (M2.5x5) screws that secure the fans to the palm-rest assembly.
18.Remove the five (M2x3) screws that secure the system board to the palm-rest assembly.
19.Remove the three (M2x3) screws that secure the left I/O-board to the palm-rest assembly.
20.Lift the system board and the left I/O-board out of the palm-rest assembly.
21. Turn the system board over.
22.Remove the
left I/O-board.
23.Remove the fan and heat-sink assembly.
Installing the system board
Prerequisites
If you are replacing a component, remove the existing component before performing the installation procedure.
About this task
The following image indicates the location of the system board and provides a visual representation of the removal procedure.
47