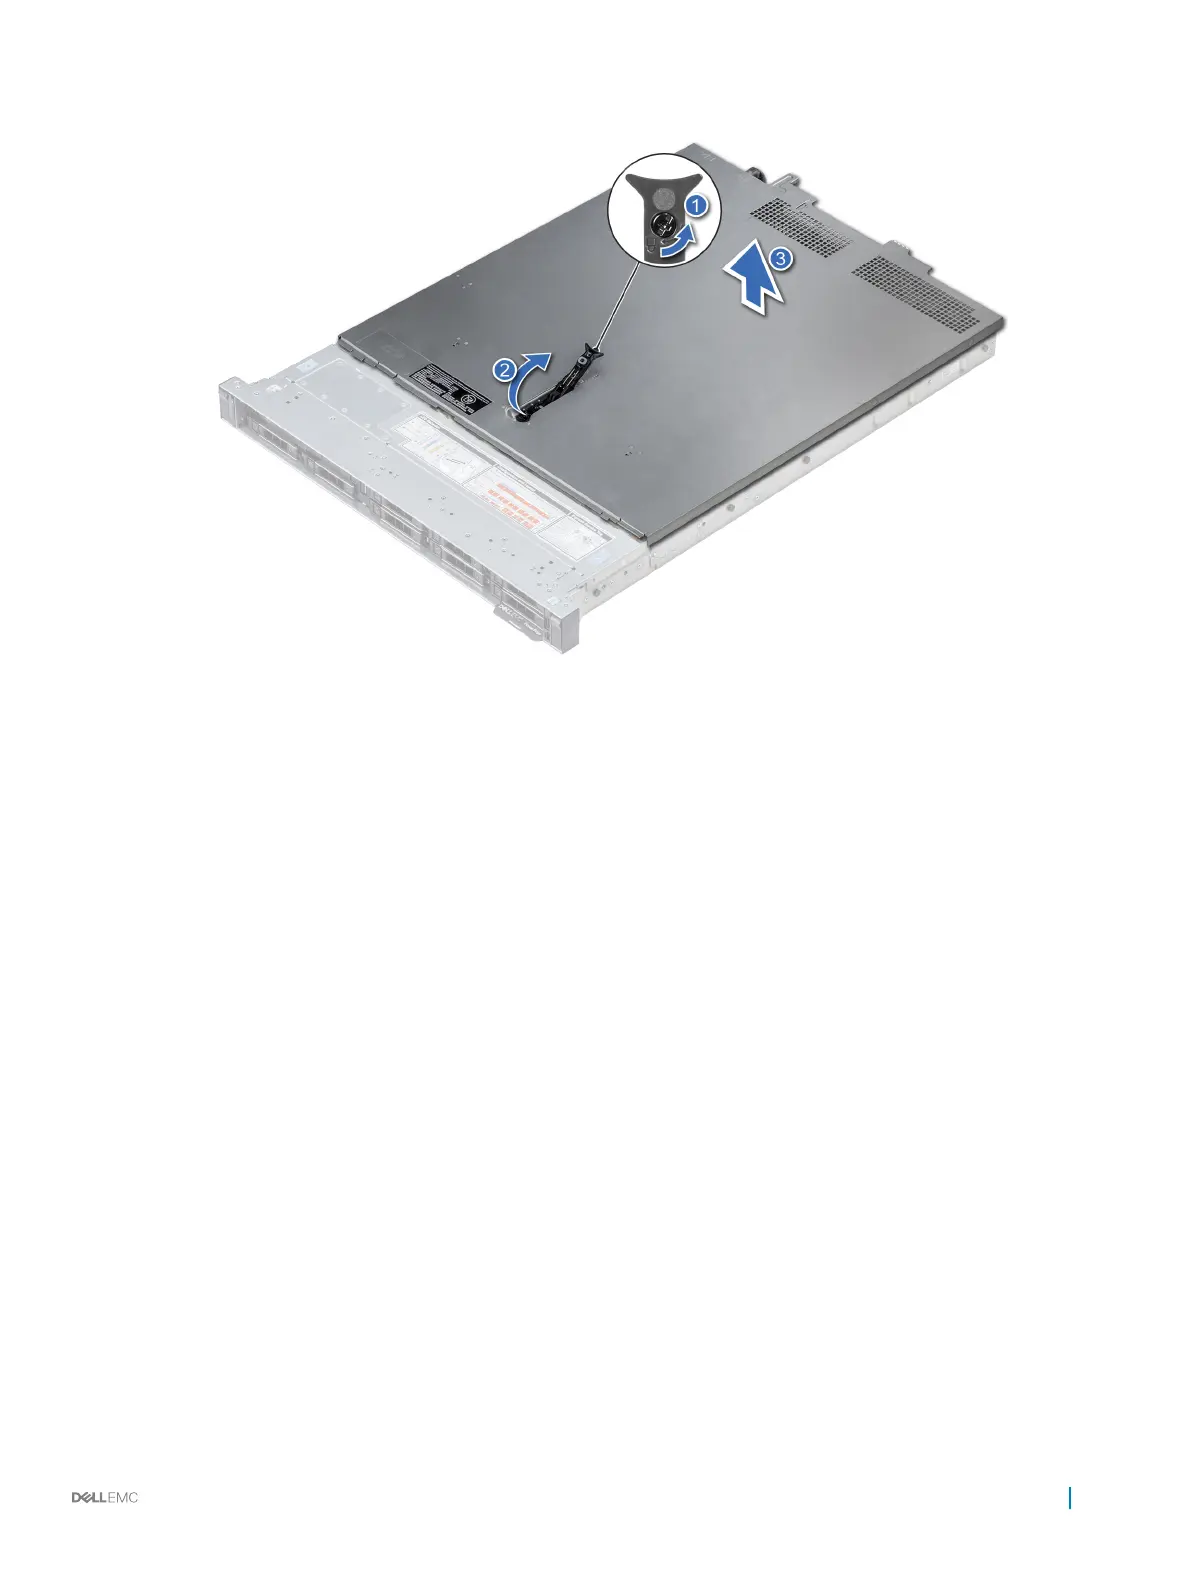
3 Hold the cover on both sides, and lift the cover away from the system.
Figure 23. Removing the system cover
Installing the system cover
Prerequisites
1 Follow the safety guidelines listed in Safety instructions.
2 Ensure that all internal cables are routed correctly and connected, and no tools or extra parts are left inside the system.
Steps
1 Align the tabs on the system cover with the guide slots on the system.
2 Push the system cover latch down.
The system cover slides forward, the tabs on the system cover engage with the guide slots on the system and the system cover latch
locks into place.
3 Using a 1/4 inch at head or Phillips #2 screwdriver, rotate the latch release lock clockwise to the locked position.
Installing and removing system components
39

 Loading...


