Removing the WiFi-Switch Board
1. Follow the procedures in
Before Working Inside Your Computer
.
2. Remove:
a) SD Card
b) ExpressCard
c) battery
d) keyboard
e) display-hinge cap
f) base cover
g) base corner caps
h) palmrest assembly
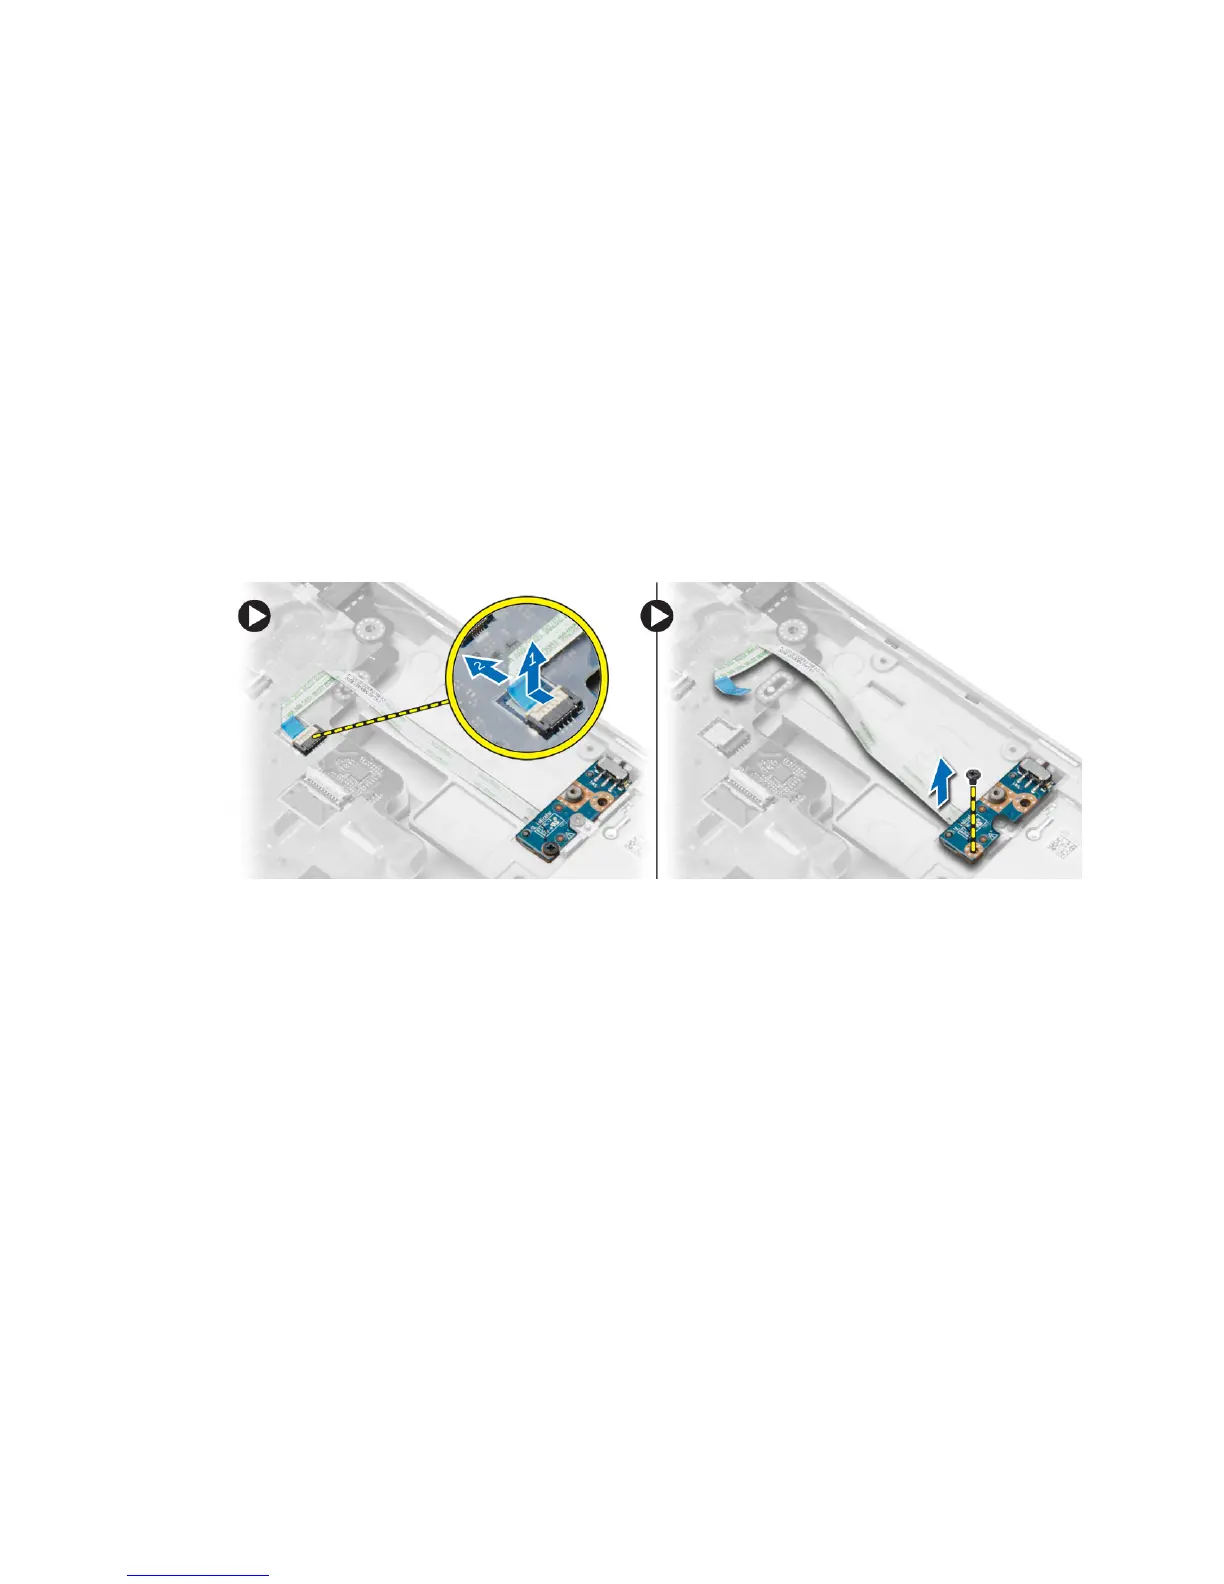
3. Perform the following steps as shown in the illustration:
a) Disconnect the cable from the system board.
b) Remove the screw that secures the WiFi-switch board and lift it from the computer.
Installing the WiFi-Switch Board
1. Place the WiFi-switch board in its slot.
2. Tighten the screw to secure the WiFi-switch board to the computer.
3. Connect the cable to the system board.
4. Install:
a) palmrest assembly
b) base cover
c) base corner caps
d) display-hinge cap
e) keyboard
f) battery
g) ExpressCard
h) SD Card
5. Follow the procedures in
After Working Inside Your Computer
.
34