58 Drives
b
Remove the unused data cable from the computer.
c
Install a drive panel insert to cover the empty drive bay opening (see
"Installing an Optical Drive Panel Insert" on page 59).
d
Follow the procedure in "After Working on Your Computer" on
page 17.
e
Update the drive configuration information in the system setup
program. For more information on using the system setup program,
see the
Dell Technology Guide
on your computer or at
support.dell.com
.
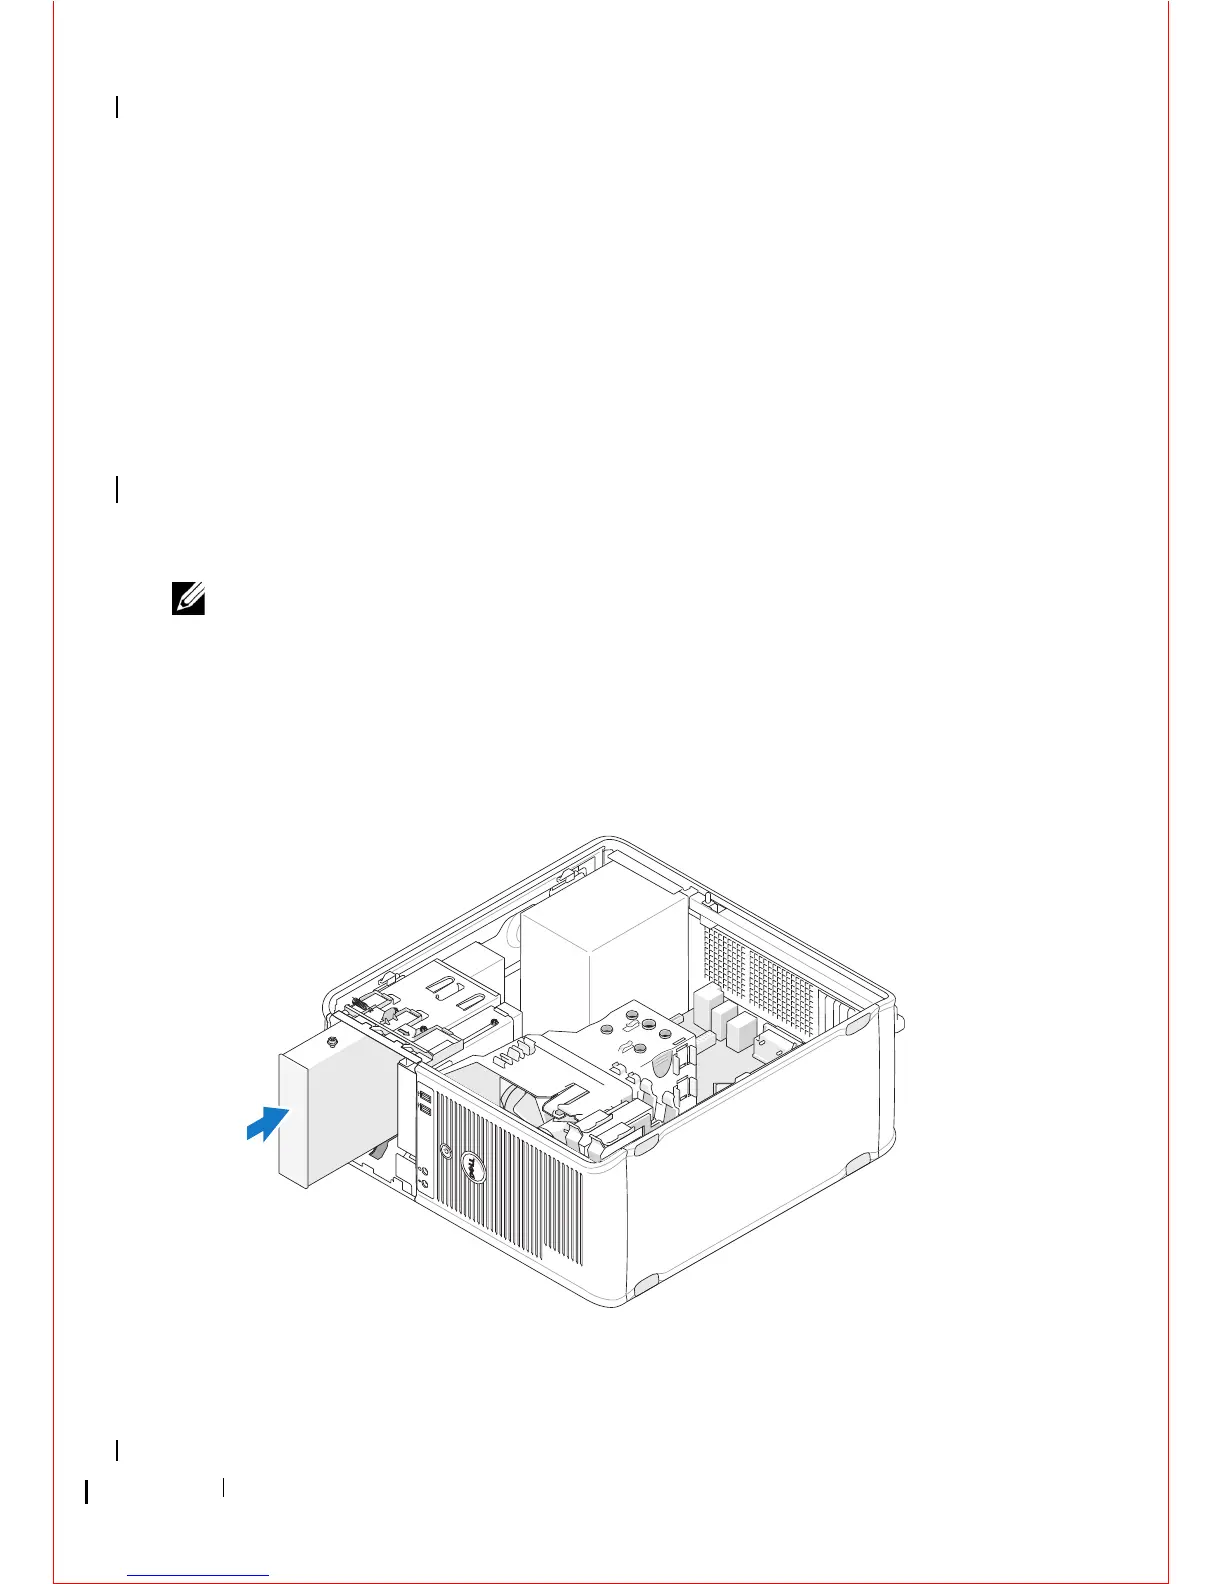
Replacing or Adding an Optical Drive in the Mini Tower Computer
NOTE: This procedure assumes that you have completed the removal procedure
first.
1
If necessary, remove the drive panel insert (see "Removing an Optical
Drive Panel Insert" on page 59).
2
Gently slide the optical drive into place, aligning the screw holes in the
optical drive bay and optical drive.
3
Tighten the screw securing the optical drive.
4
Connect the power and data cables to the drive.