Drives 59
5
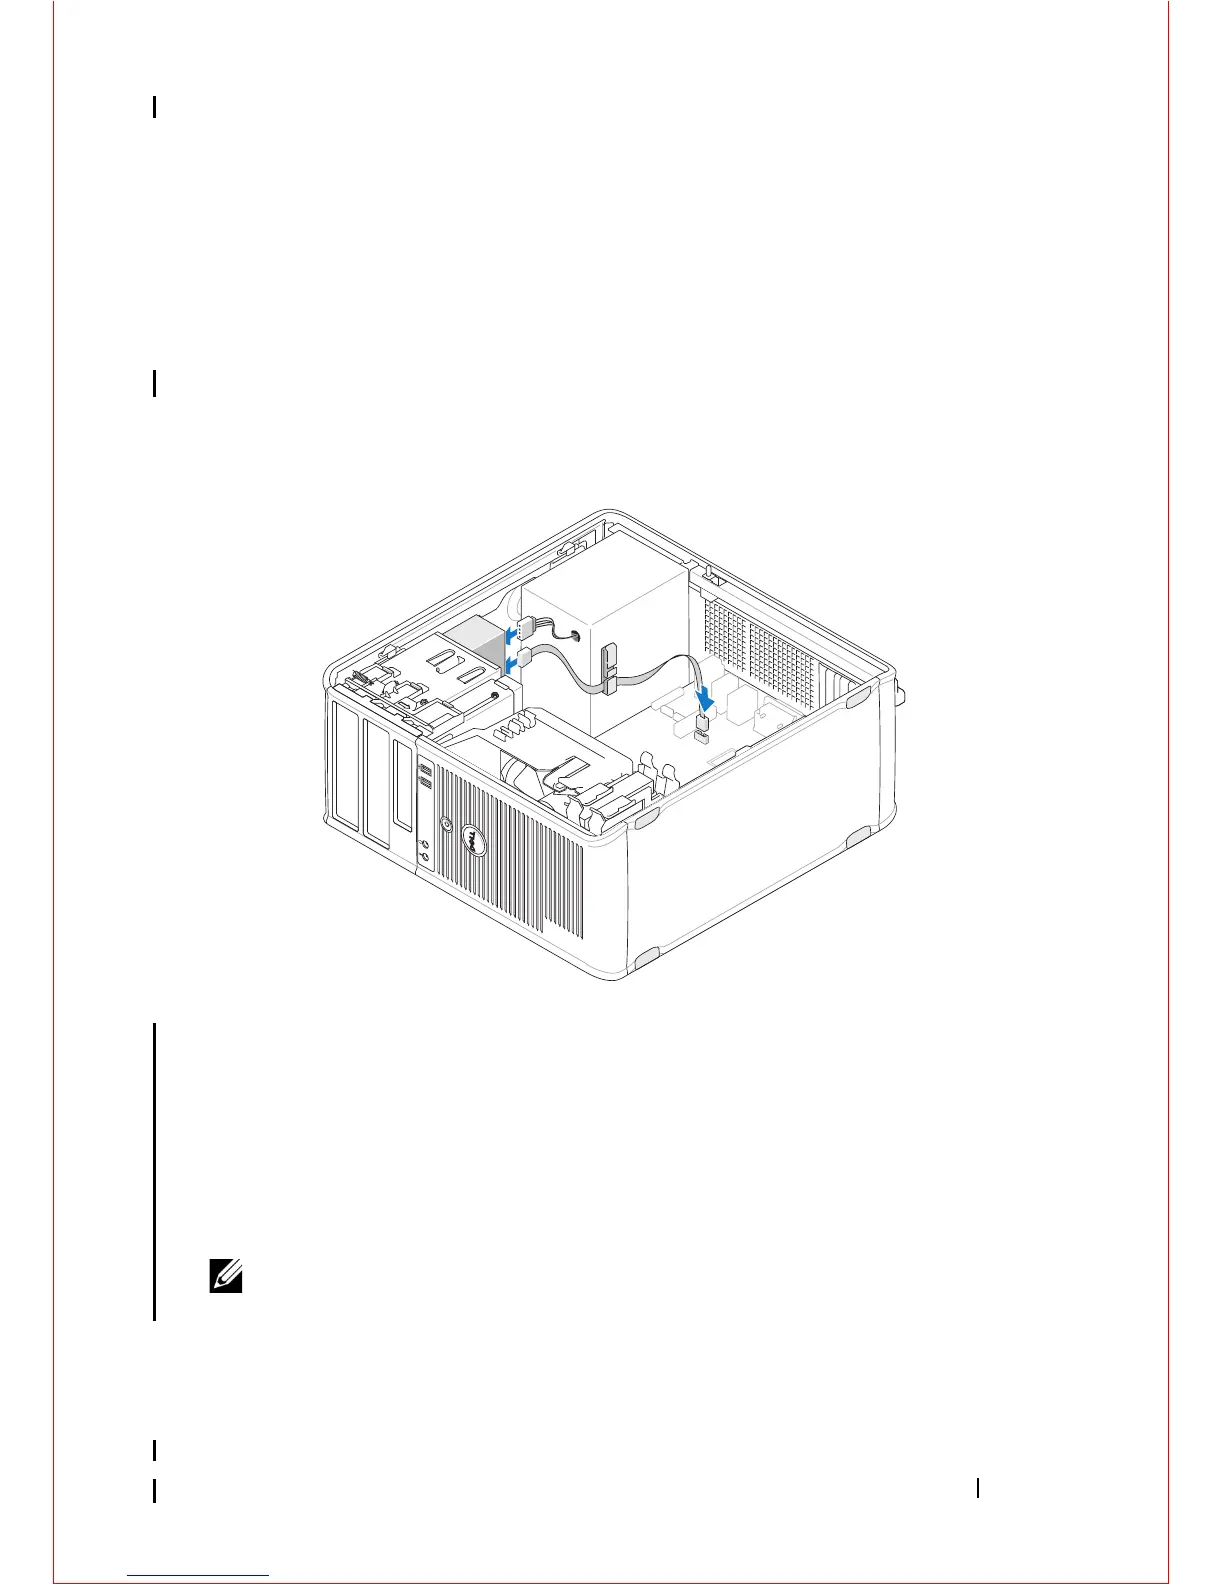
Connect the data cable to the system board connector on the system
board.
6
Follow the procedure in "After Working on Your Computer" on page 17.
7
Update the drive configuration information in the system setup program.
For more information on using the system setup program, see the
Dell
Te ch n o l o g y Gu i d e
on your computer or at
support.dell.com
.
8
Verify that your computer works correctly by running the Dell Diagnostics
(see "Dell Diagnostics" on page 136).
Removing an Optical Drive Panel Insert
Release the optical drive panel insert by pushing it out of the chassis.
Installing an Optical Drive Panel Insert
1
Align the insert with the empty bay opening.
2
Install two screws to secure the optical panel insert in place.
NOTE: To comply with FCC regulations, it is recommended that you replace the
optical drive panel insert whenever you remove the optical drive from the computer.
Removing the Optical Drive From the Desktop Computer
1
Follow the procedure in "Before Working on Your Computer" on page 9.