60 Drives
2
Remove the computer cover (see "Removing the Desktop Computer
Cover" on page 21).
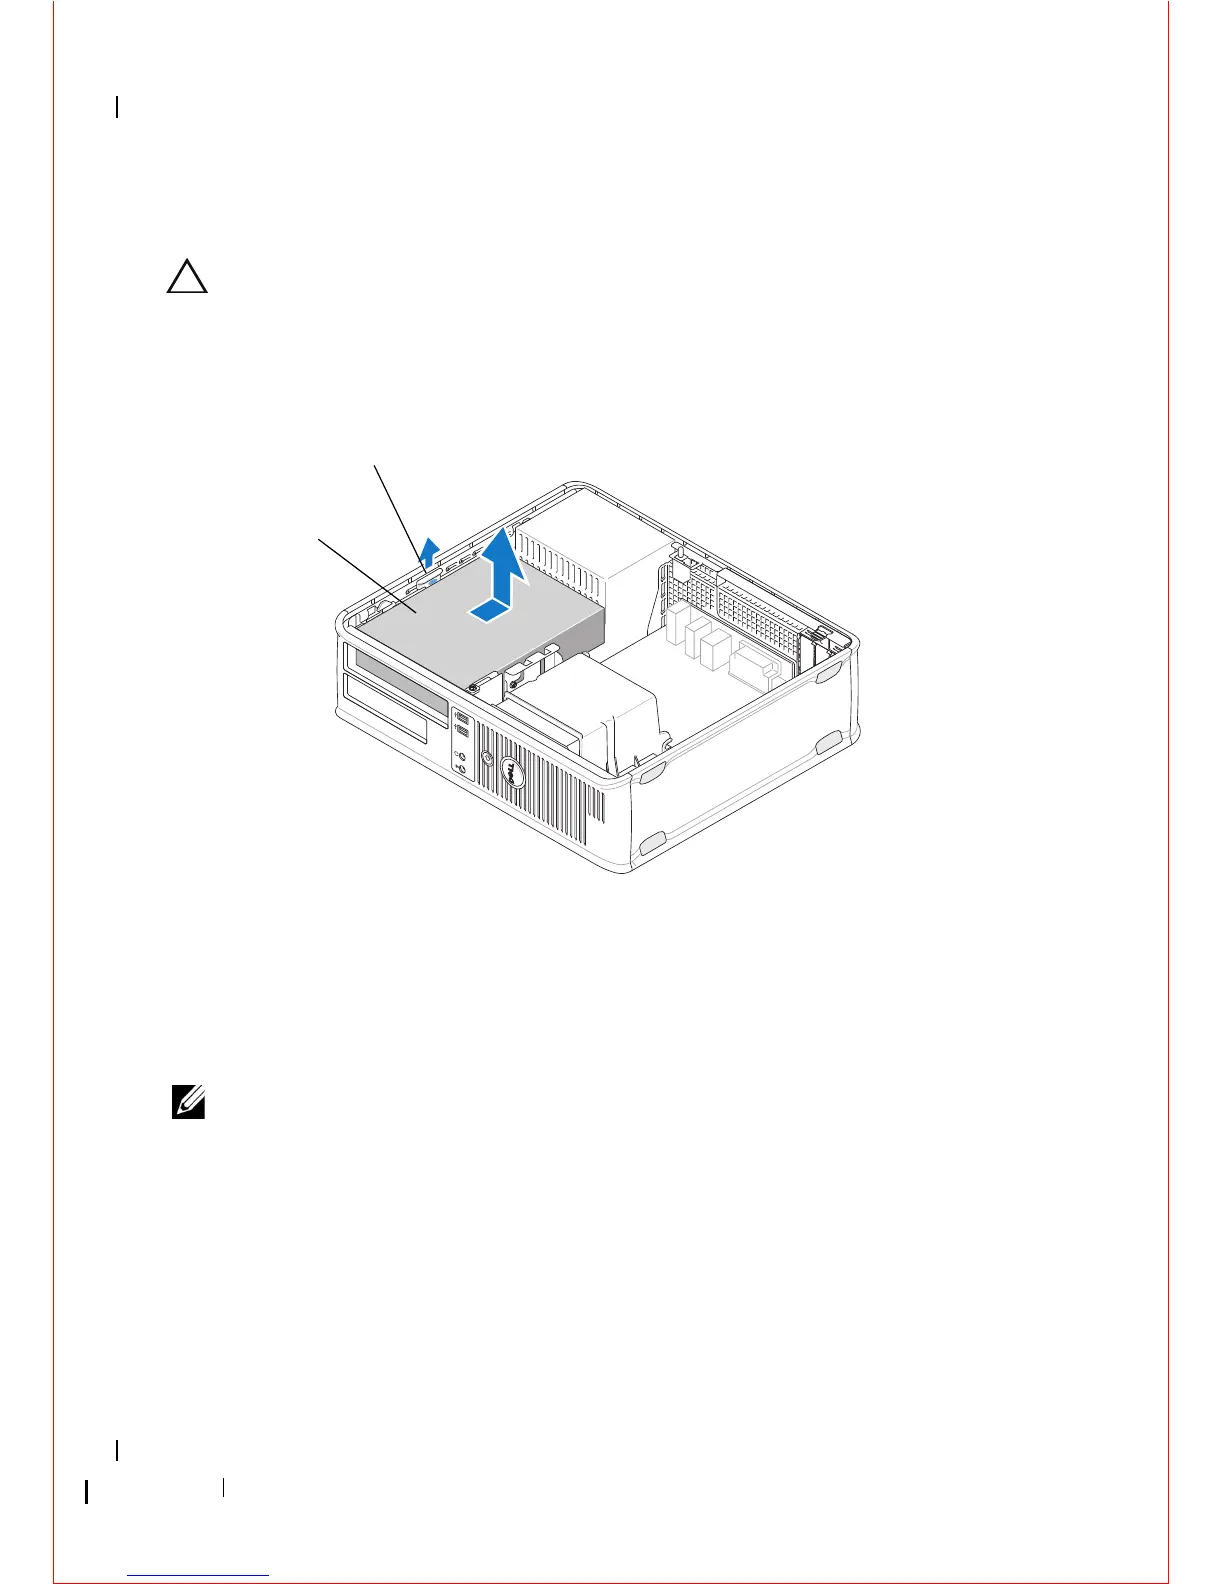
CAUTION: Do not pull the drive out of the computer by the drive cables. Doing so
may cause damage to cables and the cable connectors.
3
Pull up on the drive release latch, slide the drive toward the back of the
computer, and lift the drive from the computer.
4
Disconnect the power and data cables from the back of the drive.
Replacing the Optical Drive in the Desktop Computer
NOTE: This procedure assumes that you have completed the removal procedure
first.
1
Unpack the drive and prepare it for installation. Check the documentation
that accompanied the drive to verify that the drive is configured for your
computer.
2
If you are installing a new drive:
a
Remove the inserts (see "Removing an Optical Drive Panel Insert" on
page 59).
1 optical drive 2 drive release latch